Nx has first-class support for monorepos. Add it to an existing NPM, Yarn, or PNPM monorepo and you get
- fast task scheduling
- high-performance task caching
- affected runs that skip the packages your change doesn't touch
None of this is gated on how many packages the monorepo has. The setup installs the nx package at the root and adds an nx.json for configuring caching and task pipelines. Your workspace layout, your package manager, and your package.json scripts stay where they are.
From PNPM Workspaces to Distributed CI
Watch full courseInstalling Nx
Section titled “Installing Nx”Run the following command to automatically set up Nx:
npx nx@latest initnx init asks whether you want a minimum or a guided setup.
Minimum creates nx.json, adds nx to your root dev dependencies, and adds the Nx cache directories to an existing .gitignore. Nothing else changes, and you opt tasks into caching yourself by setting cache: true in targetDefaults.
Guided does the same and then asks which of your scripts need to run in dependency order, which are cacheable, and what they output. It writes the matching targetDefaults:
{ "$schema": "./node_modules/nx/schemas/nx-schema.json", "targetDefaults": { "build": { "dependsOn": ["^build"], "cache": true, "outputs": ["{projectRoot}/dist"] }, "test": { "cache": true } }}From there, run tasks across the workspace:
npx nx run-many -t build # every packagenpx nx build web # a single packagenpx nx affected -t test # only what your change touchesPlugins, generators, project.json files, and Nx Cloud are all things you can add later, or never.
Incrementally adopting Nx
Section titled “Incrementally adopting Nx”Nx features are independent of each other, so you can use Nx for a subset of your scripts and keep your existing commands for the rest.
For example, use Nx to run your builds:
npx nx run-many -t buildBut instead keep using NPM/Yarn/PNPM workspace commands for your tests and other scripts. Here's an example of using PNPM commands to run tests across packages
pnpm run -r testAdd plugins
Section titled “Add plugins”Plugins are optional. Guided setup detects the tools in your workspace and offers to add the matching plugins, and you can add them later instead with nx add. A plugin configures tasks from the tool config you already have, so you maintain fewer scripts and stop hand-writing cache inputs and outputs.
Adding a plugin can also point your package.json scripts at the tasks it created, which extends caching to everywhere those scripts already run, including CI. Guided nx init asks first. nx add does it without asking for a core @nx/* plugin, so pass --updatePackageScripts=false to keep your scripts as they are:
{ "name": "my-workspace", ... "scripts": { "build": "next build && echo 'Build complete'", "build": "nx next:build && echo 'Build complete'", "lint": "eslint ./src", "lint": "nx eslint:lint", "test": "node ./run-tests.js" }, ...}@nx/next/plugin adds a next:build target that runs next build with caching set up correctly, so nx next:build and next build do the same work. @nx/eslint/plugin does the same for eslint ./src. The test script matched no plugin and was left alone. Skip the rewrite and your scripts stay as they are, with the plugin tasks still available through nx next:build.
Inferred tasks
Section titled “Inferred tasks”@nx/next provides dev and start tasks in addition to the next:build task. Those tasks were created by the @nx/next/plugin plugin from your existing Next.js configuration. You can see the configuration for the Nx Plugins in nx.json:
{ "plugins": [ { "plugin": "@nx/eslint/plugin", "options": { "targetName": "eslint:lint" } }, { "plugin": "@nx/next/plugin", "options": { "buildTargetName": "next:build", "devTargetName": "dev", "startTargetName": "start" } } ]}Each plugin can accept options to customize the projects which they create. You can see more information about configuring the plugins on the @nx/next/plugin and @nx/eslint/plugin plugin pages.
To view all available tasks, open the Project Details view with Nx Console or use the terminal to launch the project details in a browser window.
nx show project my-workspace --webmy-workspace
Root: .
Type:library
Targets
dev
next dev
eslint:lint
eslint ./src
Cacheablenext:build
next build
Cacheablestart
next start
The project detail view lists all available tasks, the configuration values for those tasks and where those configuration values are being set.
Configure an existing script to run with Nx
Section titled “Configure an existing script to run with Nx”If you want to keep invoking a script through your package manager and still cache it, tell Nx about it.
- Preface the script with
nx exec --to havenpm run testinvoke the command with Nx. - Define caching settings.
The nx exec command allows you to keep using npm test or npm run test (or other package manager's alternatives) as you're accustomed to. But still get the benefits of making those operations cacheable. Configuring the test script from the example above to run with Nx would look something like this:
{ "name": "my-workspace", ... "scripts": { "build": "next build", "lint": "eslint ./src", "test": "nx exec -- node ./run-tests.js" }, ... "nx": { "targets": { "test": { "cache": "true", "inputs": [ "default", "^default" ], "outputs": [] } } }}Now if you run npm run test or nx test twice, the results will be retrieved from the cache. The inputs used in this example are as cautious as possible, so you can significantly improve the value of the cache by customizing Nx Inputs for each task.
Fast CI ⚡
Section titled “Fast CI ⚡”Caching pays off locally, and it pays off more in CI, where the same tasks run on every push. As repositories get bigger, making sure that the CI is fast, reliable, and maintainable can get very challenging. Nx provides a solution.
- Nx reduces wasted time in CI with the
affectedcommand. - Remote caching reuses task artifacts across CI runs when the task inputs match.
- Nx Agents efficiently distribute tasks across machines ensuring constant CI time regardless of the repository size. The right number of machines is allocated for each PR to ensure good performance without wasting compute.
- Nx Atomizer automatically splits large e2e tests to distribute them across machines. Nx can also automatically identify and rerun flaky e2e tests.
Connect to Nx Cloud
Section titled “Connect to Nx Cloud”Nx Cloud is a companion app for your CI system that provides remote caching, task distribution, e2e tests deflaking, better DX and more.
Now that we're working on the CI pipeline, it is important for your changes to be pushed to a GitHub repository.
- Commit your existing changes with
git add . && git commit -am "updates" - Create a new GitHub repository
- Follow GitHub instructions to push your existing code to the repository
Now connect your repository to Nx Cloud with the following command:
npx nx@latest connectA browser window will open to register your repository in your Nx Cloud account. The link is also printed to the terminal if the windows does not open, or you closed it before finishing the steps. The app will guide you to create a PR to enable Nx Cloud on your repository.
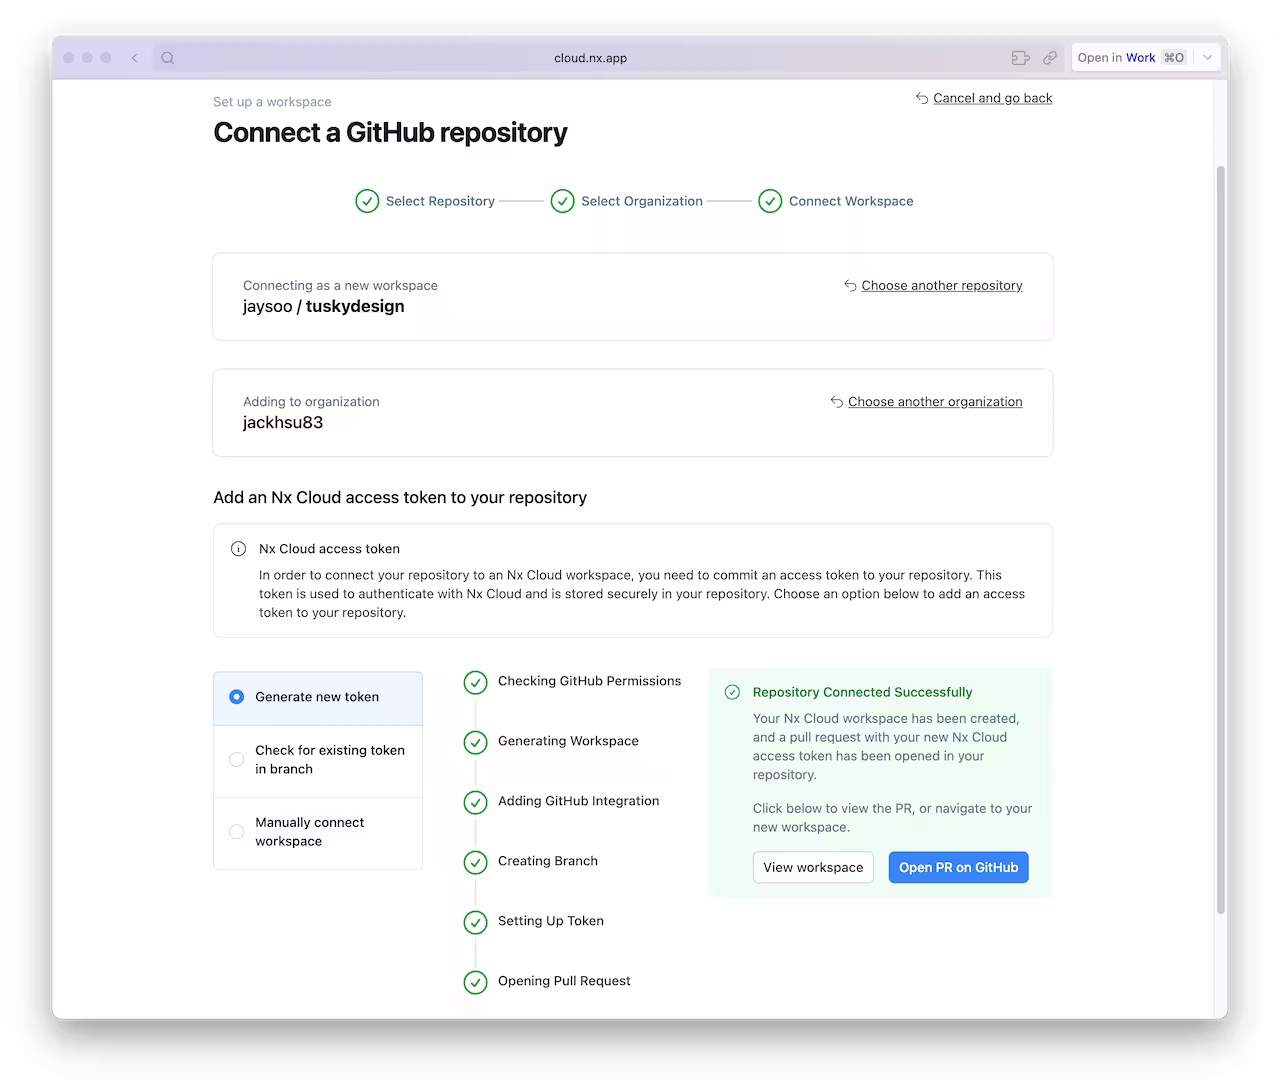
Once the PR is created, merge it into your main branch.
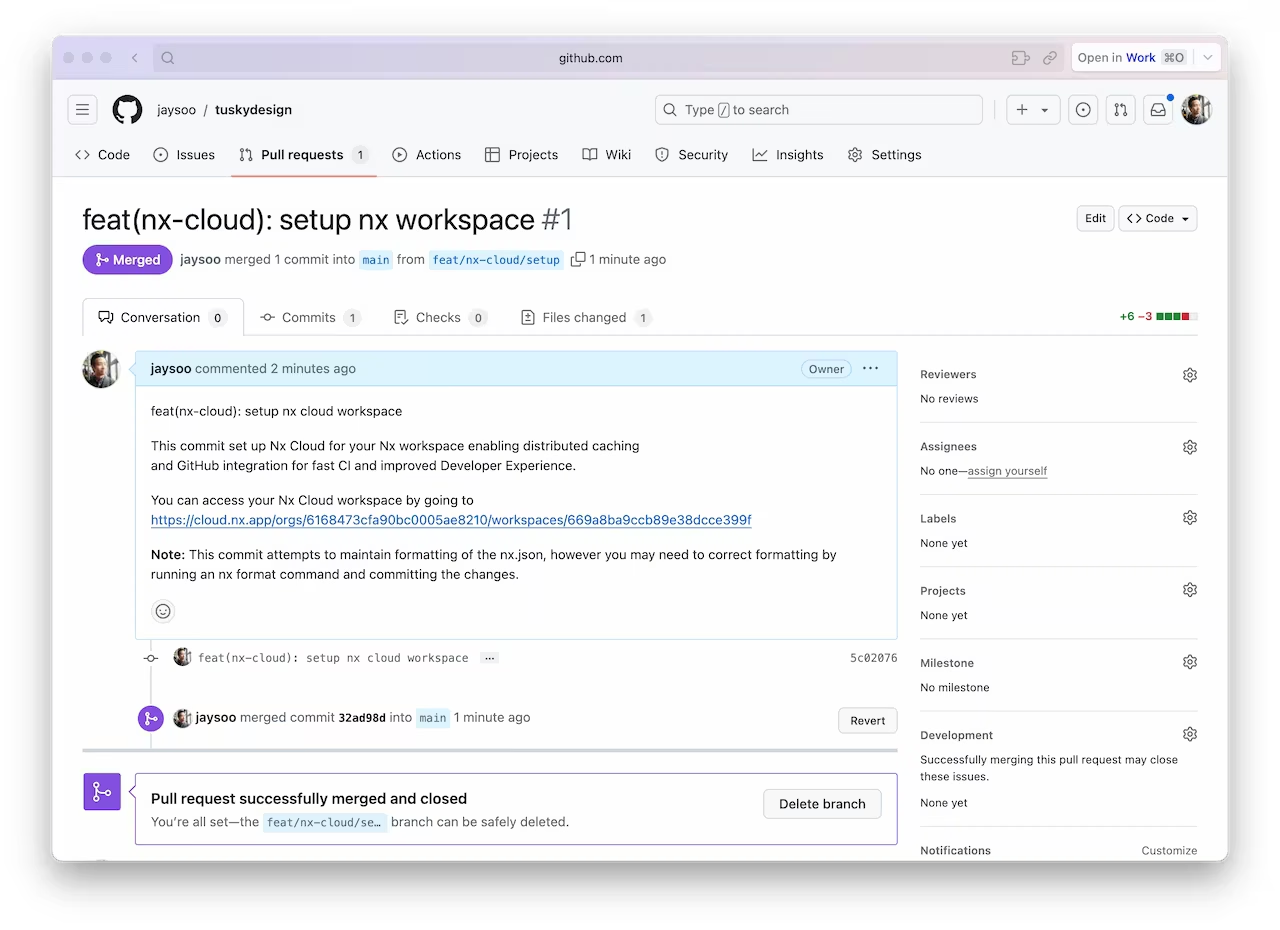
And make sure you pull the latest changes locally:
git pullYou should now have an nxCloudId property specified in the nx.json file.
Create a CI workflow
Section titled “Create a CI workflow”Use the following command to generate a CI workflow file.
npx nx generate ci-workflow --ci=githubThis generator creates a .github/workflows/ci.yml file that contains a CI pipeline that will run the lint, test, build and e2e tasks for projects that are affected by any given PR. Since we are using Nx Cloud, the pipeline will also distribute tasks across multiple machines to ensure fast and reliable CI runs.
The key lines in the CI pipeline are:
// .github/workflows/ci.yml"name: CI# ...jobs:  main:    runs-on: ubuntu-latest    steps:      - uses: actions/checkout@v7        with:          fetch-depth: 0          filter: tree:0
      # This enables task distribution via Nx Cloud      # Run this command as early as possible, before dependencies are installed      # Learn more at https://nx.dev/ci/reference/nx-cloud-cli#nx-cloud-start-nx-agents      # Connect your workspace by running "nx connect" and uncomment this      - run: npx nx start-nx-agents      - uses: actions/setup-node@v6        with:          node-version: 24          cache: 'npm'      - run: npm ci      - uses: nrwl/nx-set-shas@v5      # Nx Affected runs only tasks affected by the changes in this PR/commit. Learn more: https://nx.dev/ci/features/affected      - run: npx nx affected -t lint test build
The generator also creates a .nx/ci-config.yaml file. It holds the settings that start-nx-agents reads, so you tune task distribution there rather than in the workflow:
dte: distribute-on: 3 linux-medium-jslifecycle: stop-after: - buildOpen a pull request
Section titled “Open a pull request”Commit the changes and open a new PR on GitHub.
git add .git commit -m 'add CI workflow file'git push origin add-workflowWhen you view the PR on GitHub, you will see a comment from Nx Cloud that reports on the status of the CI run.
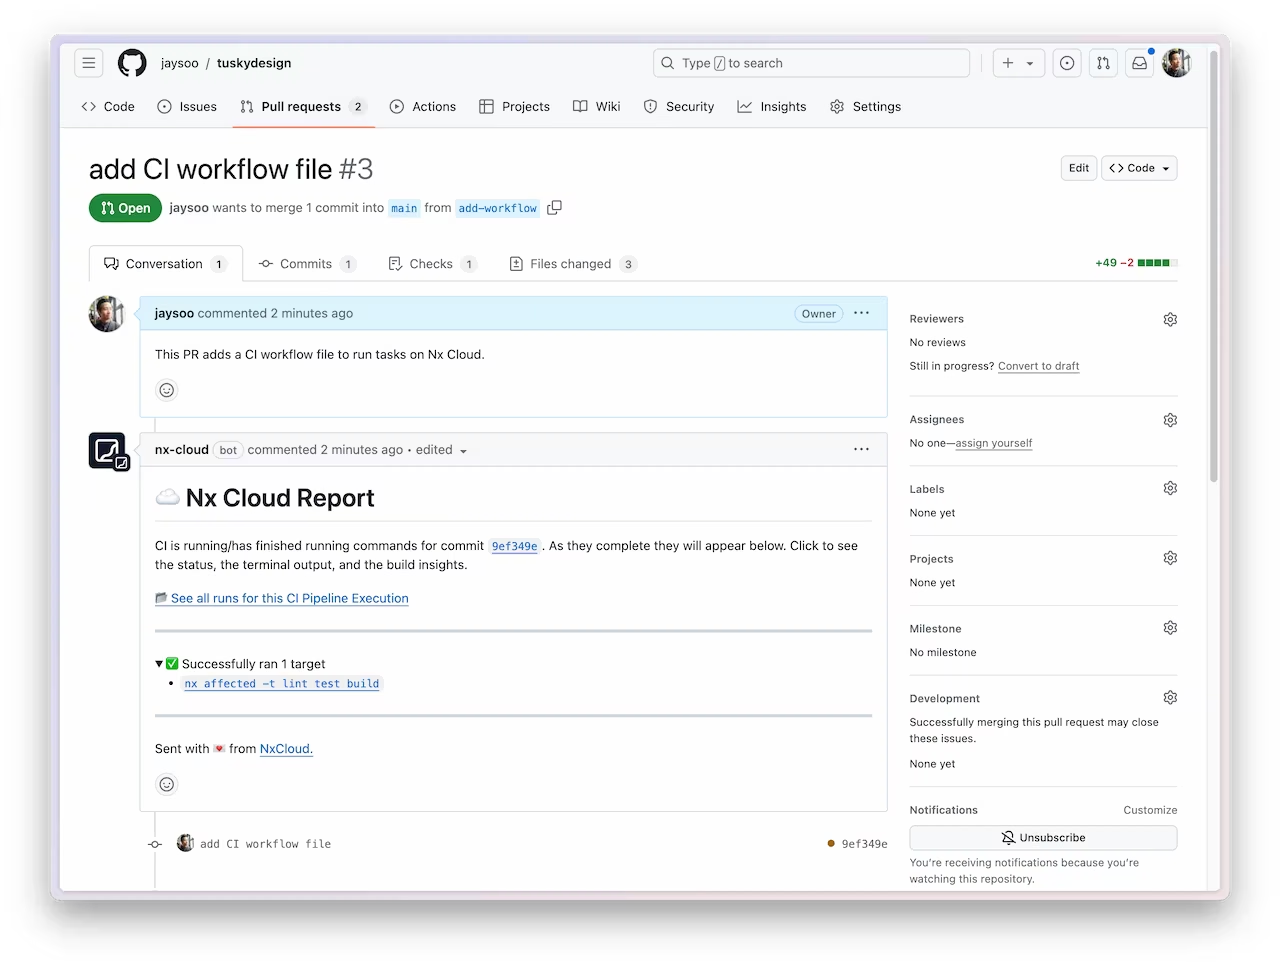
The See all runs link goes to a page with the progress and results of tasks that were run in the CI pipeline.
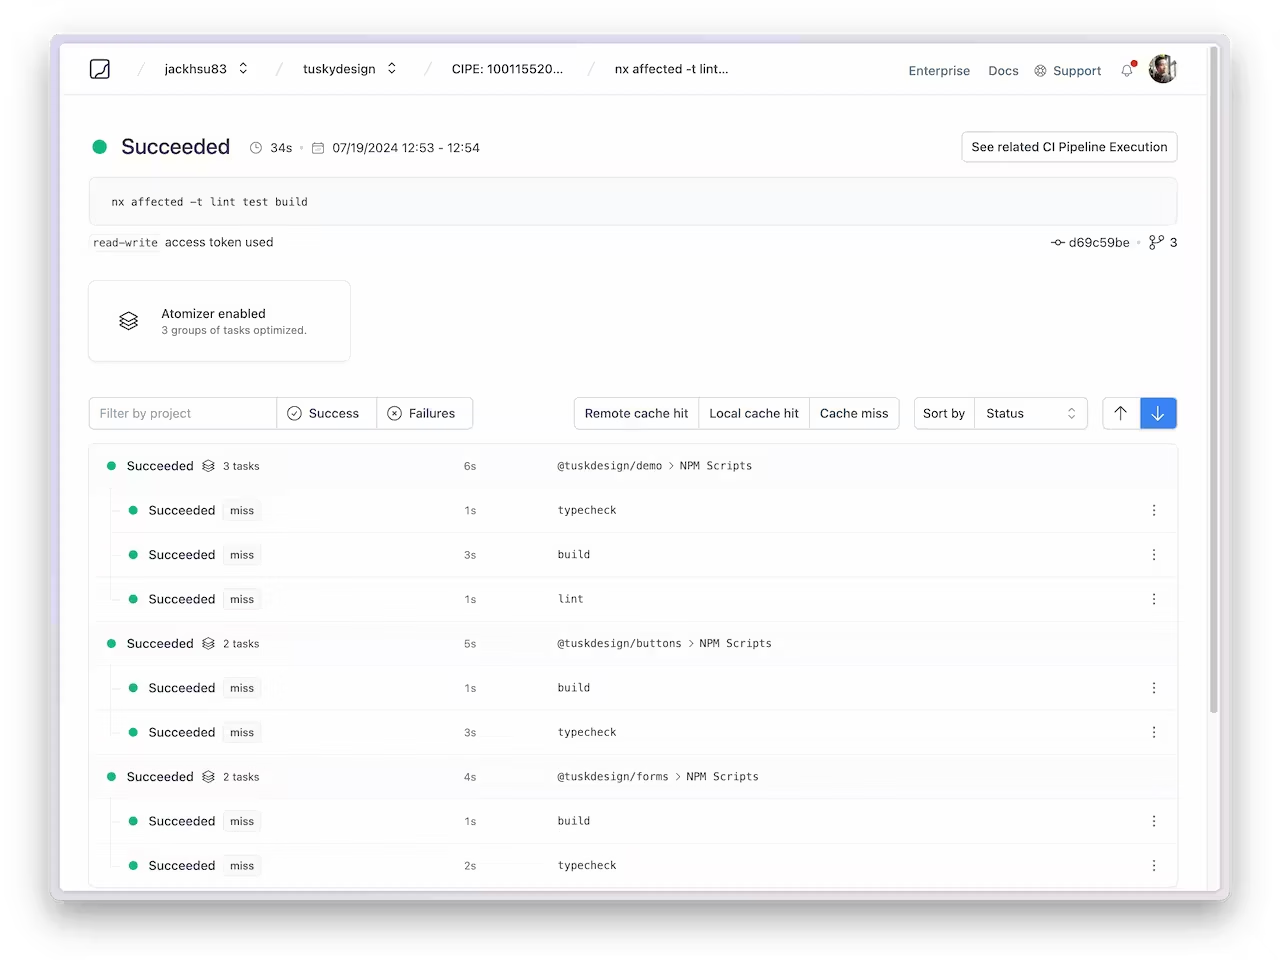
For more information about how Nx can improve your CI pipeline, check out our CI workflow for your CI provider.