This article is part of the Nx 21 Launch Week series:
Keeping your dependencies up to date is crucial for maintaining a healthy codebase. Nx provides the migrate command to help with this important part of the development process. And although it is a very powerful and flexible tool, most users may not be fully aware of its capabilities.
We're excited to introduce the Migrate UI in Nx Console, a new feature that simplifies the migration process. This visual interface guides you through each step of the migration, giving you full visibility and control over what's happening to your codebase.
Why We Built the Migrate UI
Automated migrations have always been a core strength of Nx. Migrations help you update packages, configuration files, and even your source code to match new versions. However, running them from the command line is not always straightforward. The simplest way to update your workspace is to run the following commands:
1# Check the latest version of Nx and update package.json
2# Nx creates the `migrations.json` that contains pending migrations
3nx migrate latest
4
5# Accept the `package.json` changes by running install
6npm install
7
8# Run all migrations in the generated `migrations.json` file
9nx migrate --run-migrations
10
After running the above, you are left with updated packages and file changes. If you encounter any issues, it might take some investigation to figure out which migration caused the problem.
The Migrate UI makes this process easier by:
- Visualizing the process: See what files are affected by each migration in isolation
- Providing control: Review, verify, and approve each migration step before committing it
- Simplifying troubleshooting: Get clear error messages when something goes wrong, with a link to bring up the migration source code
How the Migrate UI Works
Starting a Migration
When an update to Nx is available, a badge appears on the Nx Console icon in your Activity Bar. From the Nx Console view, you'll see a "Nx Migrate" section in the sidebar. Clicking "Start Migration" begins the process.
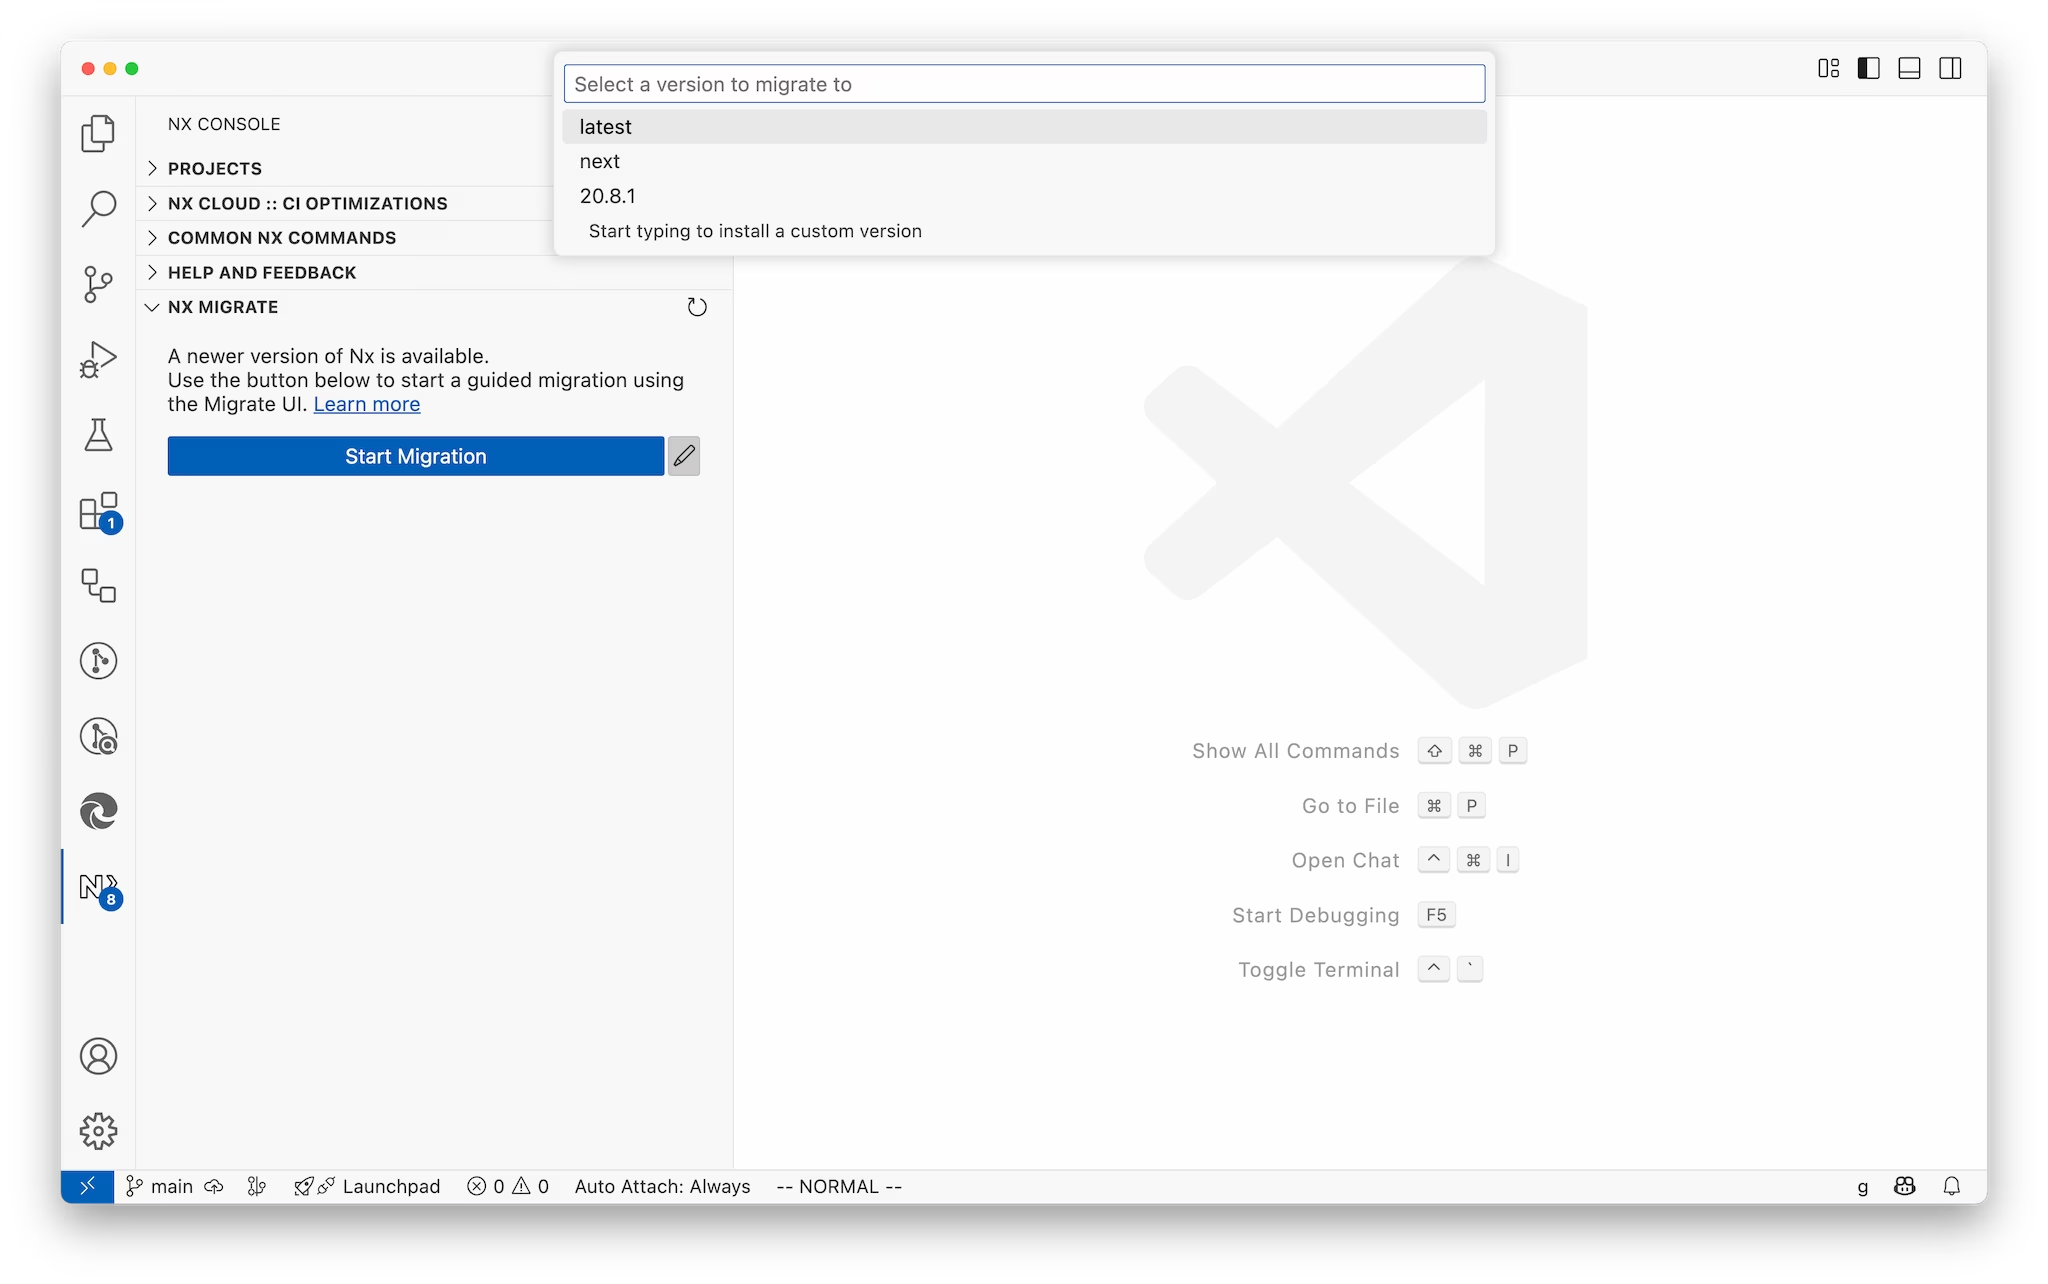
By default, the migration upgrades to the recommended Nx version (the latest version of the next major release). This method ensures you upgrade one major version at a time to avoid potential breakages. You can also customize the target version by clicking the pencil icon and providing a specific version.
Reviewing Package Changes
The first step in any migration is updating your package.json. Once you start the migration, Nx Console runs the nx migrate command to update your dependency versions and generate a migrations.json file. Before proceeding, the Migrate UI shows you exactly what changes will be made to your dependencies.
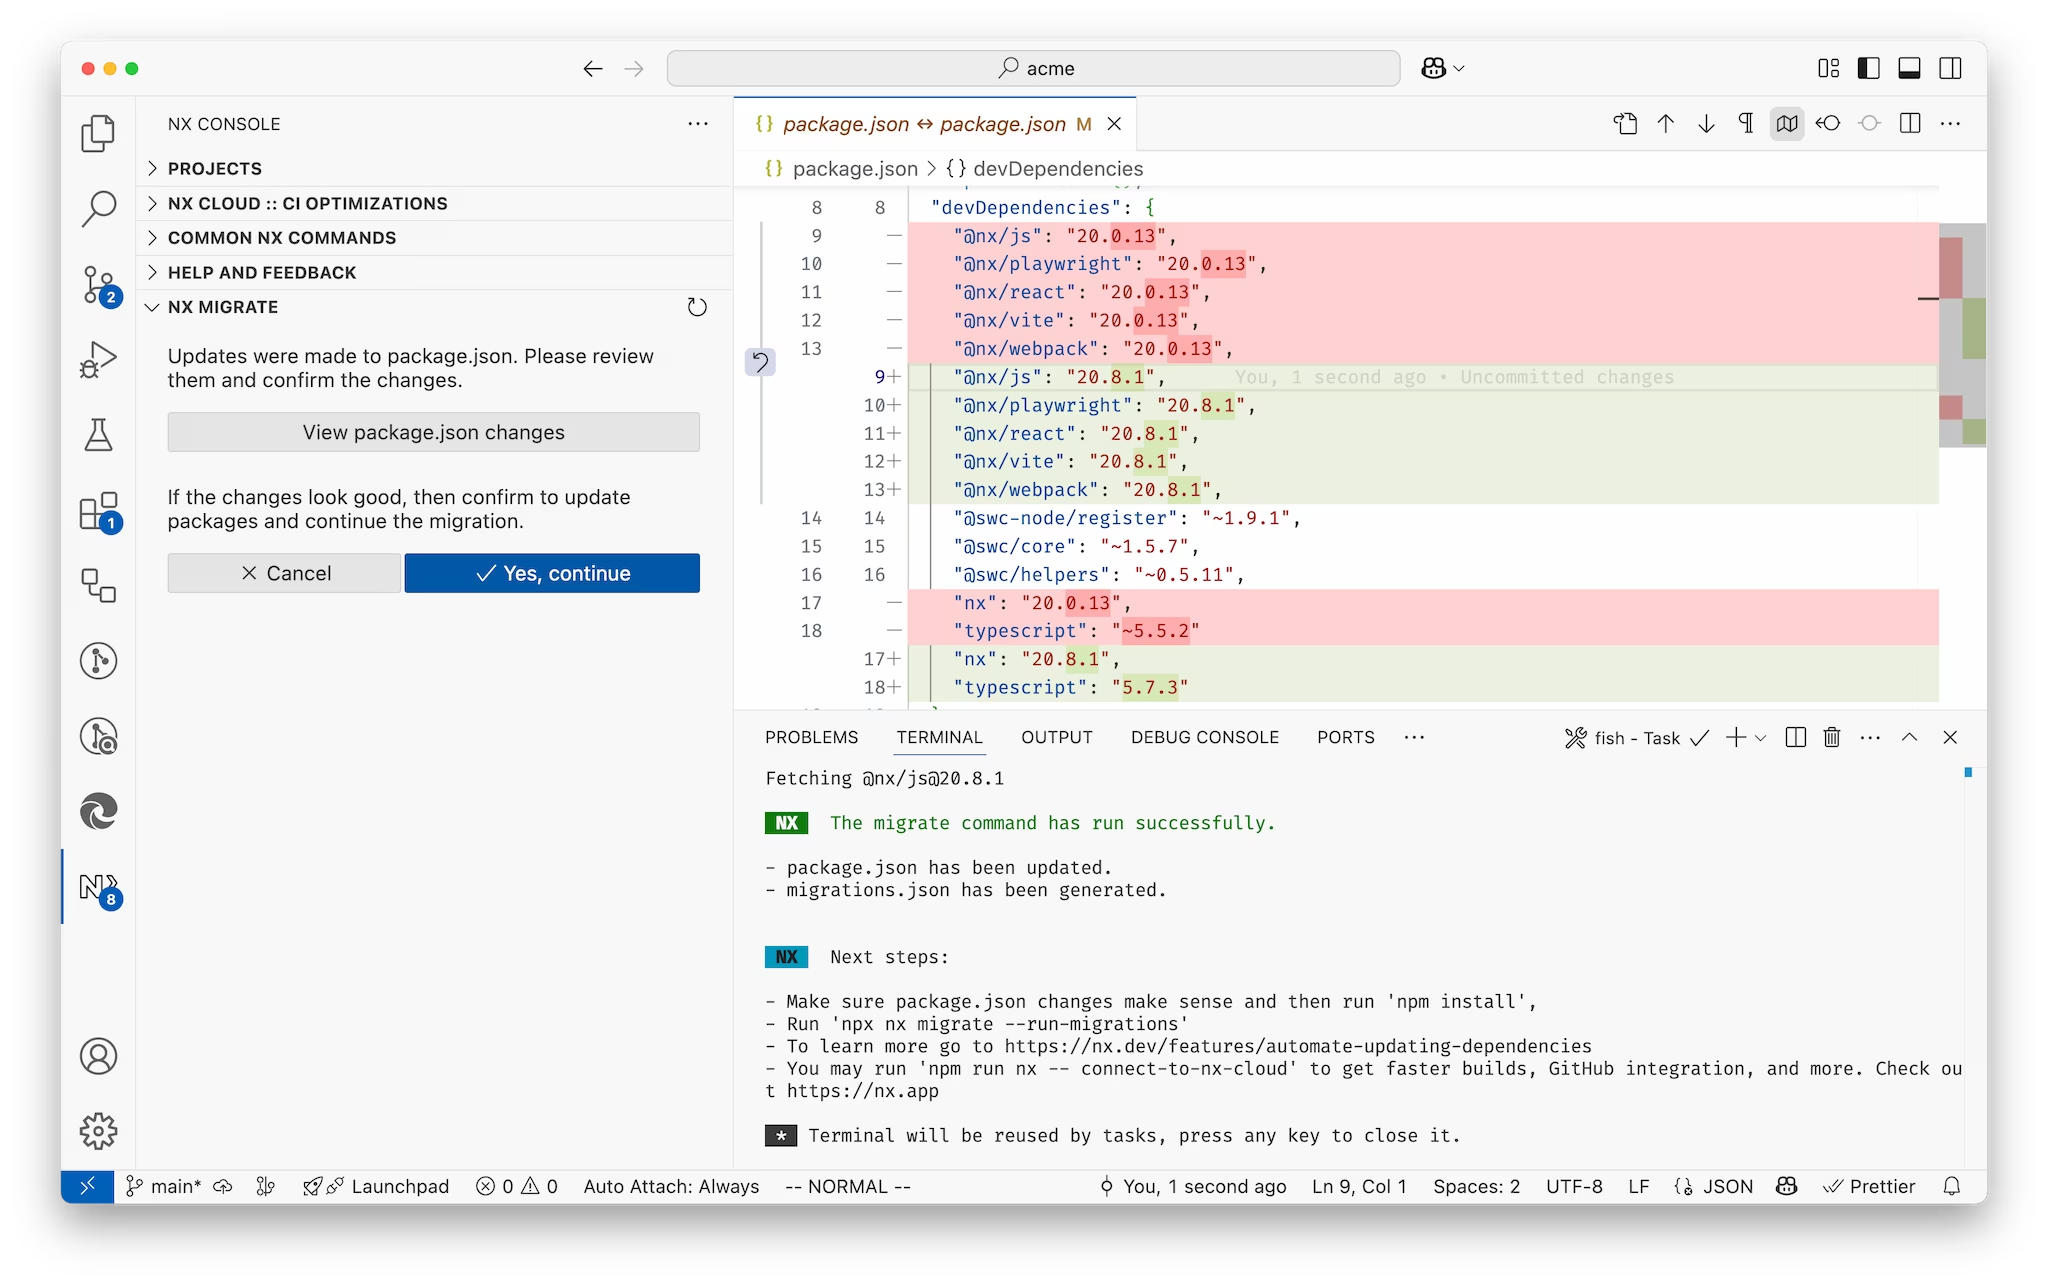
This review step gives you a chance to inspect and confirm these changes before anything is installed, ensuring there are no surprises. You can see which packages will be updated and to what versions, helping you make an informed decision about proceeding with the migration.
Step-by-Step Migration
After confirming the package.json changes, the Migrate UI opens and guides you through each migration action. Each migration will be executed in the order they appear in the migrations.json file.
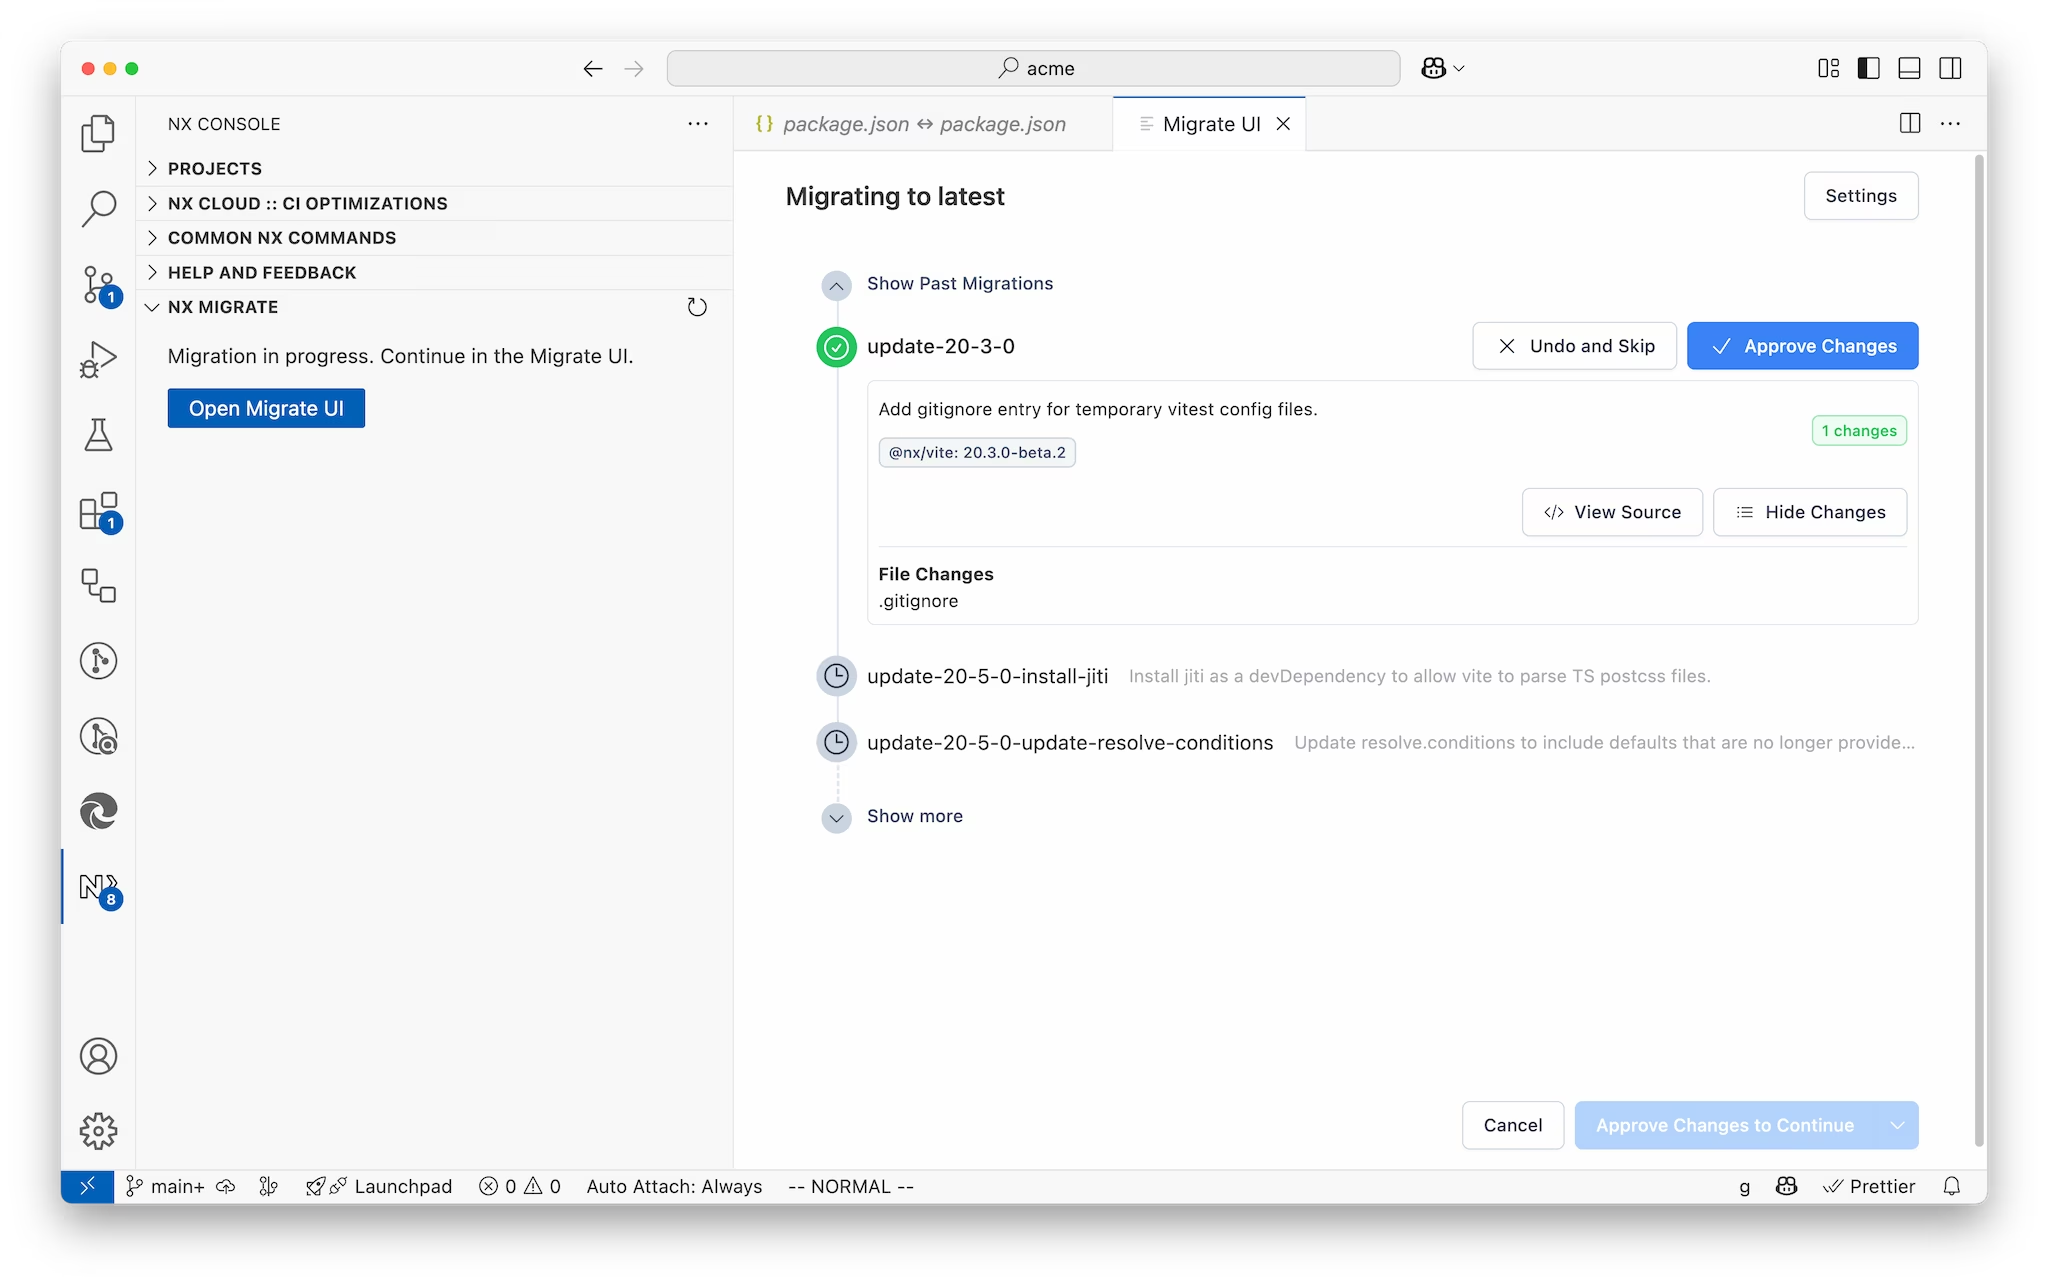
For each migration step:
- You'll see a description of what the migration does and which package it belongs to, as well as a link to the migration's source code
- If the migration makes file changes, they will be listed with links to to view the diff
- You can choose to
Acceptthe changes to proceed orUndothem if something doesn't look right - If there's an error, the process pauses so you can inspect the error details and choose to fix or skip the migration
This step-by-step approach means you're never left wondering what's happening to your codebase. You can see each change, understand its purpose, and make informed decisions about whether to apply it. The visual diff view is particularly helpful for understanding complex or larger code changes.
The step-by-step approach also allows you to check that projects continue to function correctly. If something is wrong, the changeset is much smaller than if all migrations were applied at once, making debugging easier.
Finalizing with Confidence
When all migrations are complete, you can finish the process with a single click. The Migrate UI provides options for how to finalize your migration.
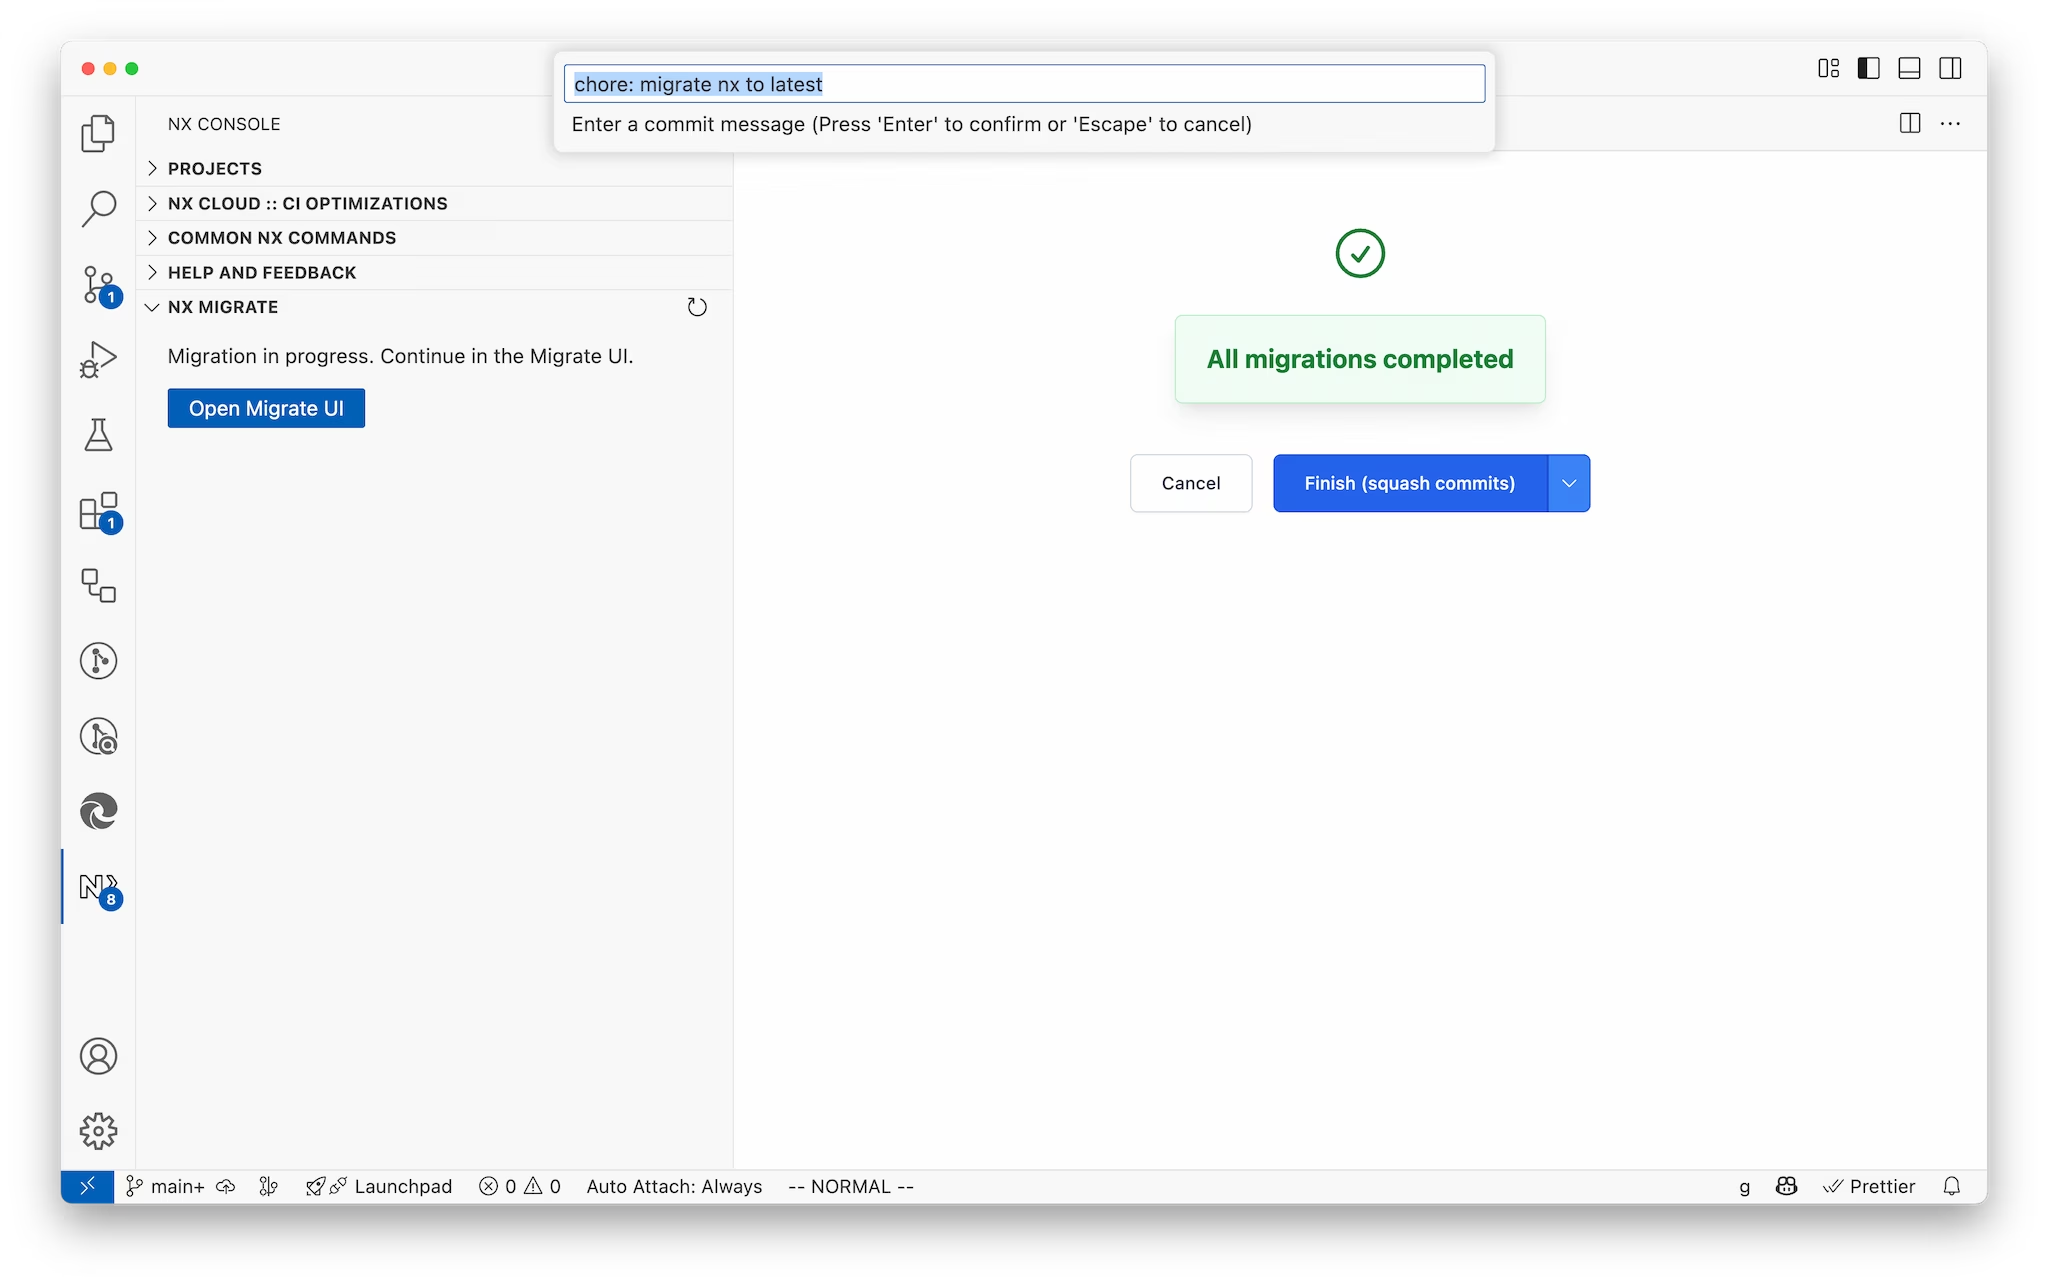
By default, all commits created during the migration are squashed together into a single commit, which keeps your git history clean. However, you can also opt to preserve the individual commits if you prefer a more detailed history of the changes made.
You'll be prompted for a final git commit message. Once entered, the migration process is completed and ready for a pull-request.
Getting Started with Migrate UI
The Migrate UI is available now in the latest version of Nx Console for VSCode and Cursor editors. To use it, make sure you have the latest version of Nx Console installed.
We'd love to hear your feedback on the Migrate UI! Try it out and let us know what you think through GitHub issues or our community channels.

