We're excited to announce the release of Nx version 17!
This article will cover the main things you need to know to get the most out of Nx 17!
Here's a Table of Contents so you can skip straight to the updates you care about the most:
- It's a Vue-tiful Day for Nx
- Enhancements to Module Federation Support
- More Consistent Generator Paths
- The NEW Nx AI Chatbot
- More Seamless Integration With Nx Cloud
nx.jsonSimplification- Nx Repo Begins Dog-Fooding Nx Workflows
- Task Graphing Improvements
@nx/linterRenames to@nx/eslint- New Experimental Feature: Nx Release
- Experimental: Nx Project Inference API v2
- 20k Github Stars!!
- How to update Nx
- Wrapping up
Prefer a video?
It's a Vue-tiful Day for Nx!
Ever since we added Vite as a first-class citizen to Nx workspaces (see @nx/vite), we started falling in love with the Vue community. The only logical next step: Nx now provides a brand new Vue plugin that is being maintained by the Nx team! (And we're already working on a Nuxt plugin 🤫)
The first place you might notice this new support is in the create-nx-workspace script:

This option will create a new Nx workspace with a fresh Vue application, all set up and ready to develop! To add new Vue projects to your existing Nx workspaces, add our new @nx/vue package as a dev dependency to your workspace, e.g.:
❯
npm add -D @nx/vue
And you'll have access to Nx generators so that you can generate Vue applications, libraries, components, and more in your workspace:
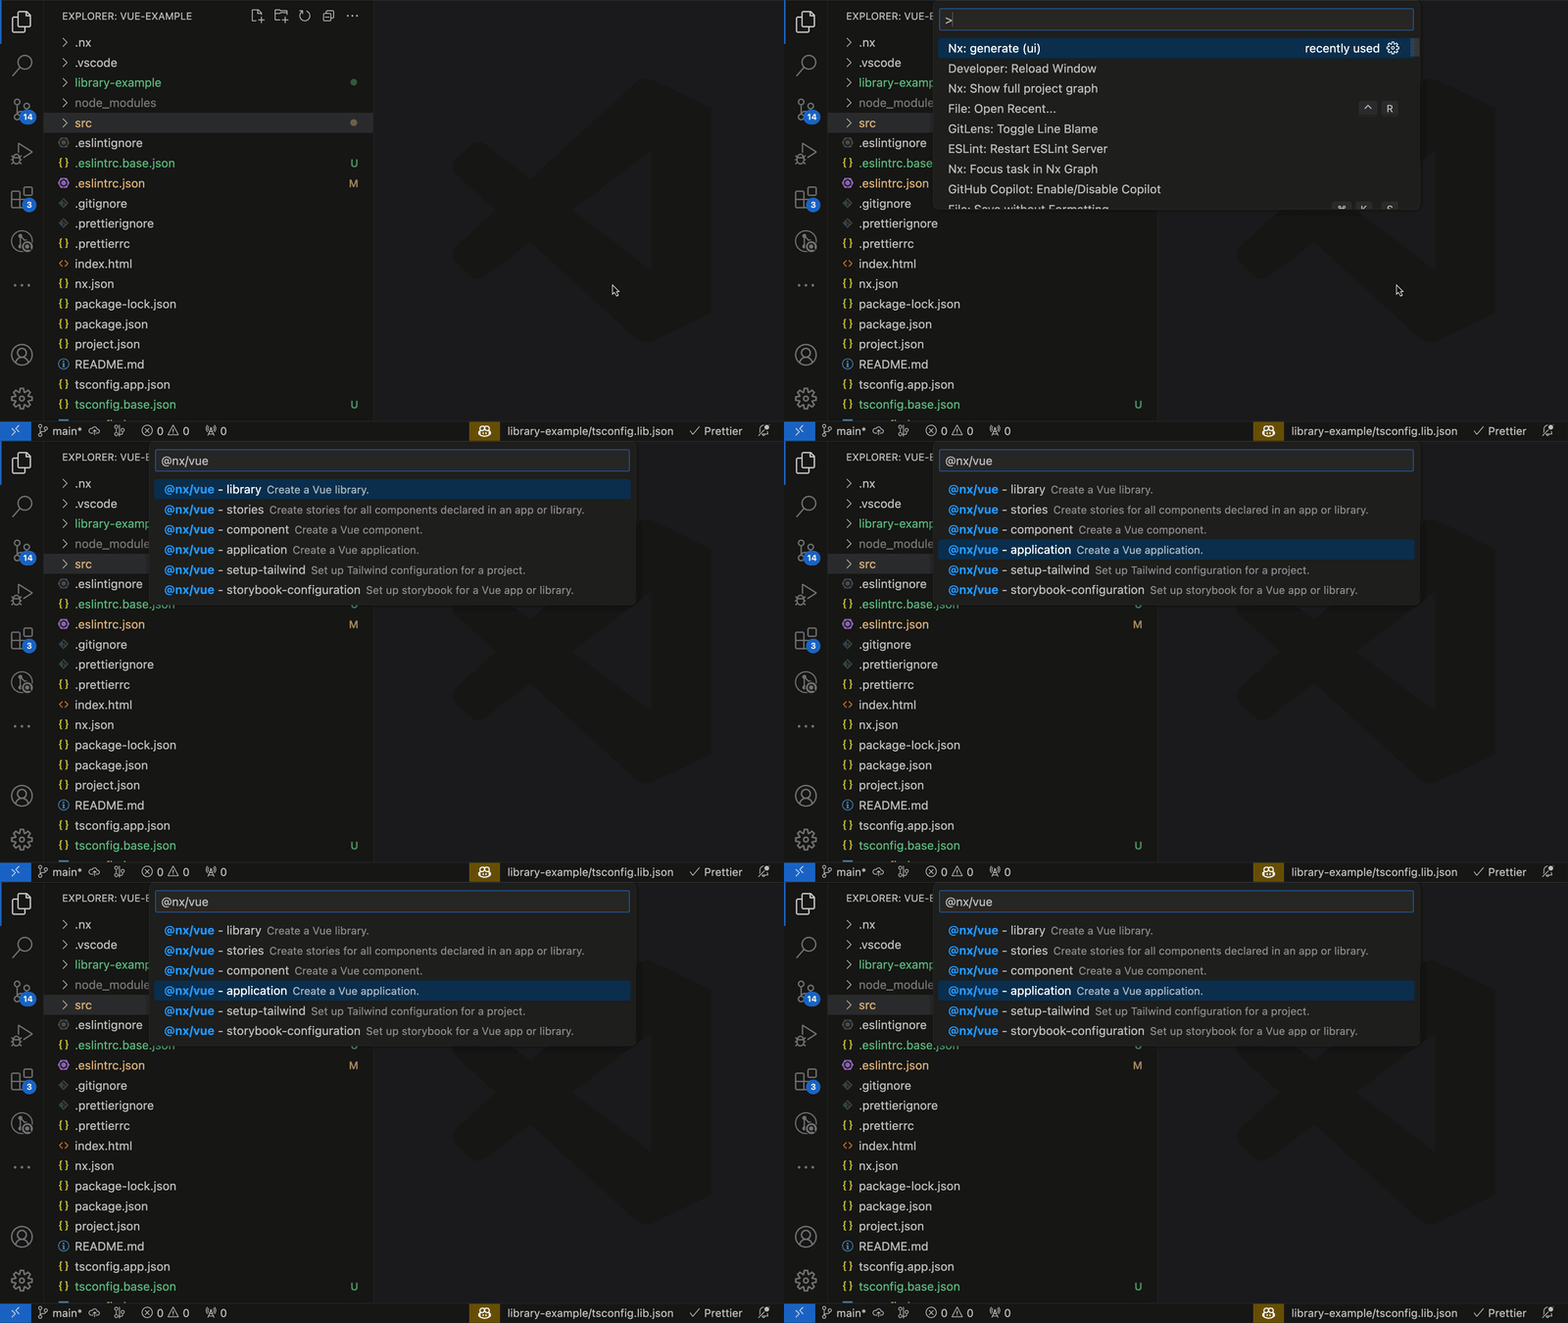
We're very excited for this support to land, and we're eager to get it into our user's hands and see what Nx can do to help Vue developers so we can continue to refine our support and make Vue with Nx an excellent developer experience.
Enhancements to Module Federation Support
Nx already had great support for Module Federation — Nx 17 improves on this support:
NEW: Typesafe Config
Projects created with Nx's generators for module federation will now be created with a module-federation.config.ts file (as opposed to a .js file). A new ModuleFederationConfig interface is also exported from the @nx/webpack plugin.
Better Typesafety Across Modules
Nx 17 improves type-safety across modules, so proper type-safety is currently supported across dynamic imports.
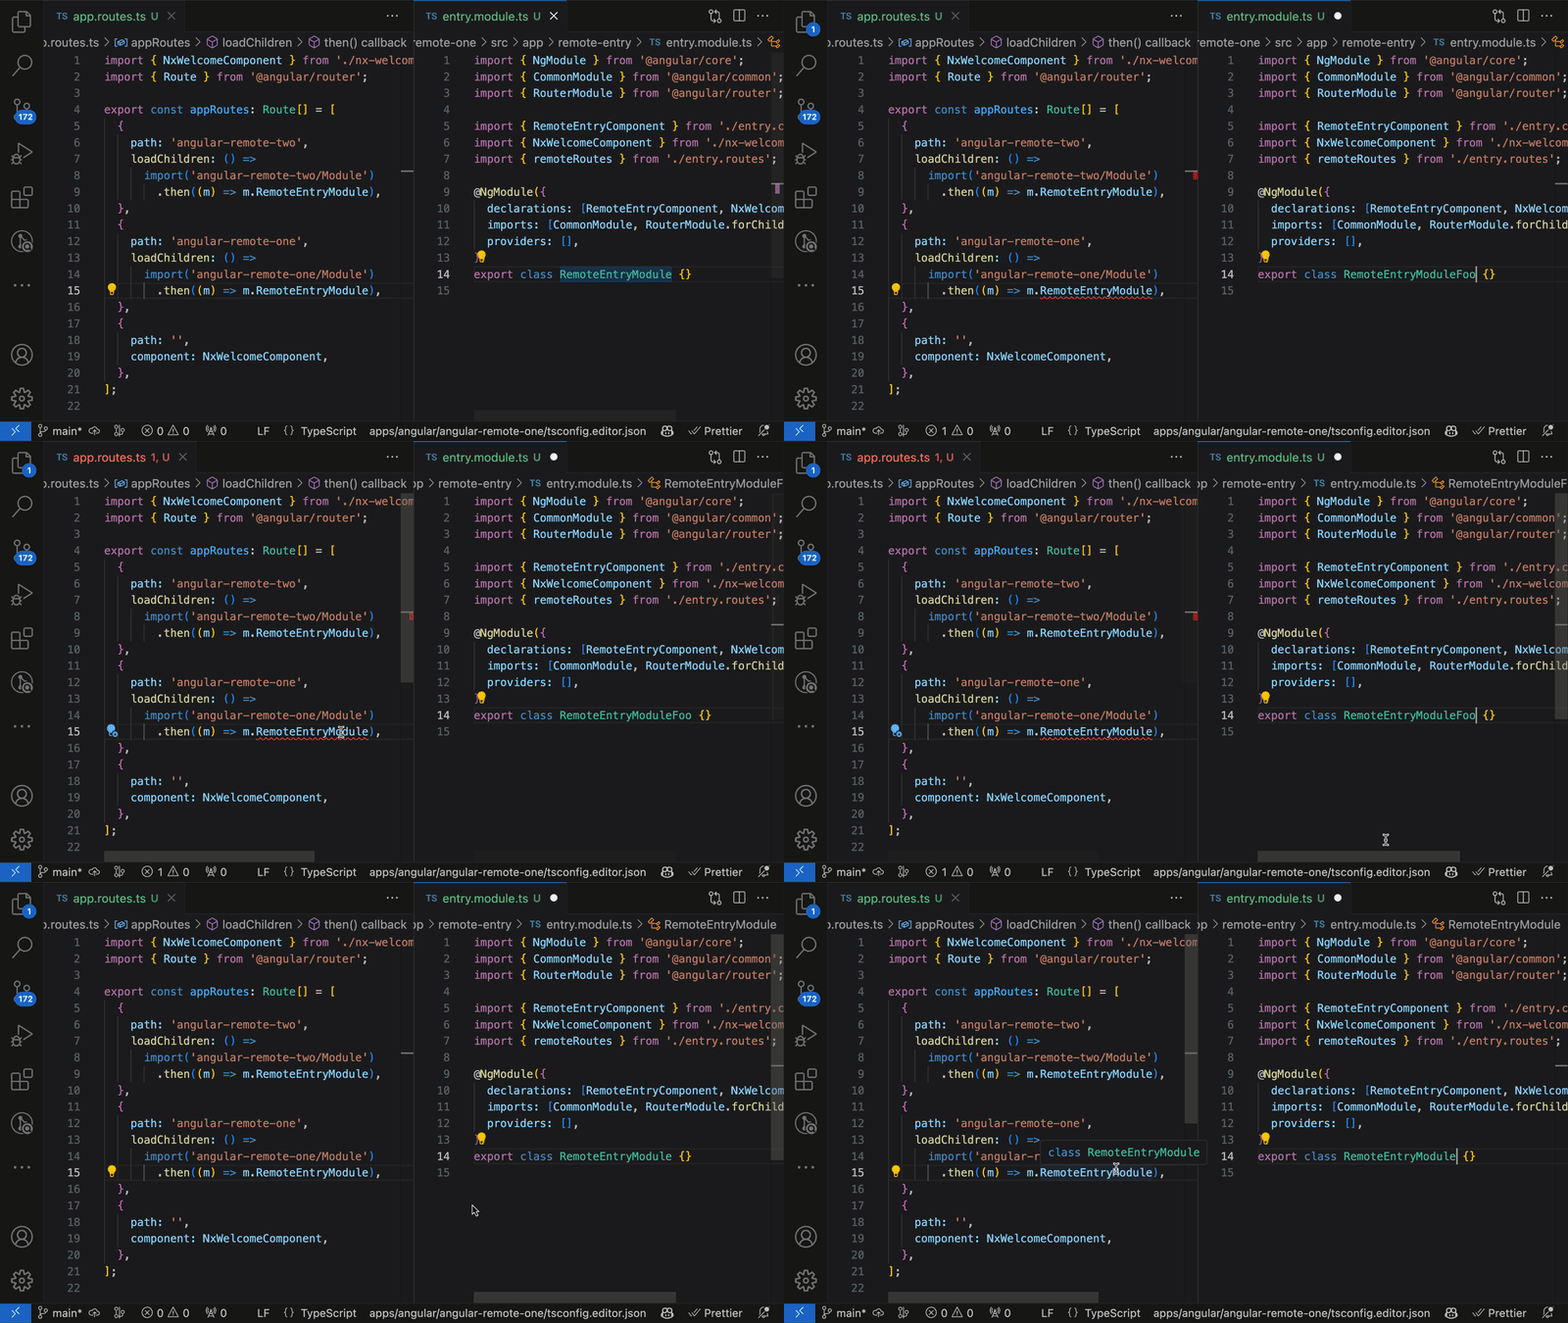
NEW GENERATOR: Federate ANYTHING.
The @nx/react and @nx/angular now include a federate-module generator. This will allow you to create a federated module from any Nx project.
To run this generator, use the command:
❯
> nx g federate-module <path to module to be exposed> --name=<module name> --remote=<name of remote exposing module>
This will add a new module to the exposes map in the specified remote application, such that it can be consumed by a host application.
Managing Module Versions
Nx now supports targeted versioning for federated modules.
To create versions for a given project, you can use the version property of that project's package.json file and then build that project to create the version locally.
Then, when consuming this library, you can use the shared method of the ModuleFederationConfig:
1import { ModuleFederationConfig } from '@nx/webpack';
2
3const config: ModuleFederationConfig = {
4  name: 'my-remote',
5  exposes: {
6    './Module': 'apps/my-remote/src/app/remote-entry/entry.module.ts',
7  },
8  remotes: ['federated-is-odd'],
9  shared: (libName, configuration) => {
10    if (libName === 'is-odd') {
11      return {
12        singleton: true,
13        strictVersion: true,
14        requiredVersion: '0.0.1',
15      };
16    }
17    return configuration;
18  },
19};
20
21export default config;
22
This config will ensure that version 0.0.1 of the is-odd is used.
More Consistent Generator Paths
Similar to the adjustments we made in 16.8 for most of our project-creating generators, v17 brings updates to how component generators work. These updates aim to give you more control over the name and file location of your components.
Towards this end, we've added a new --nameAndDirectoryFormat option that you can set to either as-provided or derived.
When set to as-provided, the generator will use the name option for the name of your component and the directory option to determine where on your file system to add the component. as-provided will be used by default if none is specified.
When set to derived, the generator will try to determine where to create your component based on the project option - which will mainly operate how component generators do now.
In addition, component generators now follow any given casing for component files. For example, let's say we have an integrated monorepo with a react application called "my-app" and want to add a "Home" component. With Nx 17, you can run the command:
❯
> nx g component apps/my-app/src/app/Home
And a Home.tsx file will be added in the apps/my-app/src/app directory.
Finally, generators will now factory in your current working directory, so you can also create this "Home" component via:
❯
cd apps/my-app/src/app
❯
nx g component Home
The NEW Nx AI ChatBot
We've added a new AI ChatBot to our docs site. You can access it now at /ai-chat.
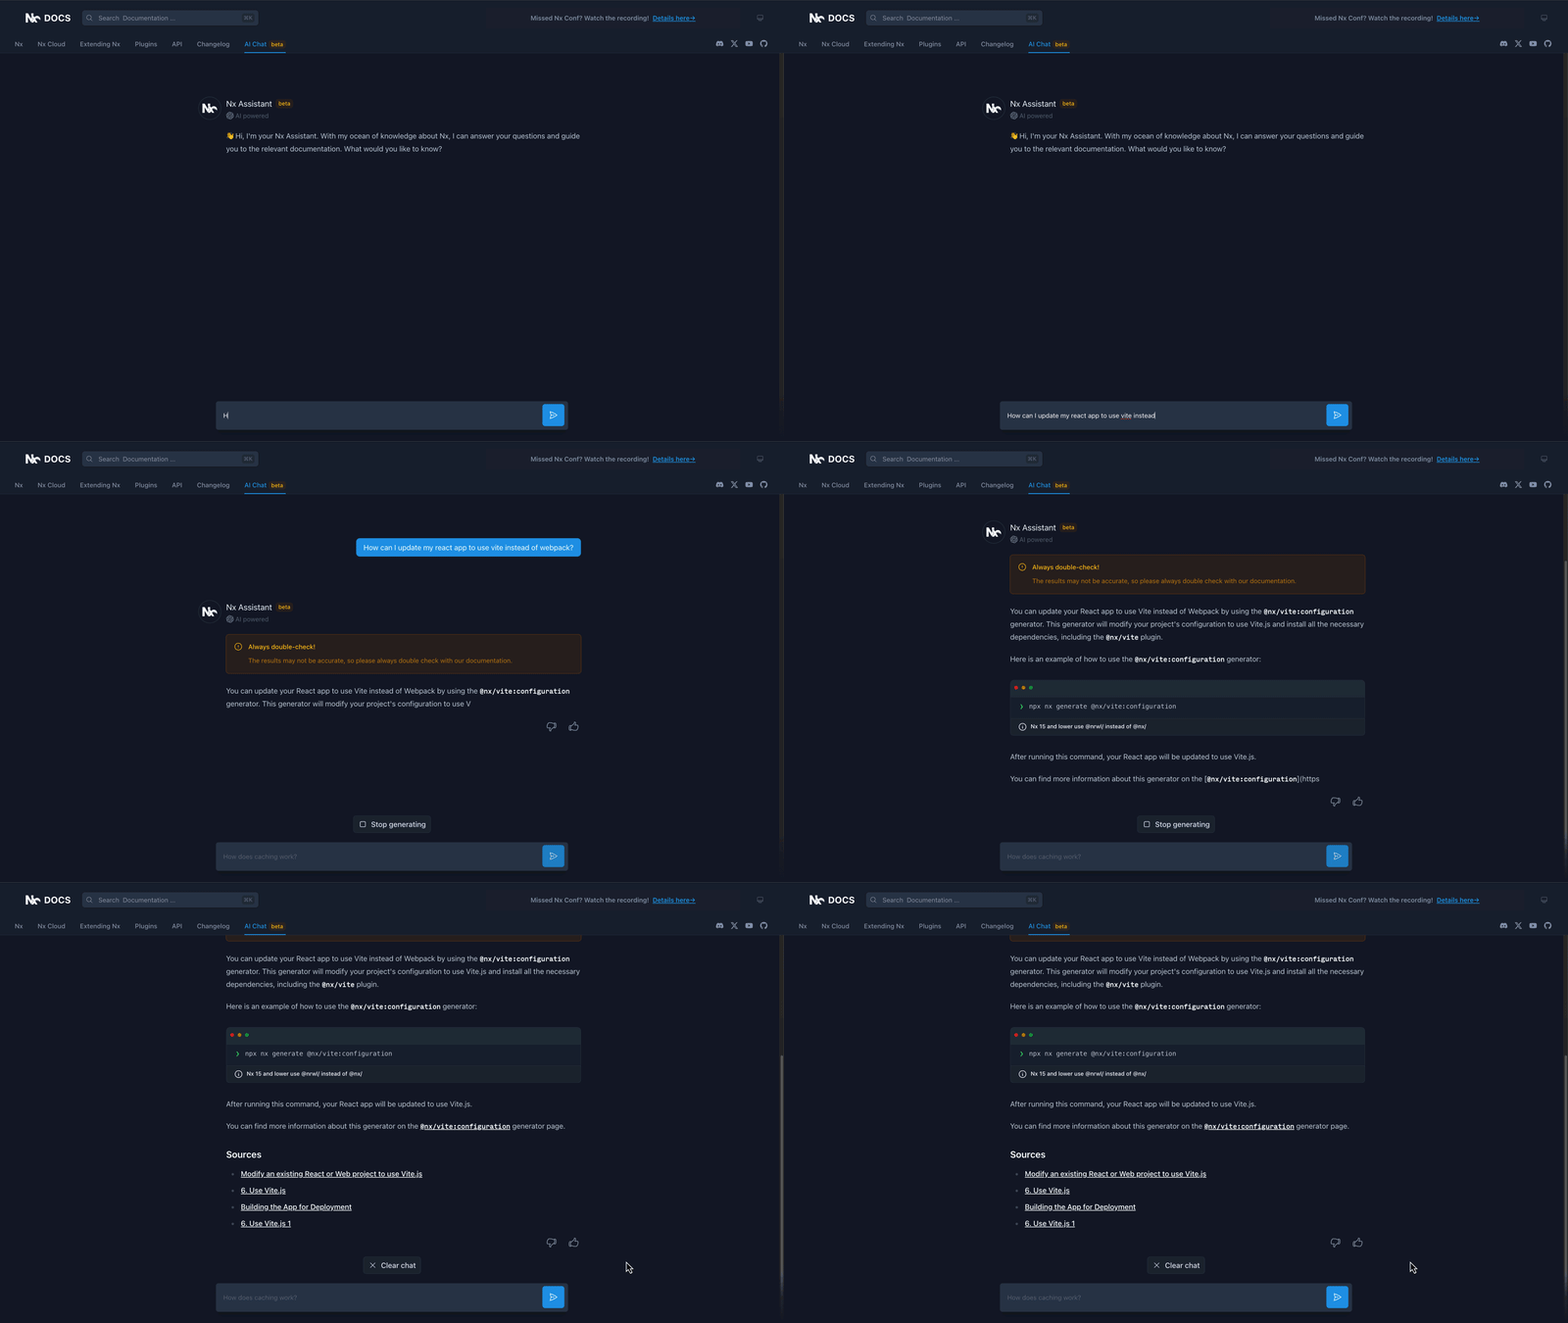
This feature is still in beta, so please use the thumbs up/thumbs down buttons to provide feedback on whether the chatbot is accurate and helpful!
More Seamless Integration With Nx Cloud
After running the nx migrate command to upgrade to Nx 17 and using Nx Cloud, you may have observed the removal of nx-cloud from your dev dependencies. Don't worry - Nx Cloud is not only still around but thriving. Instead of having a standalone package, we've integrated the Nx Cloud communication layer directly into the nx package. This ensures a seamless connection whenever you opt in and eliminates potential version misalignment concerns with our API endpoint.
nx.json Simplification
Our Nx Cloud updates come alongside configuration changes in your nx.json file and project configuration.
Specifically, we've added an optional nxCloudAccessToken to the nx.json file - as long as a token is provided here, we'll make sure that you take advantage of the currently deployed version of Nx Cloud when running commands with Nx.
We've also removed the need to specify cacheableOperations at the task-runner level. From now on, every target configured in your project.json can be defined as cacheable using the cache property.
1{
2    "targetDefaults": {
3        "build": {
4            "cache": true,
5            ...
6        }
7    }
8}
9
If you use the nx migrate command, all updates will be handled for you using the targetDefaults in your nx.json file. More in the docs.
We've been working hard at reducing and simplifying all the configuration required for your Nx workspaces. Checkout our latest guide on how to Reduce Repetitive Configuration for more, and stay tuned as we've got new efforts underway to make this simplification even more appealing!
Nx Repo Dog-Fooding Nx Workflows
At Nx Conf in New York City, we unveiled the next big step for Nx: Nx Workflows.
If you missed it, Simon Critchley walks you through in his Nx Conf talk:
Put simply, Nx Workflows represents Nx entering the CI provider arena, where Nx can now provide you with Cloud Computation to run your CI tasks. This creates the foundation for a whole new class of Nx Cloud features that we're excited to work on in the coming cycles.
The Nx repo itself is now "dog-fooding" this latest feature (dog-fooding refers to using our tool in our own projects, or "eating our own dog food"), and you can see how it's going now on our public Nx Cloud workspace.
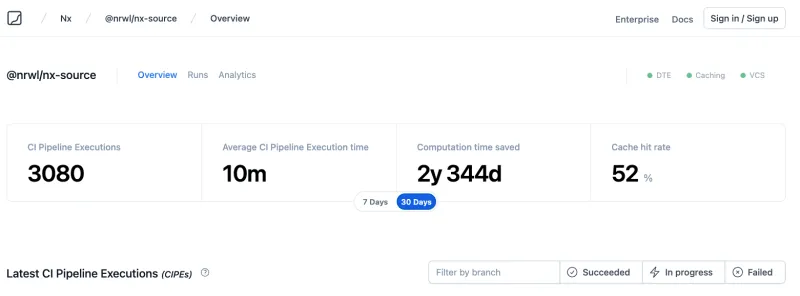
Nx Workflows are still in the experimental phase. We're running pilots with our enterprise clients and are excited to open this up for everyone soon!
Task Graphing Improvements
Task Caching in Nx is based on a set of "input" files calculated for a given task. You can specify specific files or patterns of files in your project.json for a particular task or in the targetDefaults of your nx.json to set the default file sets for your inputs.
There have been some difficulties in determining precisely which files were included and which weren't for a given task. This is where our latest update to the task graph comes in:
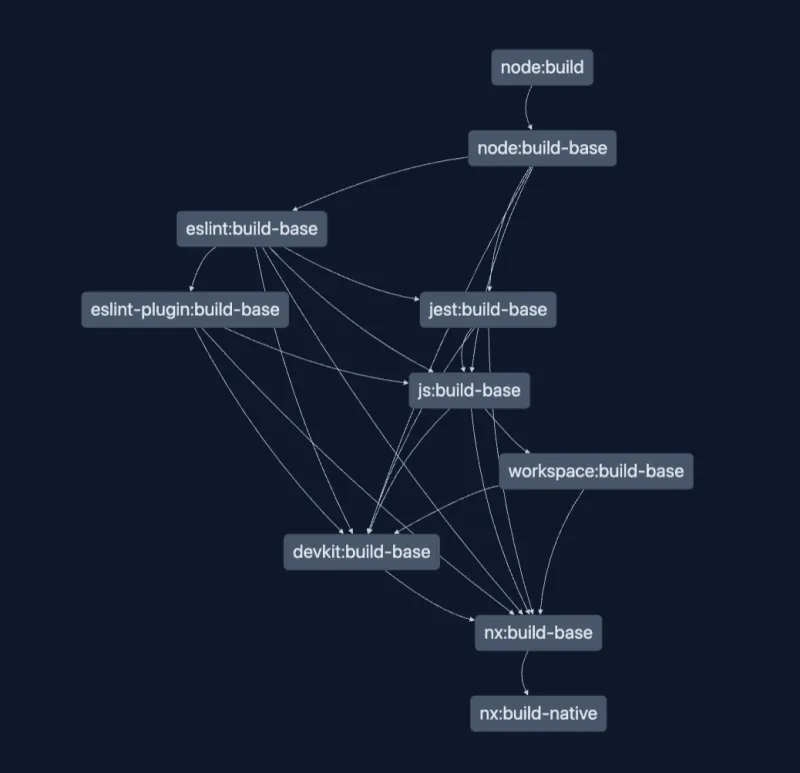
You can open this graph using the command:
❯
nx graph
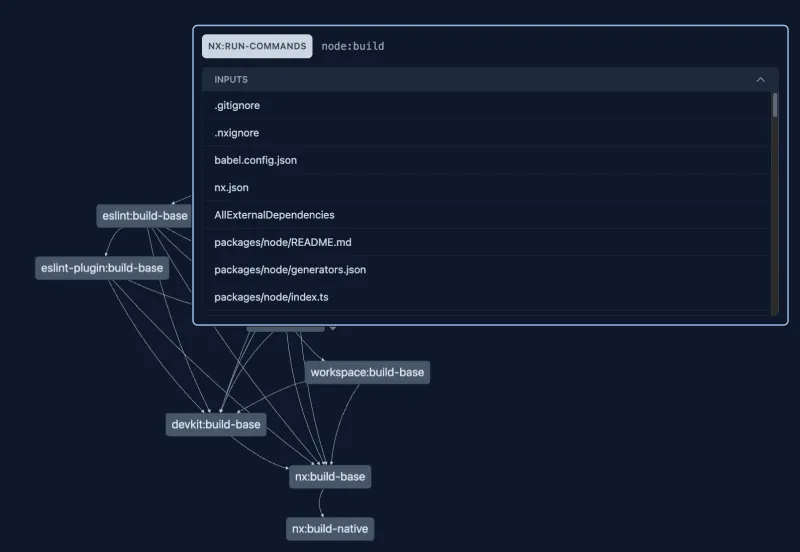
And then selecting "Task" from the "Project"/"Task" graph dropdown in the top left. Clicking on a specific task now allows you to see a comprehensive list of all files that were factored in as inputs for this task:
@nx/linter Renamed to @nx/eslint
After running nx migrate, you may have noticed that the @nx/linter plugin was removed and replaced with @nx/eslint.
In Nx 17, we removed any remaining traces of tslint from our linter package, so this is mainly a simple rename to more accurately describe the package (and to remove any confusion that this package is intended to support linting for other languages/platforms).
New Experimental Feature: Nx Release
nx release is a new top level command on the Nx CLI which is designed to help you with versioning, changelog generation, and publishing of your projects:
nx release version- Determine and apply version updates to projects and their dependentsnx release changelog- Generate CHANGELOG.md files and optional Github releases based on git commitsnx release publish- Take the freshly versioned projects and publish them to a remote registry
nx release is still experiment and therefore subject to change, but the Nx repo itself is now using these commands to version itself, as well as generate changelogs, Github releases, and publish our packages to npm.
As we solidify this command, we intend to bring robust support for various versioning and publishing strategies, as well as built-in support for publishing packages or modules to a variety of languages, registries, and platforms.
For more checkout our API docs, and be sure to catch James Henry's announcement of this new command at Nx Conf:
Experimental: Nx Project Inference API v2
At Nx, we're OBSESSED with building a better, more robust experience for our developers. Towards this end, we're now in v2 of our Project Inference API.
This API is a way of extending the Nx project graph, which can be particularly helpful for extending Nx to support other languages, allowing Nx to determine where to find and draw boundaries around projects in your workspace. A great example is our very own Vue plugin.
Interestingly, v2 includes support for dynamic targets as well. This opens up exciting new doors to reducing configuration, and we hope to expand on this to better support our first-party plugins in the near future.
For most developers, the main thing you need to know is that plugins may now add additional targets that you won't see in your project.json file. To see your actual project configuration, you can now use the command:
❯
nx show project <project_name>
For plugin authors, check out the v2 documentation to see how you can take advantage of the new API to deliver a better experience to your users.
20k Github Stars!!
Nx is SOOO CLOSE to 20,000 stars on github! If Nx has been helpful to you, please help us get there!

How to Update Nx
Nx is known to help you automatically migrate to the new version (including potentially breaking changes). To update simply run:
❯
npx nx migrate latest
This will update your Nx workspace dependencies, configuration and code to the latest version. After updating your dependencies, run any necessary migrations:
❯
npx nx migrate --run-migrations
Wrapping up
That's all for now folks! We're just starting up a new iteration of development on Nx, so be sure to subscribe to our YouTube channel to get updates when new features land! Until next time, KEEP WORKING HARD!


