We just released Nx Console 17.28.0 and it comes with a huge new feature: Nx Cloud Integration, right in VSCode! 🎉
In case you're not sure what it does, Nx Cloud takes your Nx workspace to the next level with awesome features like:
- Remote Caching — share your Nx cache with your coworkers and CI agents. By using Nx Cloud, you can be sure that no computation is done twice — throughout your company.
- Distributed Task Execution — the most important feature for truly scaling up repositories. Nx already knows about your project graph and what tasks depend on each other. With Nx Cloud, you can leverage this knowledge to distribute tasks smartly across multiple agents while making sure that everything is run in the correct sequence. This can speed up your CI times by orders of magnitude!
- VCS [version control system] Integration — see the results of your CI runs right on your pull request! Nx Cloud can talk to GitHub and other version control systems in real-time, giving you an overview of successes and failures as they happen.
And the best part? It's free! You won't pay anything for the first 500 hours of computation time saved per month. If you exceed 500 hours of computation saved, you can buy more; in the worst case, caching stops until the next month. For open-source projects, it's free even beyond that. 😍
Head over to http://nx.dev/nx-cloud to learn more.
Prefer a video walkthrough? Here we go
Show me the new features already!
Now that we're caught up, let's look at how Nx Console will make connecting to and working with Nx Cloud even easier.
To follow along, ensure you have installed the latest Nx Console version:
Nx Console — Visual Studio Marketplace
In the Nx sidebar, you will see a new Nx Cloud section.
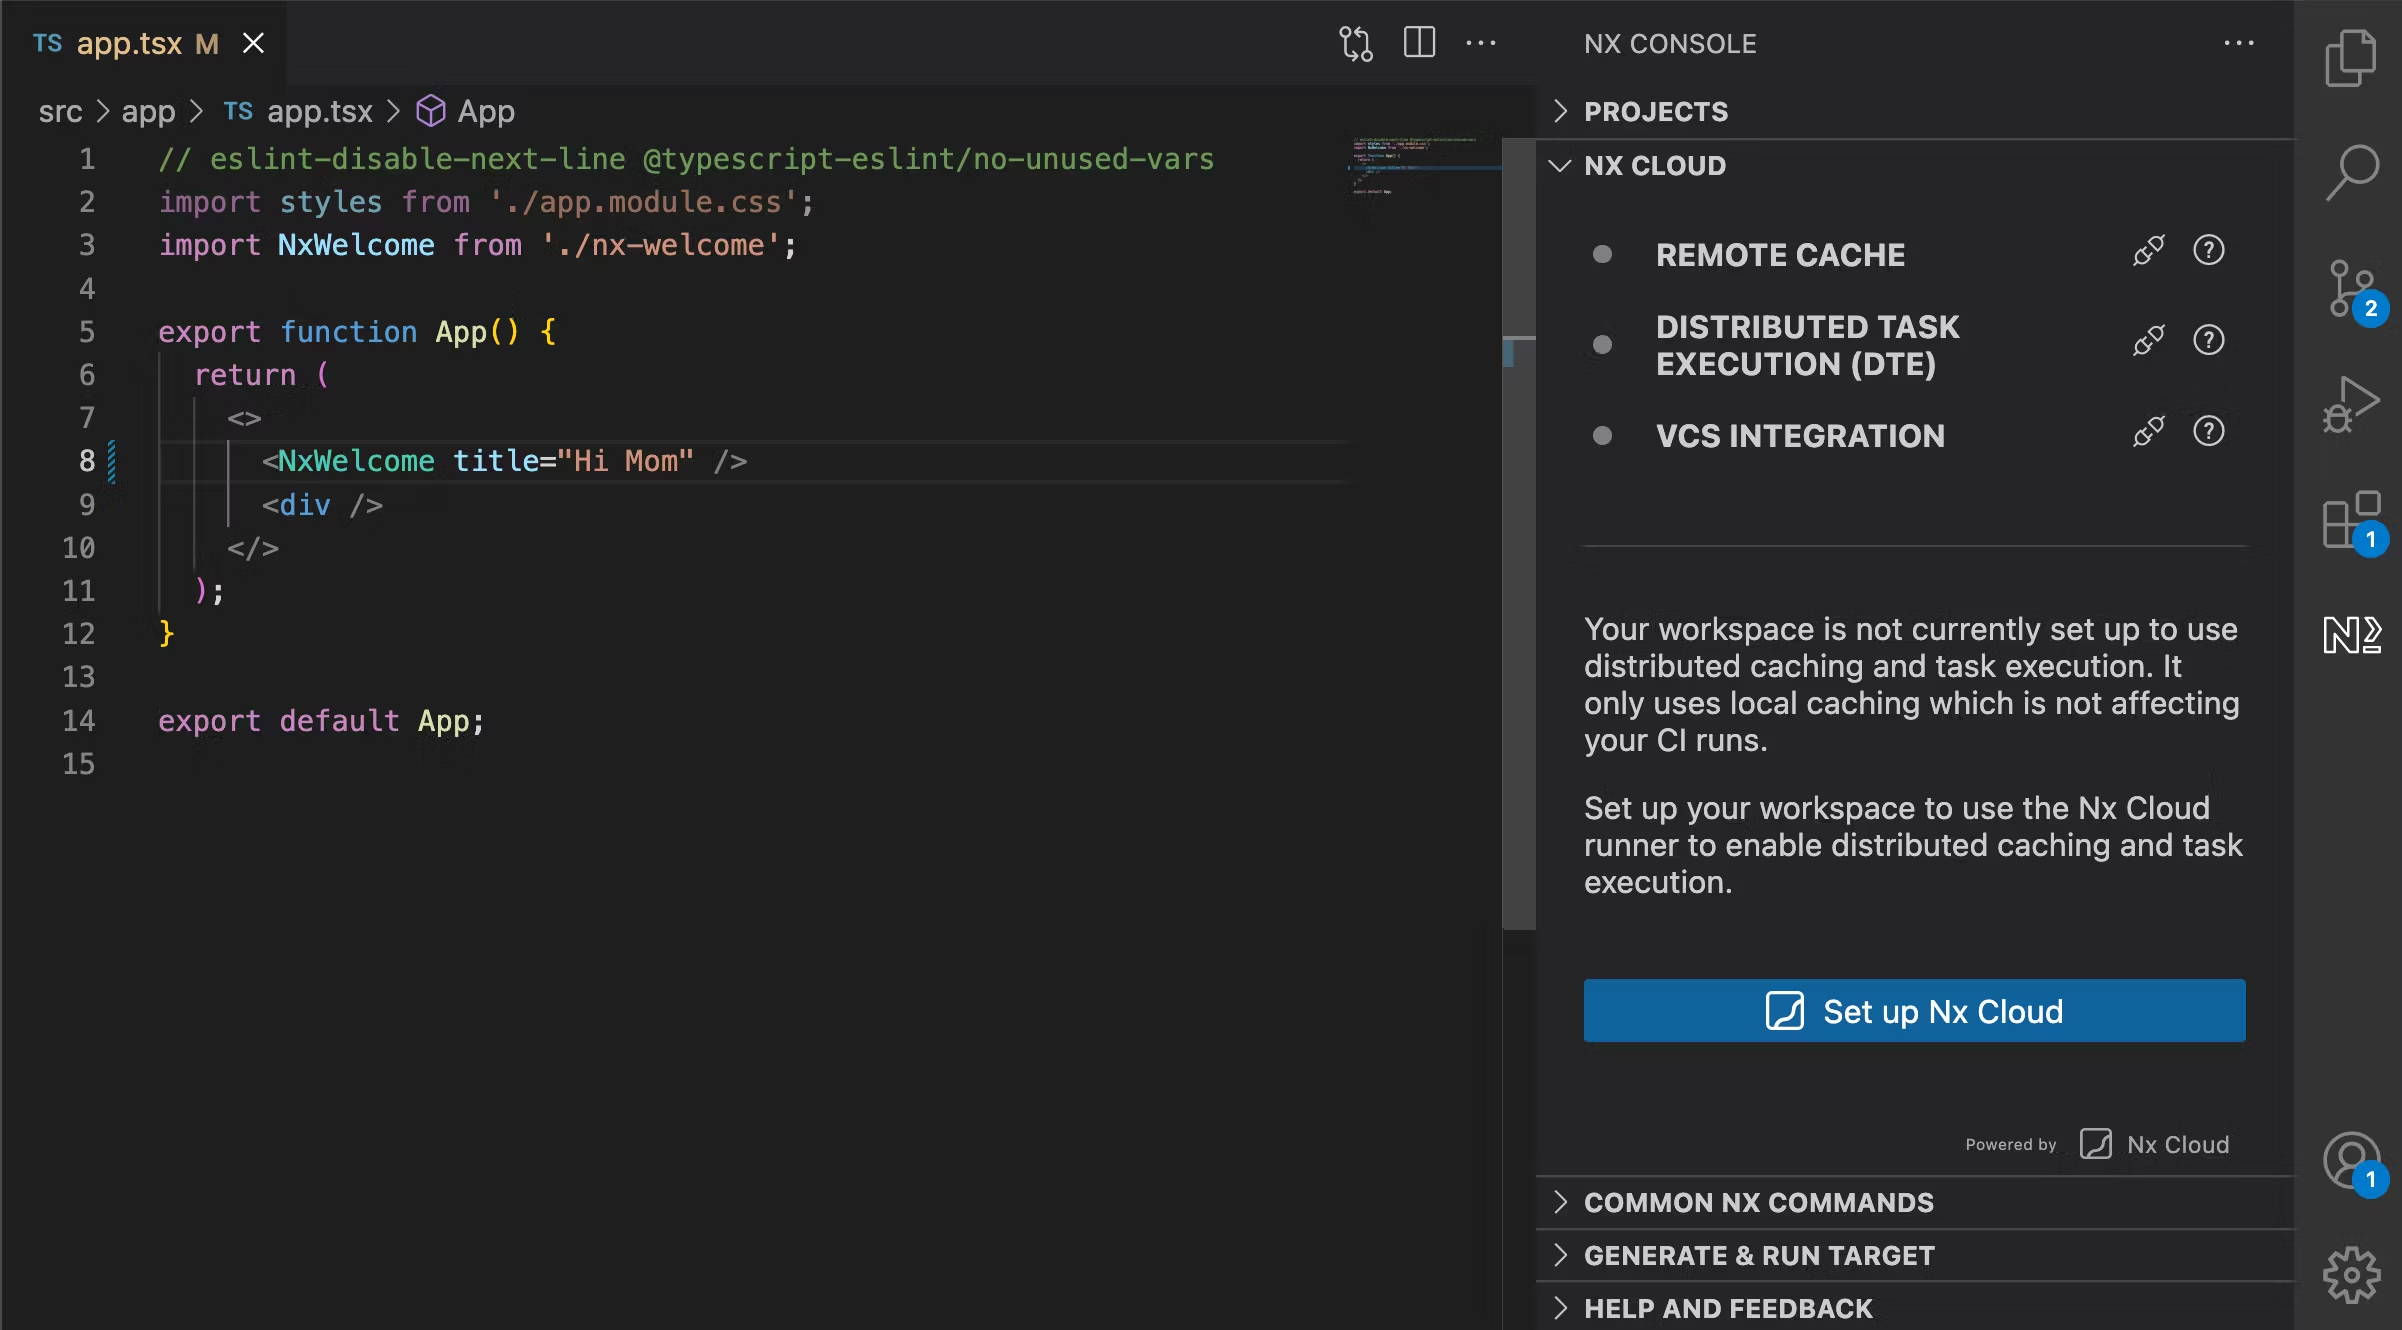
If your workspace is not using Nx Cloud, click the "Set up Nx Cloud" button to set up the cloud runner automatically.
You will see that some changes happen in your nx.json:
1"default": {
2- "runner": "nx/tasks-runners/default",
3+ "runner": "@nrwl/nx-cloud",
4  "options": {
5+   "accessToken": "NDM2MmU2YmUtNDFl…ifHJlYWQtd3JpdGU=",
6    "cacheableOperations": [
7      "build",
8      "lint",
9      "test",
10      "e2e"
11    ],
12   }
13 }
14
That's it. You can now use Remote Caching and Distributed Task Execution (DTE). 🎉
Running your first task
Let's try it out! Select a task to run and see the results in the run list. You can get an even more detailed breakdown in the Nx Cloud web app.
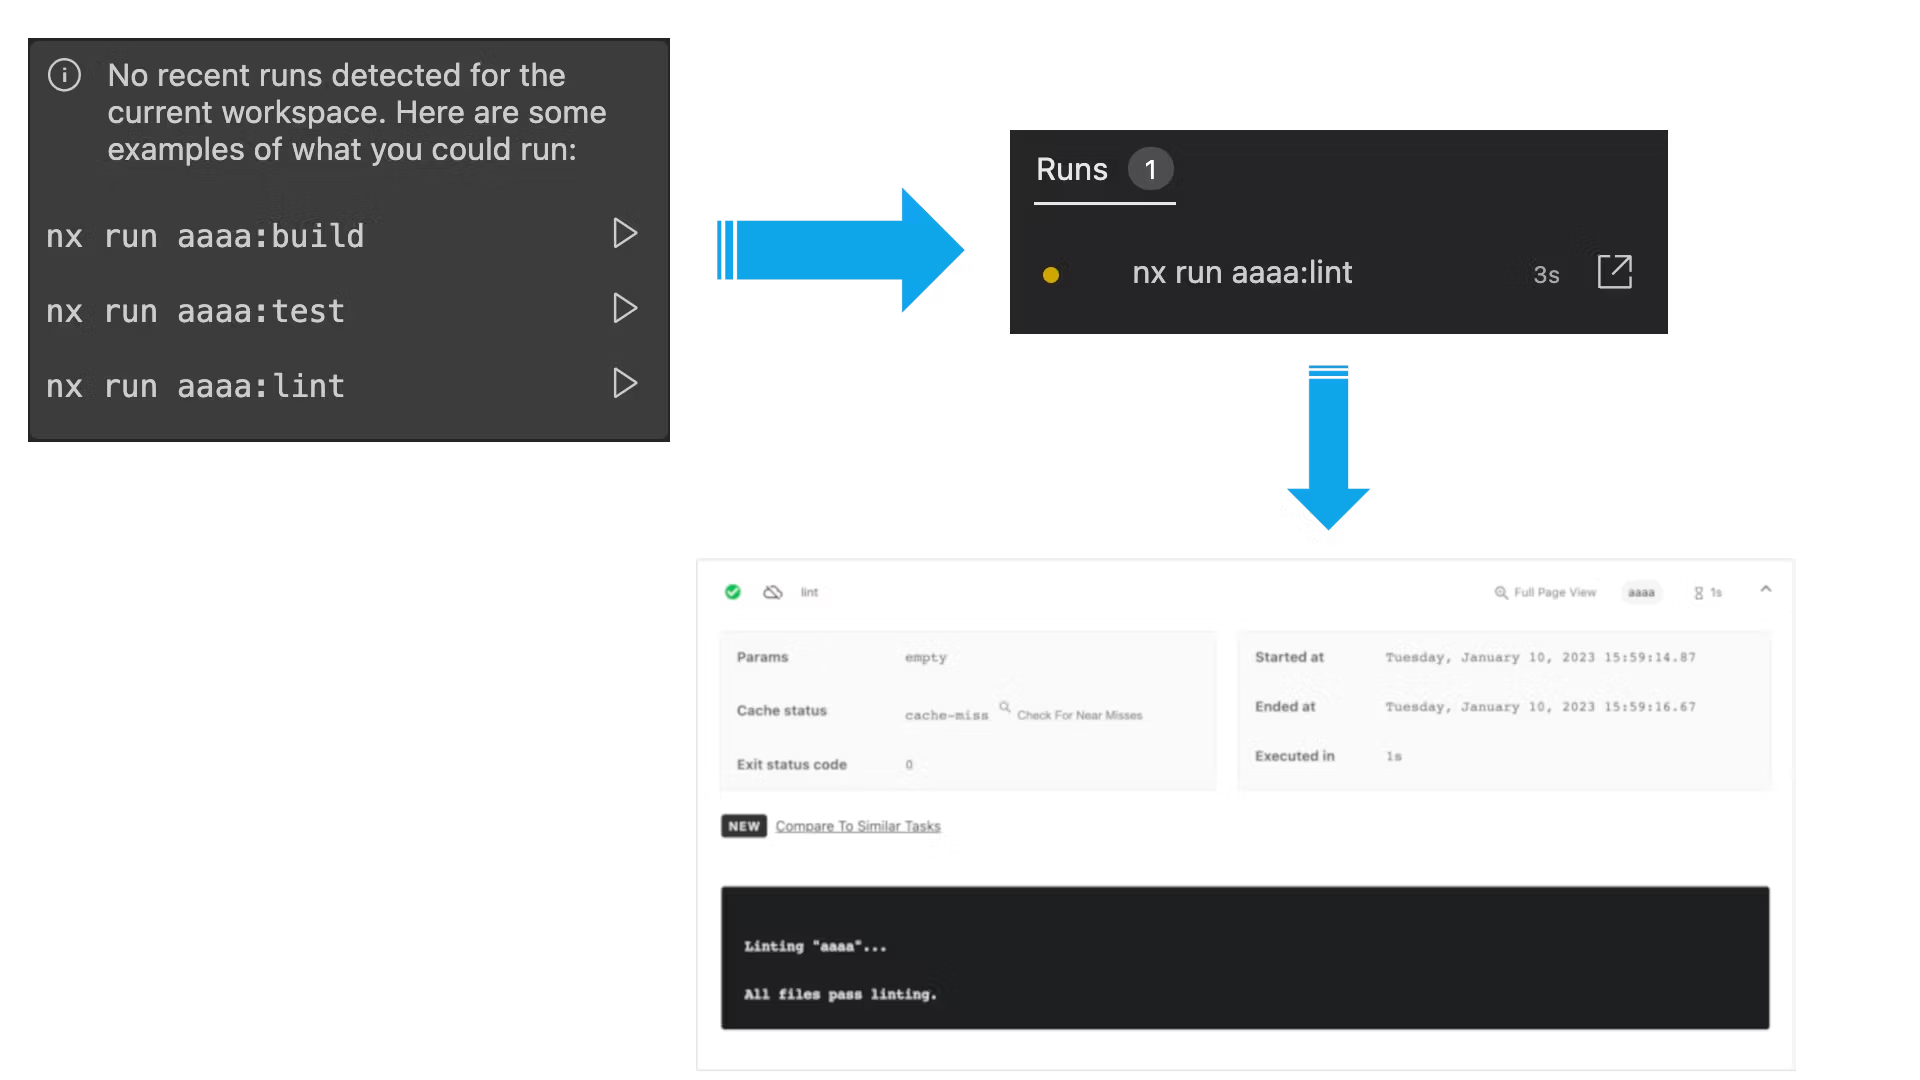
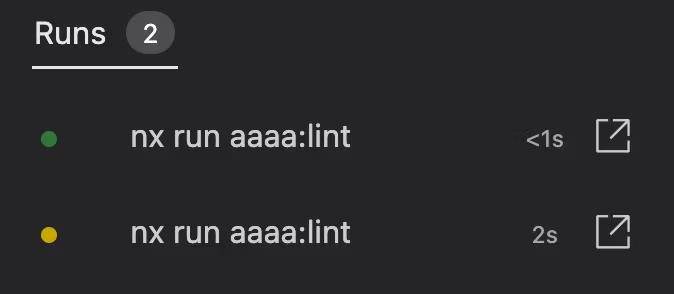
If you rerun the same task, you can see that the time it took to complete is under a second. This is because of Nx's advanced computation caching. Whenever a task is executed, Nx caches it. If the task has been run before, it just restores the result from the cache. By default, this cache is local to your own workstation. However, with Nx Cloud, you can distribute and share it between machines.
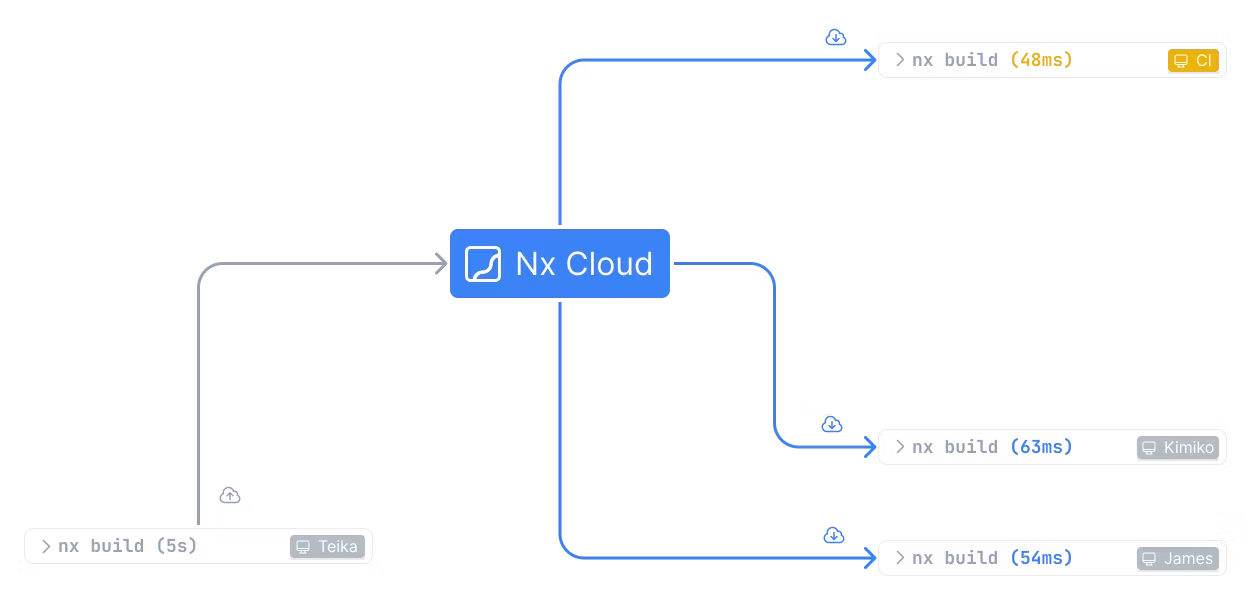
To see it in action, push your newly created access token and have a coworker (or CI pipeline) run a task on their machine. If you execute that same task again, it will be pulled from the cache just like it did locally! 🔮
To learn more about Nx Cloud access tokens, head over to the docs: Access Tokens Documentation.
Claiming your workspace
If you've just started using Nx Cloud, you will probably see this message prompting you to claim your workspace:
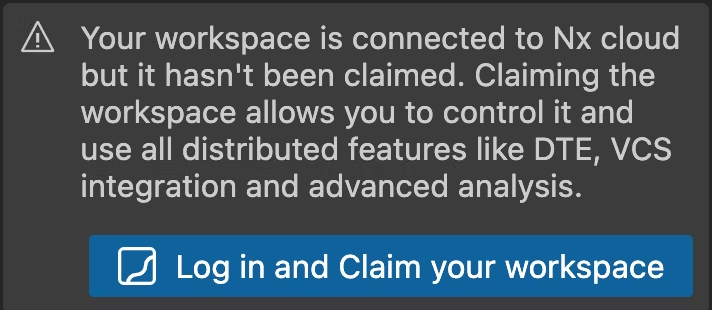
Out of the box, Nx Cloud works without the need to register. It is, however, highly recommended to create an account and associate it with your workspace. This process is called claiming your workspace and has become much easier with Nx Console! After claiming, you can take full control of your cloud workspace, manage access restrictions and other settings.
Just click on 'Login and claim your workspace' to be redirected to the browser where you can sign in to Nx Cloud or create an account. After successful authentication, you will come back to VSCode, where you can select one of your organizations and connect your workspace to it.
From now on, Nx Console will be able to make authenticated requests to the cloud API, so even if you choose to make your workspace private, logged-in users that are authorized to access it can do so.
Distributed Task Execution
Distributed Task Execution (DTE) becomes very important as your workspace grows. With Nx, powerful features like computation caching and affected analysis help you drastically cut down your CI times. Most of the time, large parts of your codebase will not need to be rebuilt and retested. However, we also have to consider the worst-case-scenarios. Let's say you do change a core lib that everything in your monorepo depends on. This could mean hundreds or even thousands of projects needing to be rebuilt and retested, which would mean hours of CI time. This is obviously very impractical and you should consider solutions that allow you to parallelize all this work and keep worst-case CI times at a reasonable level. There are different approaches to achieving this but it's hard to get right and not something most teams want to spend engineering resources on.
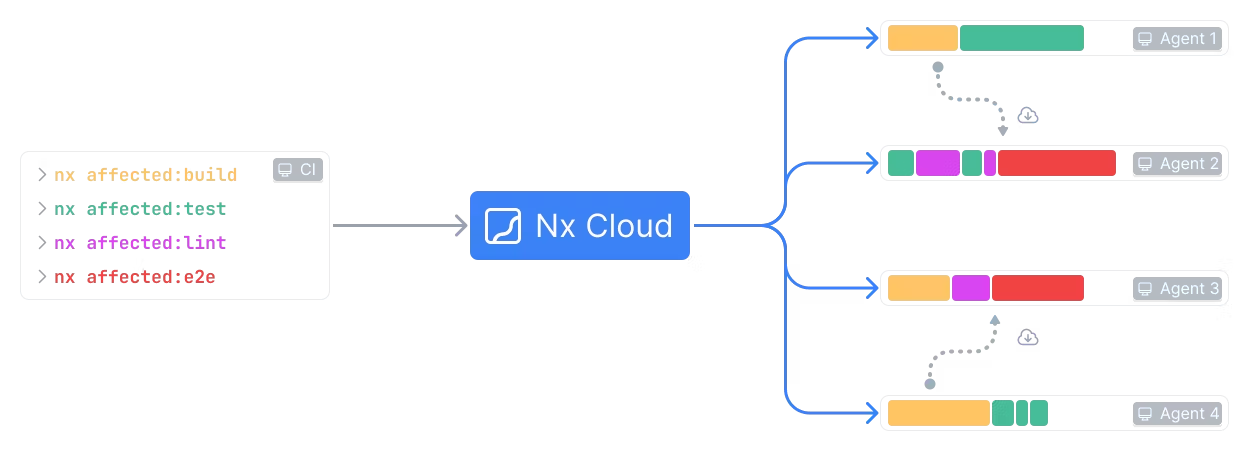
Distributed Task Execution with Nx Cloud solves this issue — it allows you to optimally parallelize tasks without thinking about their interdependencies or agent management. You don't have to use it immediately, but it's useful if you want to keep your CI times low even as your workspace grows. 🚀
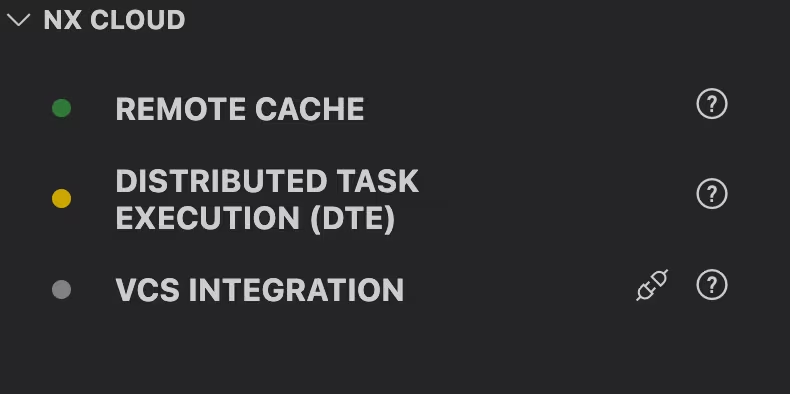
DTE is available for all Nx Cloud workspaces with minimal setup. If you see a yellow DTE status in Nx Console, that just means you haven't used it yet. Check out the docs to learn more about the motivation for DTE and how to test it out in your workspace.
VCS Integration
Nx Cloud isn't just great for its remote caching and DTE features, it also generates readable and searchable reports for any executed tasks — whether it be 10 or 10.000. In a monorepo, your CI pipelines will seldom run just a single task. It's more common to have commands like nx affected — -target=build which amounts to "rebuild everything that changed". This could potentially be dozens, hundreds or thousands of tasks. If something goes wrong, combing through thousands upon thousands of lines of logs quickly becomes tedious. So having a nicely structured, per-target view that you can filter and sort while still preserving all terminal styling is incredibly useful!
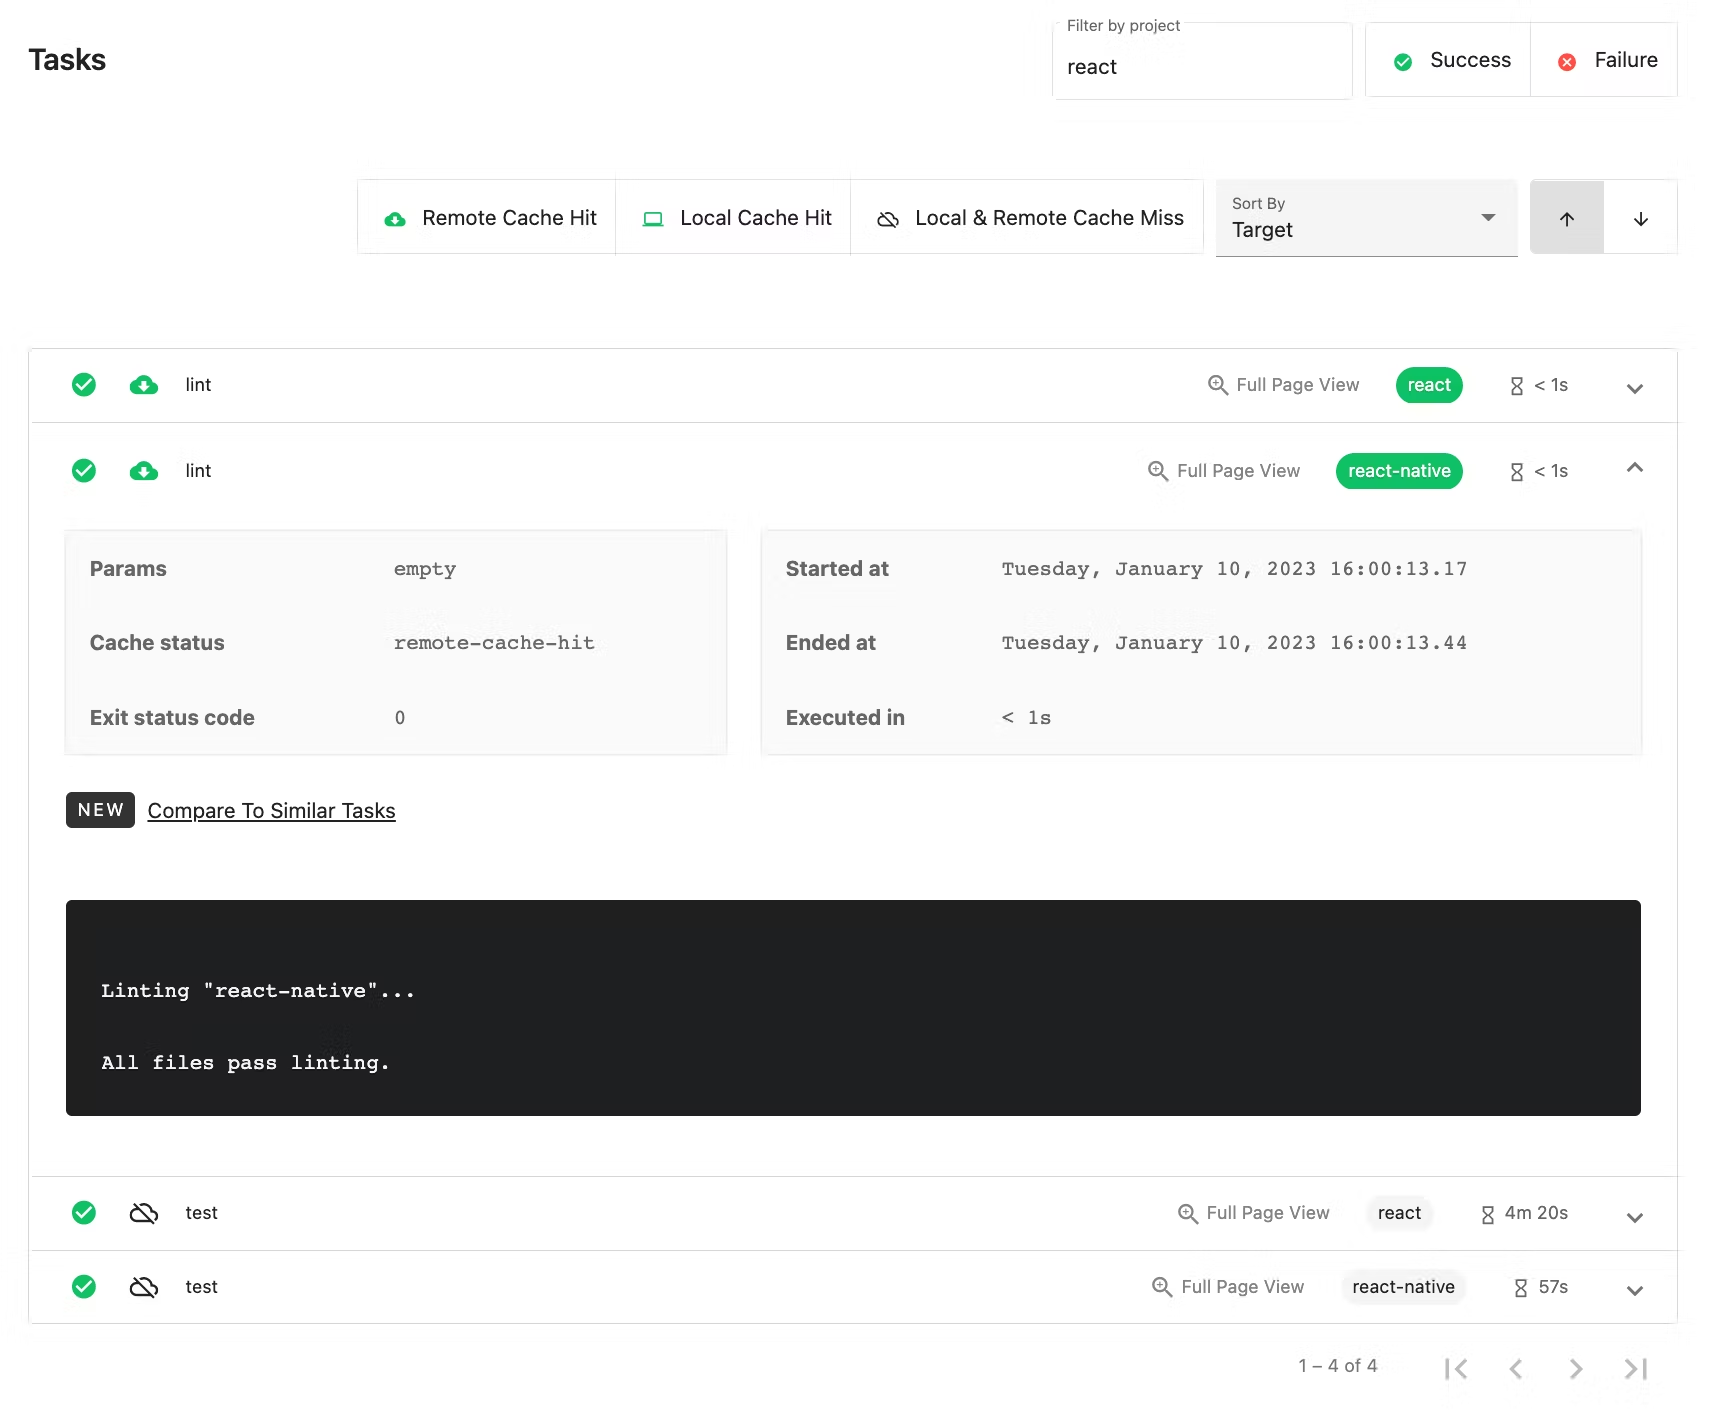
To take advantage of this valuable information without changing your development workflow, use the Nx Cloud integration for your favourite platform: Github, GitLab or Bitbucket Cloud. You can see the results of your cloud runs in a PR comment with an overview of failed tasks and links to easily readable outputs. No more scrolling through endless logs until you find what you need!
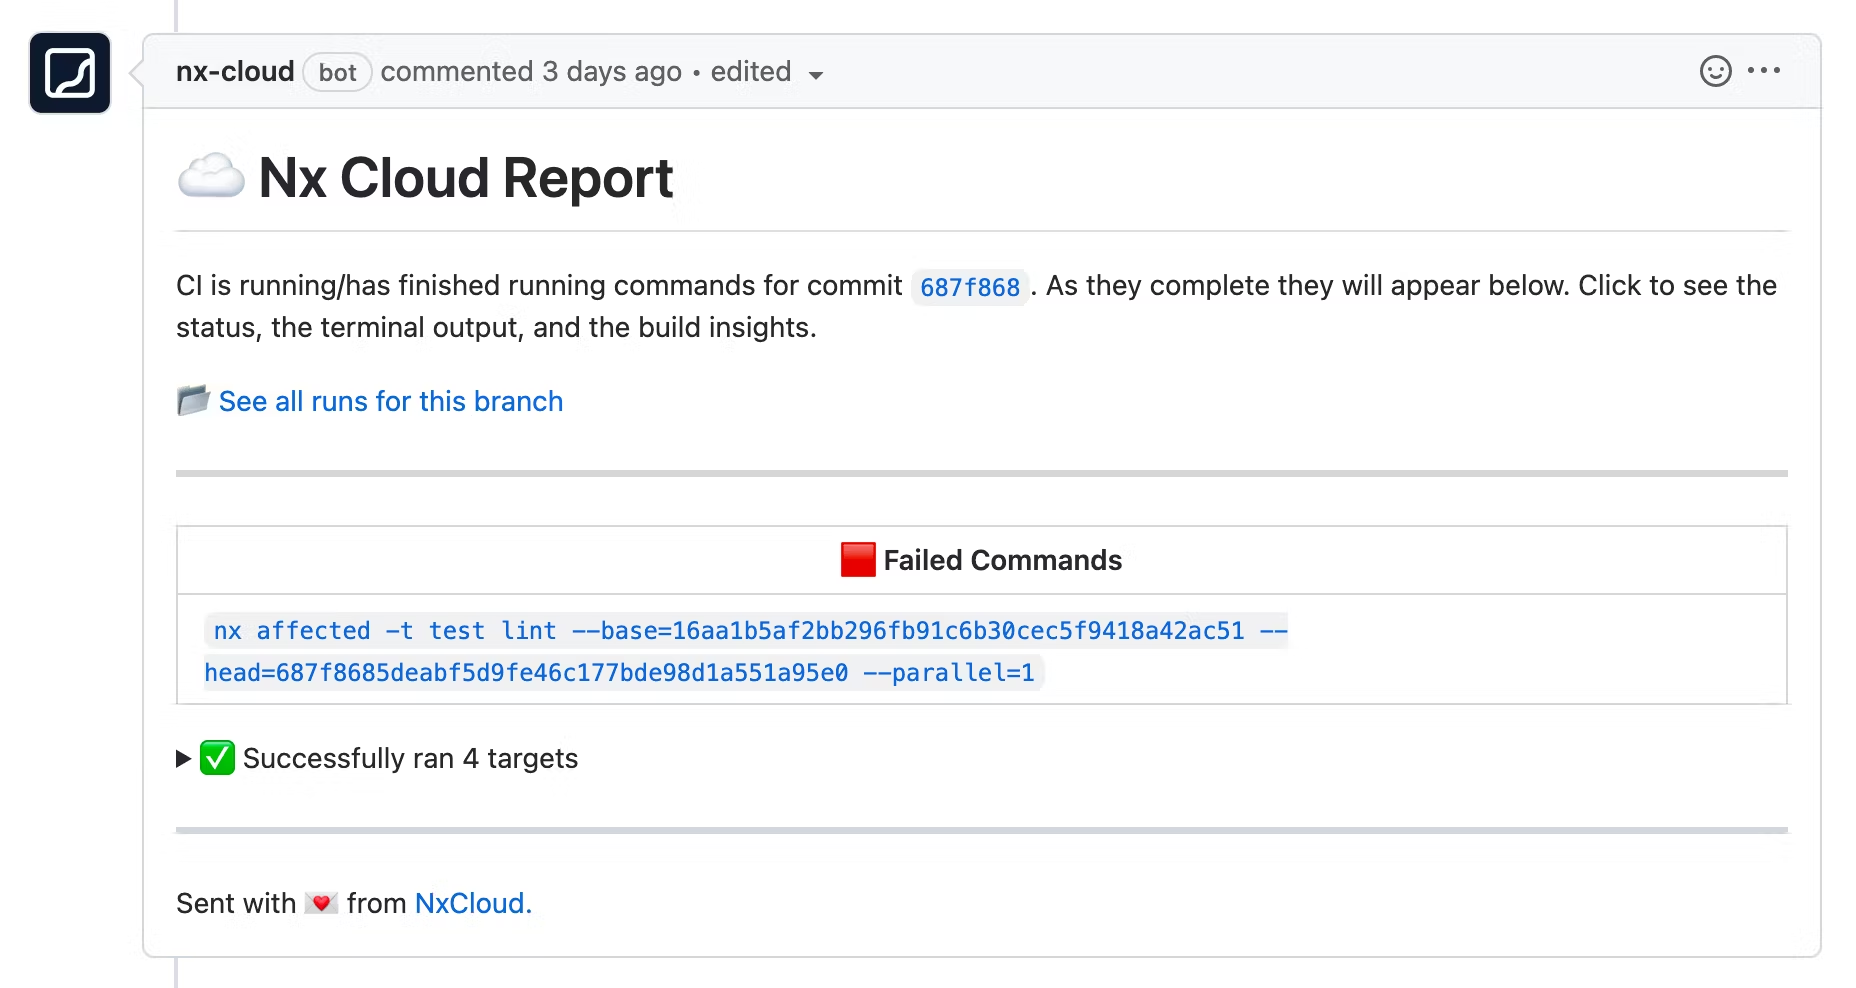
To set it up, just click on the button in the Nx Console cloud view and follow the prompts in your browser. Read more in the full guide on connecting your workspace to VCS.


