Nx Console is our IDE extension for VSCode, Cursor, IntelliJ IDEA and other Jetbrains IDEs. It integrates deeply with Nx workspaces. Recently, we've also added features to enhance your LLM assistant with rich context about your monorepo, which is particularly valuable for exploring large codebases. Our Model Context Protocol (MCP) integration specifically improves the AI's reasoning capabilities in these complex environments. Read more in the announcement blog post.
While often associated with code generation, LLMs are incredibly powerful for exploration and understanding complex codebases. Imagine onboarding a new developer onto a large project – an LLM armed with workspace context could significantly speed up their learning process.
I recently experienced this firsthand as I needed to test an upcoming PR for Nx Console itself. Having not touched the packaging part of the codebase for a while, I wasn't sure about the current structure or how to generate the .vsix package for local testing. Instead of manually digging through files, I decided to leverage Nx Console's own LLM integration within the Nx Console codebase (pure inception!). I used it to query the structure and figure out the necessary build commands.
Let's see how that went.
Setting up the Nx MCP
First, you need to ensure the Model Context Protocol (MCP) integration is set up, which allows Cursor to understand your Nx workspace. This starts with having the Nx Console extension installed, as it provides the necessary MCP server.
When you start Cursor (version 0.46 or newer) in an Nx workspace with Nx Console present, it should automatically detect the server and prompt you via a notification to enable the "Nx Enhancement" agent. Clicking the notification is the easiest way, but you can also manually trigger the setup using the nx.configureMcpServer command from the command palette (Ctrl/Cmd + Shift + P).
Finally, verify that the "Nx Console MCP" server is listed and enabled within Cursor's settings (Cursor -> Settings -> Cursor Settings -> MCP). This step confirms that Cursor is connected to the local MCP server provided by Nx Console. Once enabled, the AI assistant gains access to a powerful set of tools, allowing it to query detailed information about your Nx workspace structure, project configurations, and task dependencies.
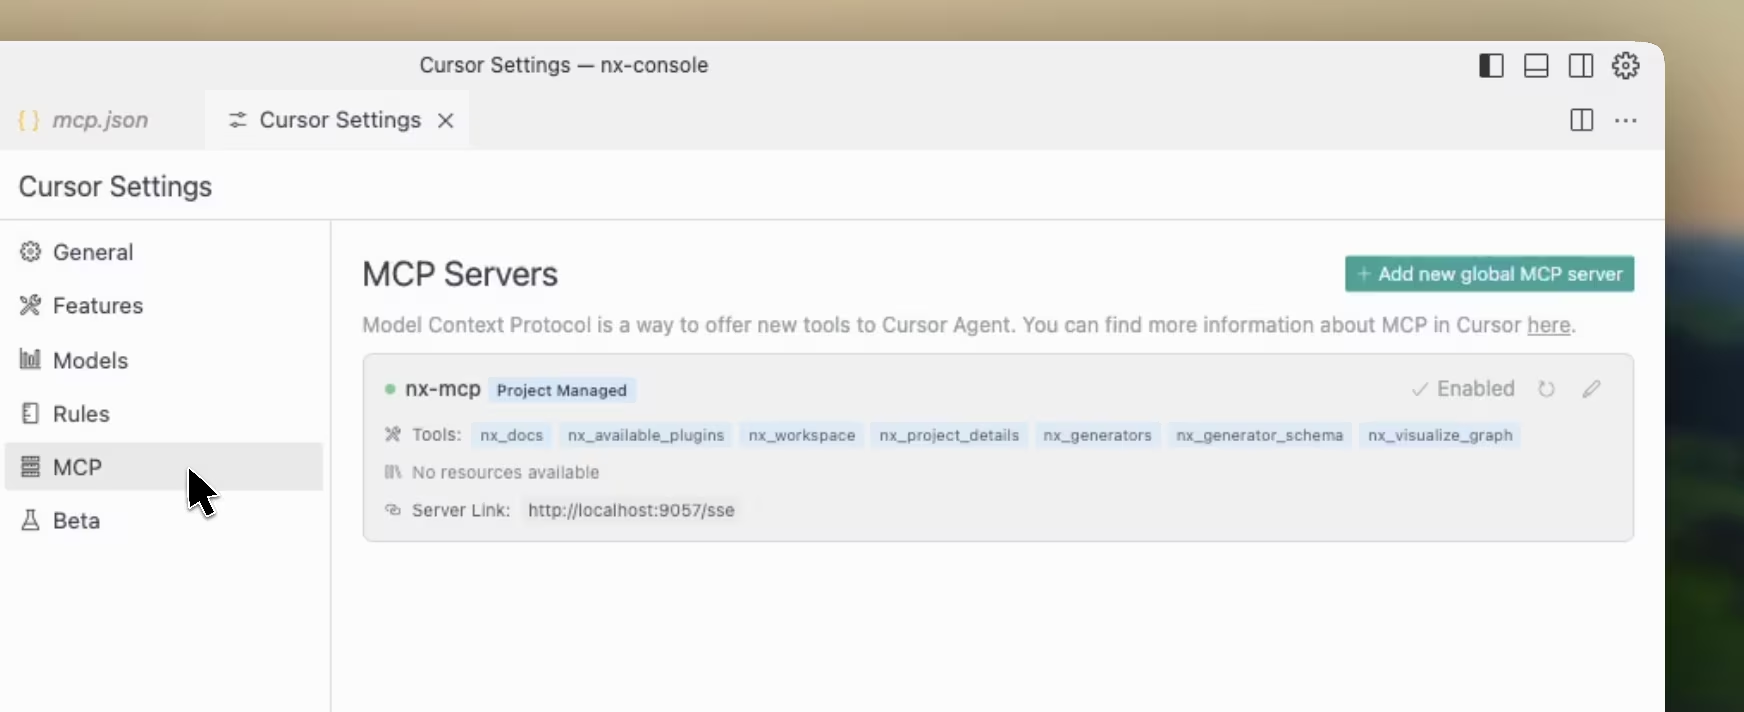
The docs have all the details if you need more infos.
Figuring out the Build Process
My goal was to build the VS Code extension package (.vsix file) so I could install and test it locally. I wasn't sure about the exact command.
Query: "What command can I use to build the VS Code extension so I can try it out locally?"
Initially, the assistant might search for generic build scripts. However, thanks to the nx_workspace tool provided by the MCP, it quickly identifies the project as an Nx workspace.
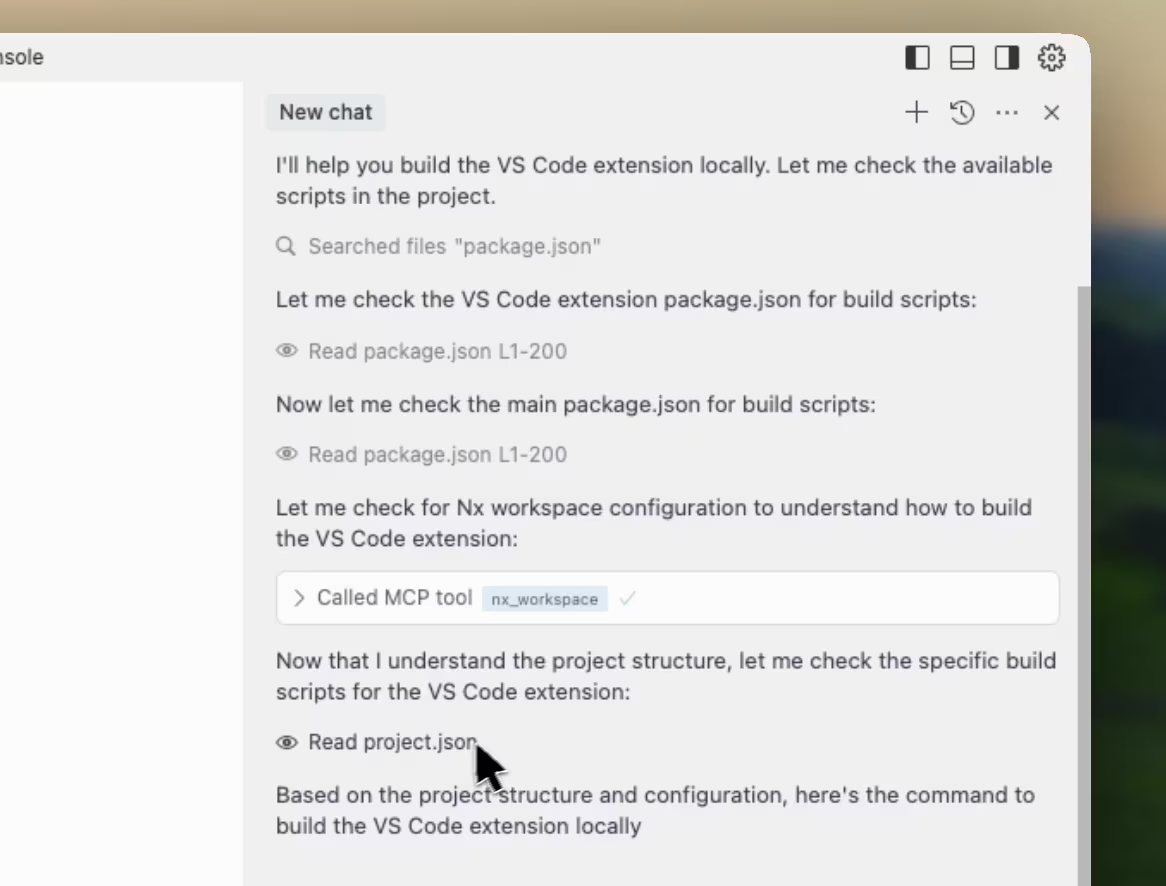
It accesses the workspace details and finds the project.json for the VS Code extension project (likely located under an apps directory). Within this file, it discovers the available targets, including build and package.
Query: "What is the difference between the build and package command? I want to get an extension VSIX file that I can install. Which one should I use?"
The assistant, using the nx_project_details tool, examines the configuration for both targets. It determines that the package target is the one that produces the .vsix file needed for installation, while build likely just compiles the code.
Understanding Task Dependencies
A common question when dealing with build pipelines is whether prerequisite steps need to be run manually.
Query: "When I run the package command, do I need to run build beforehand?"
This is where the Nx MCP integration truly shines. Nx allows defining dependencies between tasks. The assistant analyzes the project configuration again.
Query: "Where is that dependency between the package and build command defined?"
It reads the project.json for the VS Code project, specifically looking at the package target:
1// Example structure within project.json (apps/vscode/project.json)
2{
3  // ... other config ...
4  "targets": {
5    "build": {
6      // build configuration
7    },
8    "package": {
9      "executor": "nx:run-commands",
10      "options": {
11        "commands": ["node ./tools/scripts/vscode-vsce.js"]
12      },
13      "dependsOn": [
14        "build" // <-- Here's the dependency!
15        "^build"
16      ]
17    }
18    // ... other targets ...
19  }
20}
21
The assistant points out the dependsOn array within the package target configuration. This explicitly tells Nx to run the build target before executing the package command.
This understanding comes directly from the structured data provided by the MCP server about the Nx workspace's configuration and task graph. Without the MCP, the AI would lack the context of Nx's task dependency system.
Wrapping Up
Much of the buzz around LLMs focuses on code generation (a major use case, for sure) or even the more extreme "vibe coding". However, as this walkthrough demonstrates, using LLMs for exploring and understanding large codebases is an incredibly valuable application, especially within an Nx monorepo enhanced with our MCP integration.
Think about navigating an unfamiliar project: you can ask the AI where specific functionality is located, how different parts are connected, or where new code should ideally be placed. This can help accelerate the onboarding process for new team members.
We're really just getting started with Nx's LLM integration. Keep an eye on our social channels (@nxdevtools on X/Twitter, @nx.dev on Bluesky, and our Nx YouTube channel) where we regularly share showcases and announce new features – we're releasing improvements almost weekly!
Learn more:
