Since the Model Context Protocol (MCP) was released by Anthropic in late 2024, it has quickly become an important part of the AI ecosystem. The MCP provides an open standard for connecting AI agents to the rest of the world - the web, software systems and developer tools, just to name a few examples.
We've been busy building the Nx MCP server, which gives LLMs deep access to your monorepo's structure. It helps AI tools to better understand your workspace architecture, browse the Nx docs and even trigger actions in your IDE like executing generators or visualizing the graph.
There are many examples of MCP servers for popular tools popping up all over the place. Check out the official MCP repo to see a long list of reference servers as well as official and community integrations.
Whatever you're building, it's becoming more and more important to ensure that AI systems can interact with your software. So let's learn how to build your very own MCP server to make your technology be usable for AI - all from an Nx monorepo!
In this series of blog posts, we'll be using a fictional startup as an example: Astra Arcana - a bewitched SaaS company that lets you cast spells from anywhere with a few simple clicks.
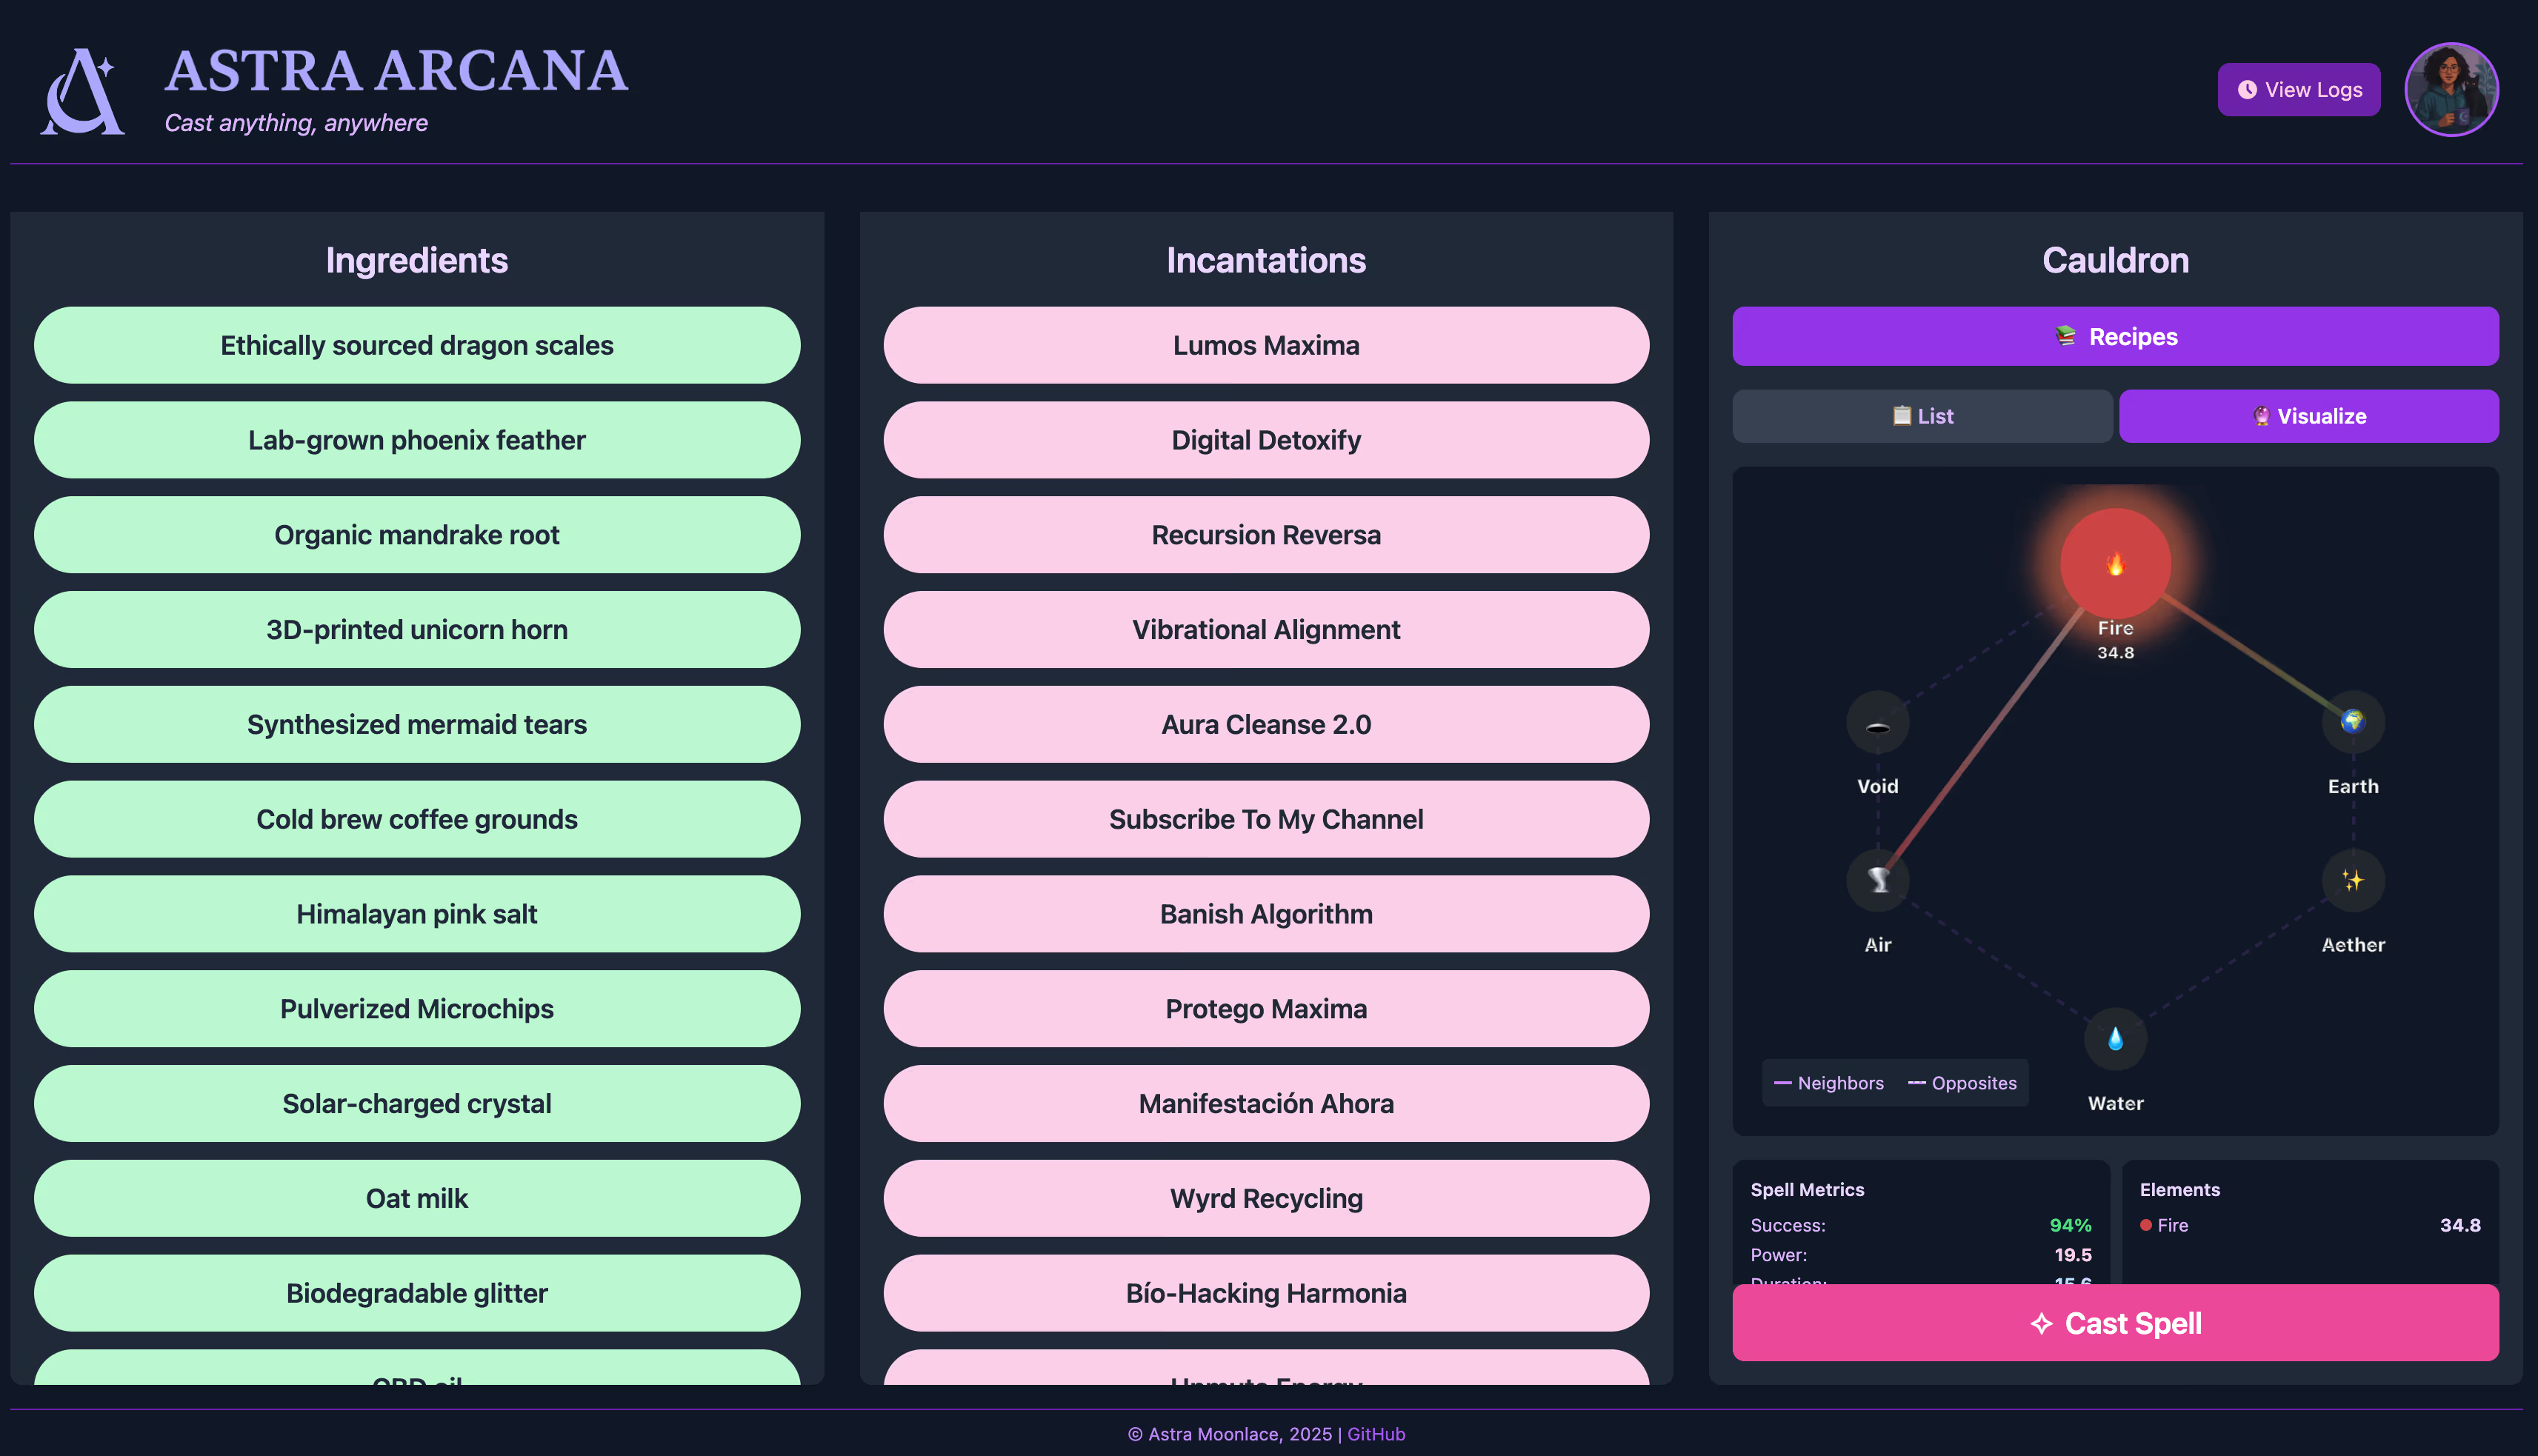
You can go and try casting some spells right away at https://astra-arcana.pages.dev/
Of course, like any modern software company, they need to be ready for the coming shift towards AI - let's help them by building an MCP server that lets you browse ingredients and cast spells directly from your AI chat!
Setting up the Server
If you want to code along and build your own mcp server, clone the https://github.com/MaxKless/astra-arcana repo on GitHub to get started.
Astra Arcana is built in an Nx monorepo, where the web app and api live. There's also a shared types library as well as the Typescript SDK, which lets users programmatically cast spells.
1apps
2 ├── web
3 └── api
4libs
5 ├── spellcasting-types
6 └── spellcasting-sdk
7
We will create a new Node application that contains our MCP server and use the Typescript SDK to power it.
Creating the MCP Server
MCP are JSON-RPC servers that communicate with clients via stdio or http. Thankfully, the official Typescript SDK abstracts away large pieces of the implementation, making it easier to get started - let's get started by installing it.
❯
npm install @modelcontextprotocol/sdk
We'll continue by installing the @nx/node plugin and using it to generate a new Node application:
❯
npx nx add @nx/node
❯
npx nx generate @nx/node:application --directory=apps/mcp-server --framework=none --no-interactive
This generates a basic node application:
1UPDATE package.json
2CREATE apps/mcp-server/src/assets/.gitkeep
3CREATE apps/mcp-server/src/main.ts
4CREATE apps/mcp-server/tsconfig.app.json
5CREATE apps/mcp-server/tsconfig.json
6UPDATE nx.json
7CREATE apps/mcp-server/package.json
8UPDATE tsconfig.json
9
In package.json, you'll see that Nx has configured a build and serve target for our app that uses webpack. Now that our setup is ready, let's implement the actual server.
First, let's import some things and set up an instance of McpServer. This is part of the MCP SDK and will take care of actually implementing the Protocol Layer of the MCP specification, for example how to communicate with the client.
1import { SpellcastingSDK } from '@astra-arcana/spellcasting-sdk';
2import { McpServer } from '@modelcontextprotocol/sdk/server/mcp.js';
3import { StdioServerTransport } from '@modelcontextprotocol/sdk/server/stdio.js';
4
5const server = new McpServer({
6  name: 'Astra Arcana',
7  version: '1.0.0',
8});
9
Next, we'll register a set of MCP tools. A tool is essentially a function that the AI model can call, passing some input parameters if necessary. Instead of constructing API calls manually, our tools will expose three main parts of casting a spell with the Spellcasting SDK: Ingredients, Incantations and Recipes. This is really the core piece of the MCP server, as it defines what it can do. There are other features you can implement, but currently, tools are by far the most widely supported and important part.
1const sdk = new SpellcastingSDK();
2
3server.tool('get-ingredients', async () => {
4  const ingredients = await sdk.getIngredients();
5  return {
6    content: [{ type: 'text', text: JSON.stringify(ingredients) }],
7  };
8});
9
10server.tool('get-incantations', async () => {
11  const incantations = await sdk.getIncantations();
12  return {
13    content: [{ type: 'text', text: JSON.stringify(incantations) }],
14  };
15});
16
17server.tool('get-recipes', async () => {
18  const recipes = await sdk.getRecipes();
19  return {
20    content: [{ type: 'text', text: JSON.stringify(recipes) }],
21  };
22});
23
Finally, let's implement the Transport Layer, letting the MCP server listen to and send messages via process inputs and outputs (stdio). It's only a few lines of code:
1const transport = new StdioServerTransport();
2(async () => {
3  await server.connect(transport);
4})();
5
And just like that, we've built our very own MCP server! Let's make sure it works.
Testing with the MCP Inspector
Anthropic has not just come up with the protocol, they've also created a great ecosystem around it: Various SDKs, reference servers and a visual testing tool: The MCP Inspector.
Let's modify our serve target to use the Inspector, letting us explore our newly created server. First, delete the existing serve target in apps/mcp-server/package.json , as it doesn't really apply to our use case. Replace it with this
1"serve": {
2  "command": "npx -y @modelcontextprotocol/inspector node ./apps/mcp-server/dist/main.js",
3  "dependsOn": ["build"],
4  "continuous": true
5}
6
Let's break it down:
- the command runs the Inspector, pointing to the build output location of our MCP server
"dependsOn": ["build"]tells nx to always run the build before this target, making sure that the bundled javascript is available"continuous": truemarks the serve as a continuous task so that will work properly in more complex task pipelines
You can see the result by running npx nx serve mcp-server and looking at the website it spins up (usually on http://localhost:6274 ).
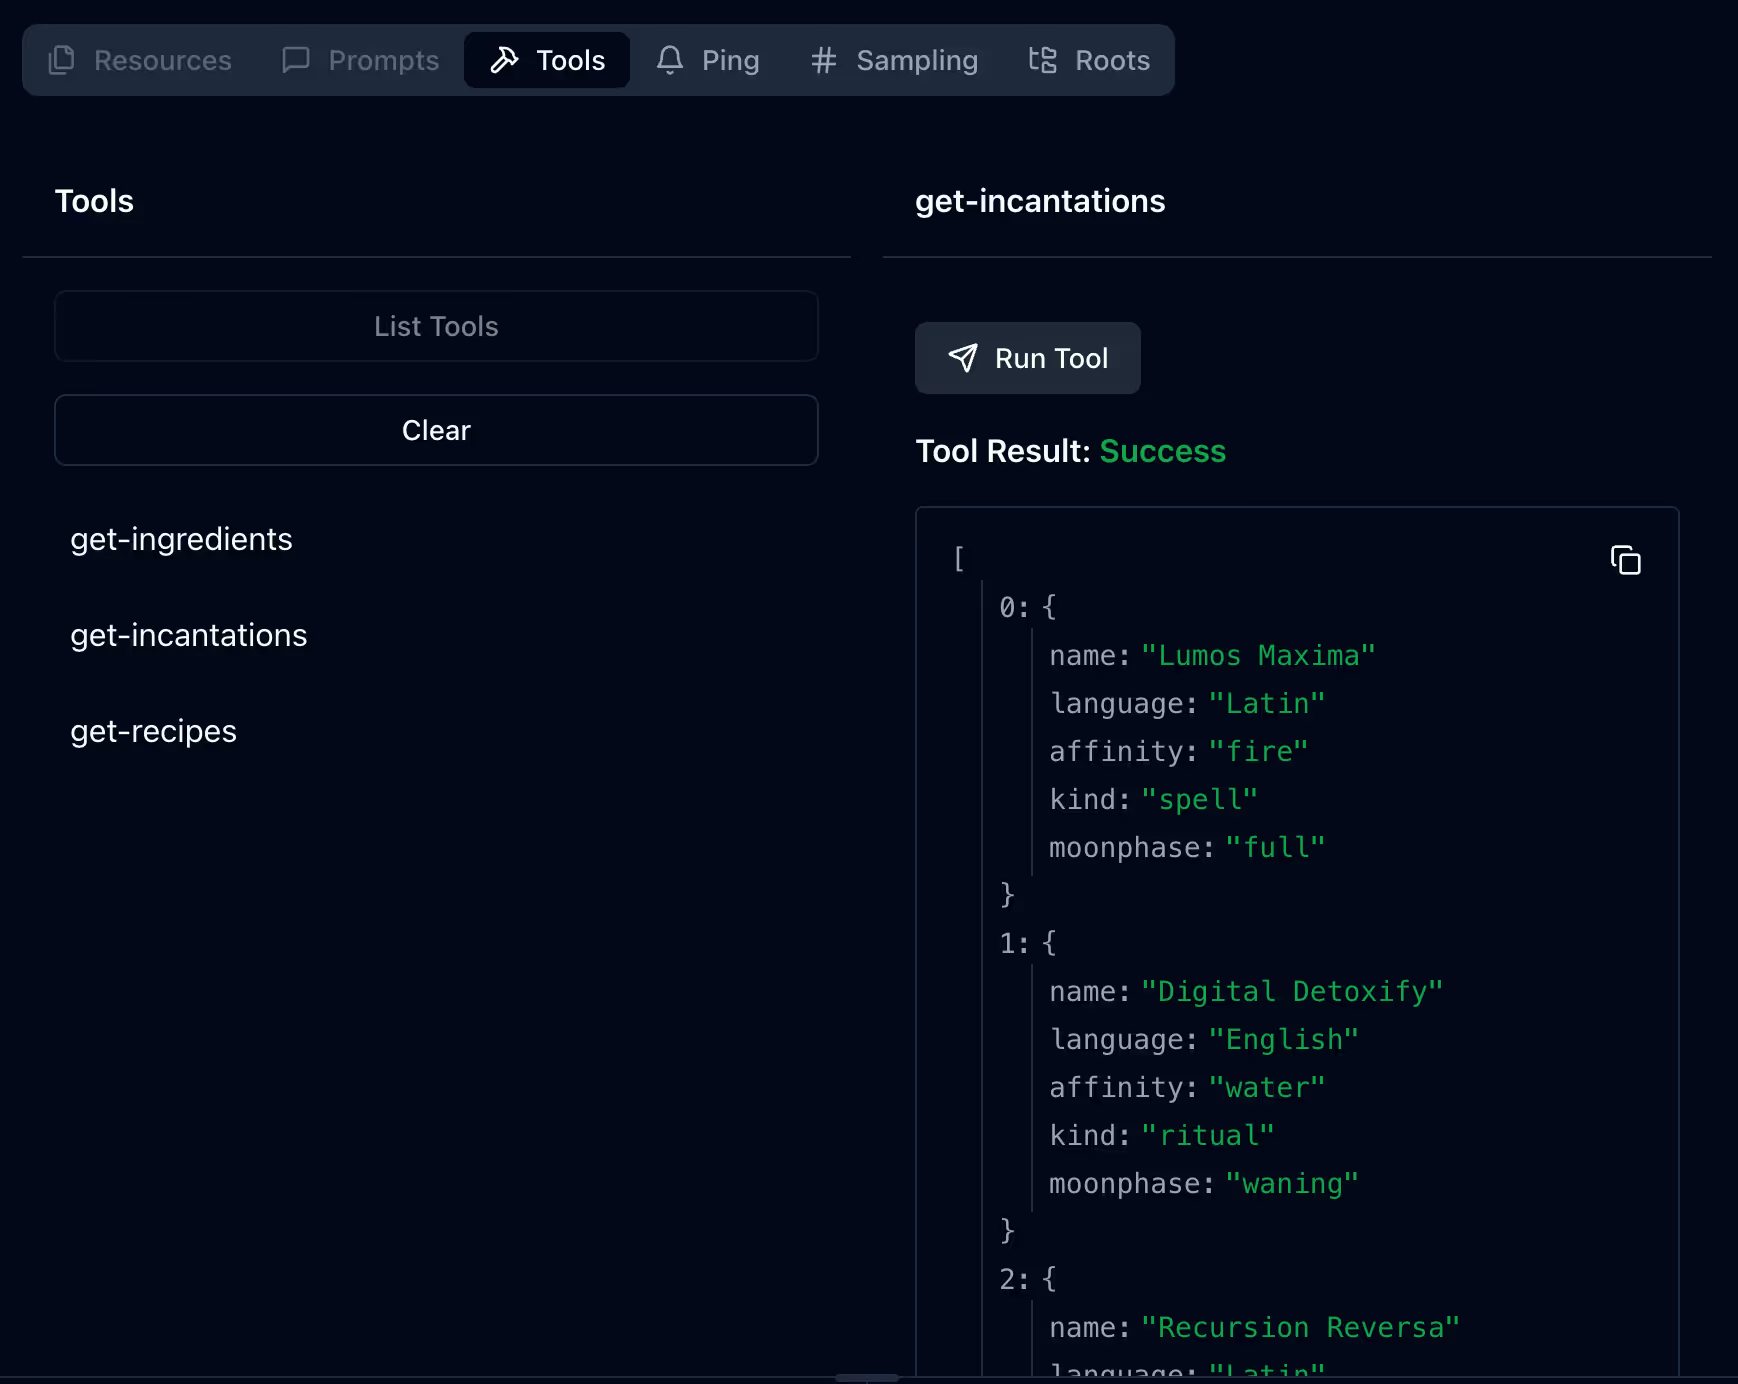
The sidebar contains all the information required to start the server - here the STDIO transport is correctly preselected as well as the command needed to start the server.
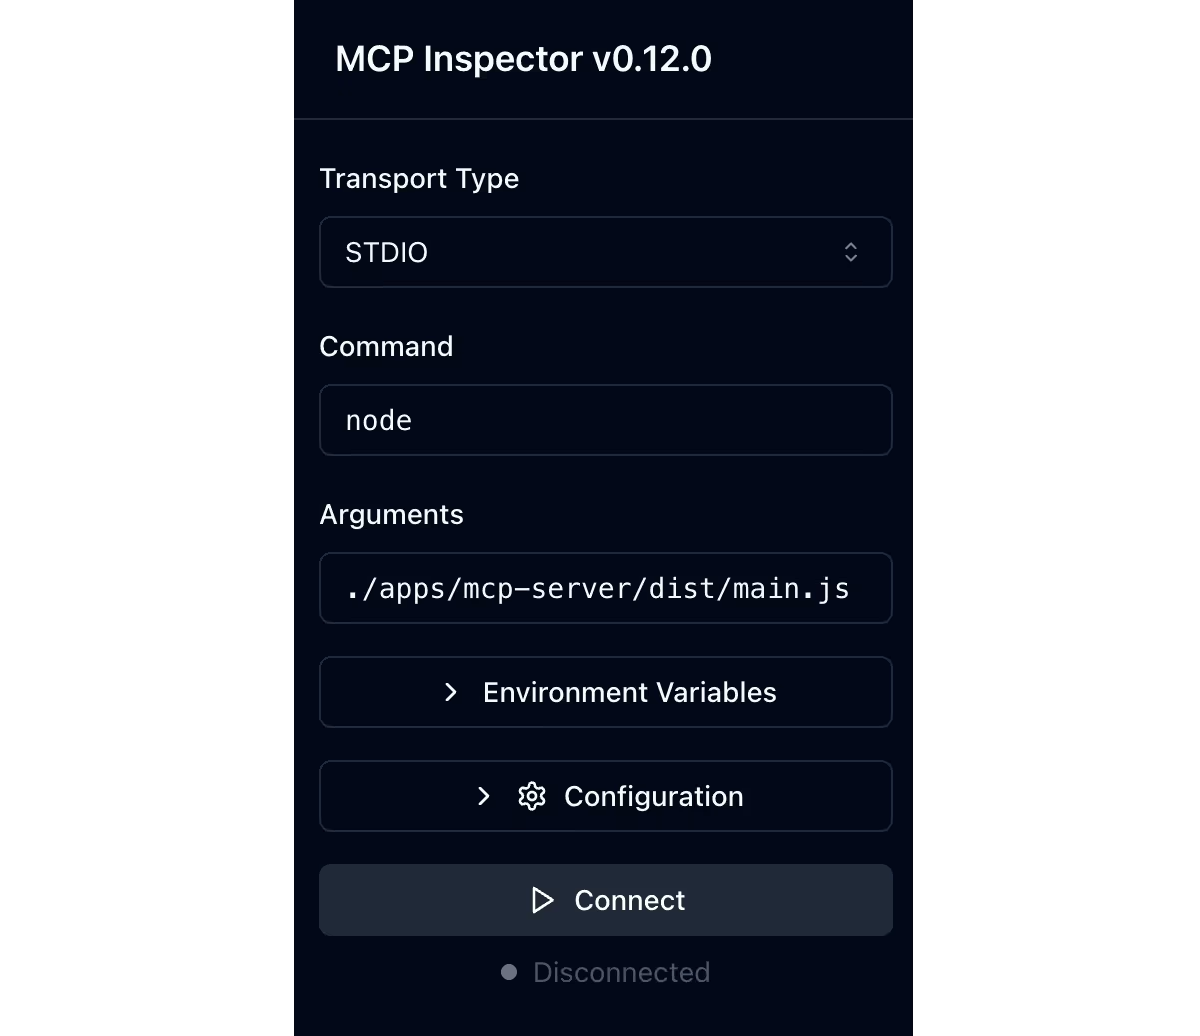
After clicking on the Connect button, the server is started in the background and you'll be able to see the available tools and call them under the Tools tab.
Agents that can take actions
The get-* tools that we've built are already super useful and budding spellcasters will be glad to have help in perfecting their concoctions and learning ancient incantations. However, where the power of AI agents really starts to shine is when they go beyond just reading data and start taking actions. Let's give AI the ability to cast spells. 🪄
We'll register another tool in apps/mcp-server/src/main.ts
1import { z } from 'zod';
2
3// ... previous tools
4
5server.tool(
6  'cast-spell',
7  'Lets the user cast a spell via the Astra Arcana API.',
8  { ingredients: z.array(z.string()), incantations: z.array(z.string()) },
9  async ({ ingredients, incantations }) => {
10    const result = await sdk.castSpell(ingredients, incantations);
11    return {
12      content: [{ type: 'text', text: JSON.stringify(result) }],
13    };
14  }
15);
16
There are two key differences in this tool definition:
- We've passed a description string as the second argument. You can do this for every tool in order to describe what to use it for and what will happen when the agent calls it.
cast-spellis sort of self-explanatory but it's still good practice to add a description and increase the model's chances of picking the right tool for the job. You can even add more annotations to mark a tool as read-only, destructive or more. - We've passed an object that defines the shape of the input using
zod. This lets the agent know how to structure the inputs that are passed to the tool.ingredientsandincantationsas arrays of strings aren't very complicated, but you could also add descriptions to each individual option to explain what it does. The full feature set ofzodis available to define exactly what's possible with each tool.
Now, let's try it out in an actual agent. I'll use VSCode & GitHub Copilot for this but any agent implementation with MCP support will do. I really like Windsurf or Cursor, for example.
Register the MCP server by editing .vscode/mcp.json (or using the built-in command):
1{
2  "servers": {
3    "astra-arcana": {
4      "command": "node",
5      "args": ["/path/astra-arcana/apps/mcp-server/dist/main.js"]
6    }
7  }
8}
9
Once you open a Copilot chat in Agent mode, the MCP server will start automatically and you should see all four tools available

Let's try to cast a spell! For obvious reasons, I want to make sure that I'm writing high-quality blog posts and could use a magic boost. You can see that the AI agent uses all the tools to figure out what's available and then tries to cast the spell. Some models might ask for permission first or ask follow up questions to make sure they're getting it right.
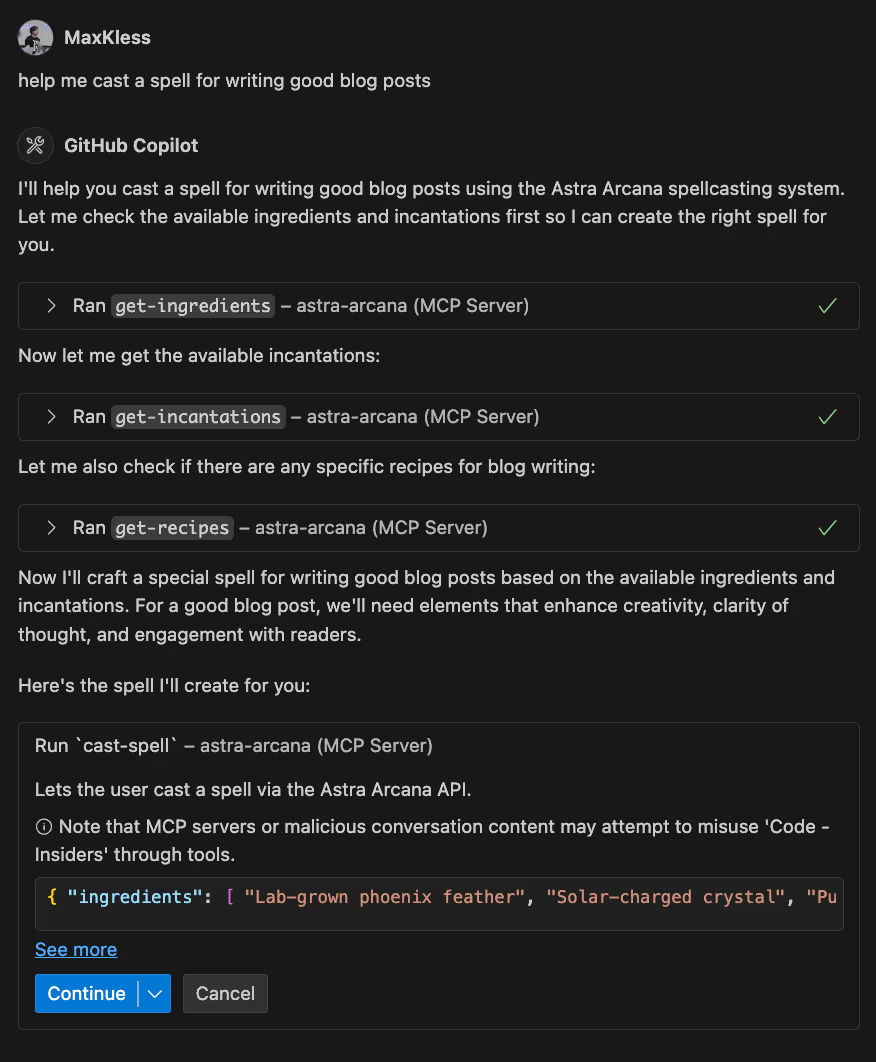
After casting, you can head over to https://astra-arcana.pages.dev/ and check the logs to see your spell! 🎉

Publishing to npm
Of course, now that we've built our magical MCP server, we want to make sure people can use it easily. Let's go through the process of publishing an executable file to the npm registry. In the future, anyone will be able to run npx @astra-arcana/mcp-server and spin it up immediately!
This section goes over the release process of this specific example. If you want to learn how to use nx release in detail, I recommend checking out Juri's great course on the topic: https://www.epicweb.dev/tutorials/versioning-and-releasing-npm-packages-with-nx
Publishing Pre-Requisites
In order to have our bundled code be executable via npx, we need to add a shebang (#!/usr/bin/env node) to the first line of the file. We'll make sure this is added in a new script in the apps/mcp-server directory called setup-publish.js.
1import path from 'path';
2import fs from 'fs';
3
4const distDir = path.resolve(import.meta.dirname, './dist');
5const distMainJsPath = path.resolve(distDir, 'main.js');
6const mainJsContent = fs.readFileSync(distMainJsPath, 'utf8');
7const shebang = '#!/usr/bin/env node\n';
8
9if (!mainJsContent.startsWith(shebang)) {
10  fs.writeFileSync(distMainJsPath, shebang + mainJsContent);
11  console.log('Shebang added');
12}
13
14console.log('Setup completed successfully!');
15
We'll also set up a target that calls this script after making sure the main bundle is built.
1"setup-publish": {
2  "command": "node apps/mcp-server/setup-publish.js",
3  "dependsOn": ["build"]
4}
5
While we're in package.json , let's also make sure that our package is publishable and let npx and similar tools know where to find the executable javascript file.
1{
2  "name": "@astra-arcana/mcp-server",
3  "version": "0.0.1",
4- "private": true,
5+ "private": false,
6+ "bin": "./main.js",
7  // ...
8
Local Publishing with Verdaccio
Keep in mind that the @astra-arcana/mcp-server package already exists on the official npm registry, so we will only publish to a local registry.
At Nx, we use an awesome open-source tool called Verdaccio. It's a lightweight implementation of a local npm registry - let's use it to test out our publishing flow.
You can add verdaccio to the repo by running the setup-verdaccio generator:
❯
npx nx g @nx/js:setup-verdaccio
This will create a verdaccio config and an nx target to spin it up at the root of our workspace. Start the local registry by running.
❯
npx nx run @astra-arcana/source:local-registry
On http://localhost:4873/ , you'll see an instance of verdaccio running with no packages published yet. Let's change that!
Configuring Nx Release
Now that everything is set up, let's configure nx release to actually version our package, generate changelogs and publish to npm.
There are a couple of things we want to configure. Check out the comprehensive release documentation to learn more about the different configuration options.
- Since we're in a monorepo with different kinds of packages, we have to let
nx releaseknow which ones to configure releases for - in this case, only themcp-serverapp - When releasing, we need to make sure that not only is the version in the repo's
package.jsonis incremented, but also the version in thedistfolder that we'll actually release from. We can do this by settingmanifestRootsToUpdate. - We have to make sure the
distfolder exists, so we'll run our newsetup-publishaction first by specifying the command inpreVersionCommand. - Since our mcp server will be released independently, we configure the changelogs to be generated per-project instead of for the entire workspace.
1"release": {
2  "projects": ["mcp-server"],
3  "version": {
4    "manifestRootsToUpdate": [
5      "{projectRoot}",
6      "{projectRoot}/dist"
7    ],
8    "preVersionCommand": "npx nx run mcp-server:setup-publish"
9  },
10  "changelog": {
11    "projectChangelogs": true,
12    "workspaceChangelog": false
13  }
14}
15
This is enough to configure nx release for our exact use case. With this, we can run npx nx release --dry-run . Nx will run the setup-publish target, prompt you for the kind of version change that's happening and give you a preview of what the result would be.
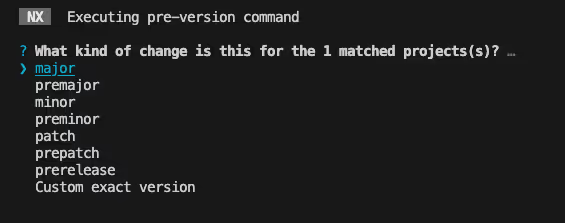
If you're happy with the results, rerun the command without --dry-run and watch as nx release does its magic. The versions will be updated across both package.json files, and a changelog file, a git commit and tag will be created.
In order to release to npm, we have to add some final configuration to nx.json .
1"targetDefaults": {
2  // ... other config
3  "nx-release-publish": {
4    "options": {
5      "packageRoot": "{projectRoot}/dist"
6    }
7  }
8}
9
This will tell the automatically generated nx-release-publish target where to find the built files so that it can publish them to npm (or verdaccio, in our case). After running npx nx release publish , refresh Verdaccio to see the successfully published package! 🎉 You can spin up the MCP server using the published version by running npx @astra-arcana/mcp-server and try it out.
That's it! You can view the @astra-arcana/mcp-server package on npm here: https://www.npmjs.com/package/@astra-arcana/mcp-server
Looking back and into the Future
We've come a long way. Looking back, we've
- learned about the Model Context Protocol
- set up a node application and built an MCP server with it
- used the MCP Inspector to test and debug our implementation
- used AI agents to cast spells 🪄
- learned how to publish an executable package to npm
The next post in this series will dive into implementing a different MCP transport layer in streamable HTTP and hosting our server on Cloudflare!
Learn more:


