Tailwind CSS v4 brings revolutionary changes to how we configure and use the popular utility-first framework. The simplified setup eliminates configuration files and complex PostCSS setups - you just install, import, and start building. But when working in NPM workspaces or monorepos, there's still one crucial challenge: how do you tell Tailwind which packages to scan for classes?
This guide walks you through setting up Tailwind v4 with Vite in an NPM workspace, then shows you how to automate the configuration using Nx Sync Generators to eliminate manual maintenance.
Don't want to build your own sync generator? Use the @juristr/nx-tailwind-sync package which implements everything described in this article.
Example repository/juristr/tailwind4-vite-npm-workspaces
Setting up Tailwind v4
Tailwind v4 introduced some nice simplifications when it comes to configuring Tailwind:
- No more
tailwind.config.js- The framework works out of the box - Minimal dependencies - Just
tailwindcssand@tailwindcss/vitefor Vite projects - Simple CSS import - Add
@import "tailwindcss"to your stylesheet and you're ready
Since we're using Vite in this workspace, we can leverage the dedicated Tailwind Vite plugin instead of PostCSS configuration. Here's what you need:
Install the required packages at your workspace root:
1{
2  "devDependencies": {
3    "tailwindcss": "^4.0.0",
4    "@tailwindcss/vite": "^4.0.0"
5  }
6}
7
Configure your Vite setup:
1import { defineConfig } from 'vite';
2import react from '@vitejs/plugin-react';
3import tailwindcss from '@tailwindcss/vite';
4
5export default defineConfig({
6  plugins: [react(), tailwindcss()],
7  // ... rest of your config
8});
9
Add the import to your main CSS file:
1@import 'tailwindcss';
2
The NPM workspace challenge
Consider a typical e-commerce application structured as an NPM workspace:
1apps/
2  shop/
3    src                  <<<< where tailwind is configured
4packages/
5  products/
6    feat-product-list/
7    feat-product-detail/
8    data-access-products/
9  shared/
10    ui/
11    utils/
12
At this point, your application will build and serve, but you'll notice that styles from your packages/ are missing. In this modular setup, your main application (shop) depends on various feature packages, but Tailwind only scans the main app by default. This means styles defined in your packages won't be included in the final bundle, leading to missing styles and broken layouts.
Solving the scanning problem with @source directives
Tailwind v4 introduces the @source directive to address exactly this problem. You can explicitly tell Tailwind which directories to scan by adding these directives to your CSS file:
1@import 'tailwindcss';
2
3@source "../../../packages/products/feat-product-list";
4@source "../../../packages/products/feat-product-detail";
5@source "../../../packages/shared/ui";
6...
7
With these directives in place, Tailwind will scan the specified packages and include any utility classes found there. Your application styles will now work correctly across all packages.
Automating @source entries - enter Nx sync generators
While @source directives solve the technical problem, they introduce a maintenance challenge:
- manual updates required when adding or removing dependencies,
- easy to forget updating the directives,
- hard-to-debug issues since missing styles don't break builds (just cause visual problems), and
- team coordination since every developer needs to remember to update these paths.
This is where automation becomes crucial and where Nx can help. Nx Sync Generators provide a powerful solution for automating configuration that needs to stay in sync with your project structure.
For our specific use case we can automate the generation of the @source directives by
- analyzing and traversing all of the
shopapplication's dependencies (leveraging the Nx project graph) - generating the
@sourceentries into the correctstyles.cssfile
You can follow the guide on the Nx docs for all the details on how to implement your own Nx sync generator. At a high level these are the steps you'll need:
Step 1: Add Nx Plugin development support
❯
npx nx add @nx/plugin
Step 2: Generate a new plugin into your workspace
❯
npx nx g @nx/plugin:plugin tools/tailwind-sync-plugin
Note, you can choose whatever folder you like. I happen to use the tools/ folder for this example.
Step 3: Generate a sync generator
❯
npx nx g @nx/plugin:generator --name=update-tailwind-globs --path=tools/tailwind-sync-plugin/src/generators/update-tailwind-globs
With that you have the infrastructure in place and we can look at the actual implementation of the sync generator:
1import { Tree, createProjectGraphAsync, joinPathFragments } from '@nx/devkit';
2import { SyncGeneratorResult } from 'nx/src/utils/sync-generators';
3
4export async function updateTailwindGlobsGenerator(
5  tree: Tree
6): Promise<SyncGeneratorResult> {
7  const appName = '@aishop/shop';
8  const projectGraph = await createProjectGraphAsync();
9
10  // Traverse all dependencies of the shop app
11  const dependencies = new Set<string>();
12  const queue = [appName];
13  const visited = new Set<string>();
14
15  while (queue.length > 0) {
16    const current = queue.shift()!;
17    if (visited.has(current)) continue;
18    visited.add(current);
19
20    const deps = projectGraph.dependencies[current] || [];
21    deps.forEach((dep) => {
22      dependencies.add(dep.target);
23      queue.push(dep.target);
24    });
25  }
26
27  // Generate @source directives for each dependency
28  const sourceDirectives: string[] = [];
29  dependencies.forEach((dep) => {
30    const project = projectGraph.nodes[dep];
31    if (project && project.data.root) {
32      const relativePath = joinPathFragments('../../../', project.data.root);
33      sourceDirectives.push(`@source "${relativePath}";`);
34    }
35  });
36
37  // Update the styles.css file
38  const stylesPath = 'apps/shop/src/styles.css';
39  const currentContent = tree.read(stylesPath)?.toString() || '';
40
41  // Insert the @source directives after @import "tailwindcss"
42  // ... (implementation details)
43
44  return {
45    outOfSyncMessage: 'Tailwind @source directives updated',
46  };
47}
48
(Check out the Github repo for the full implementation)
You can manually run sync generators with nx sync, but we want this to run automatically whenever we build or serve our application. As such we can register the sync generator in the app's package.json:
1{
2  "name": "@aishop/shop",
3  ...
4  "nx": {
5    "targets": {
6      "build": {
7        "syncGenerators": ["@aishop/tailwind-sync-plugin:update-tailwind-globs"]
8      },
9      "serve": {
10        "syncGenerators": ["@aishop/tailwind-sync-plugin:update-tailwind-globs"]
11      }
12    }
13  }
14}
15
Nx sync generators in action
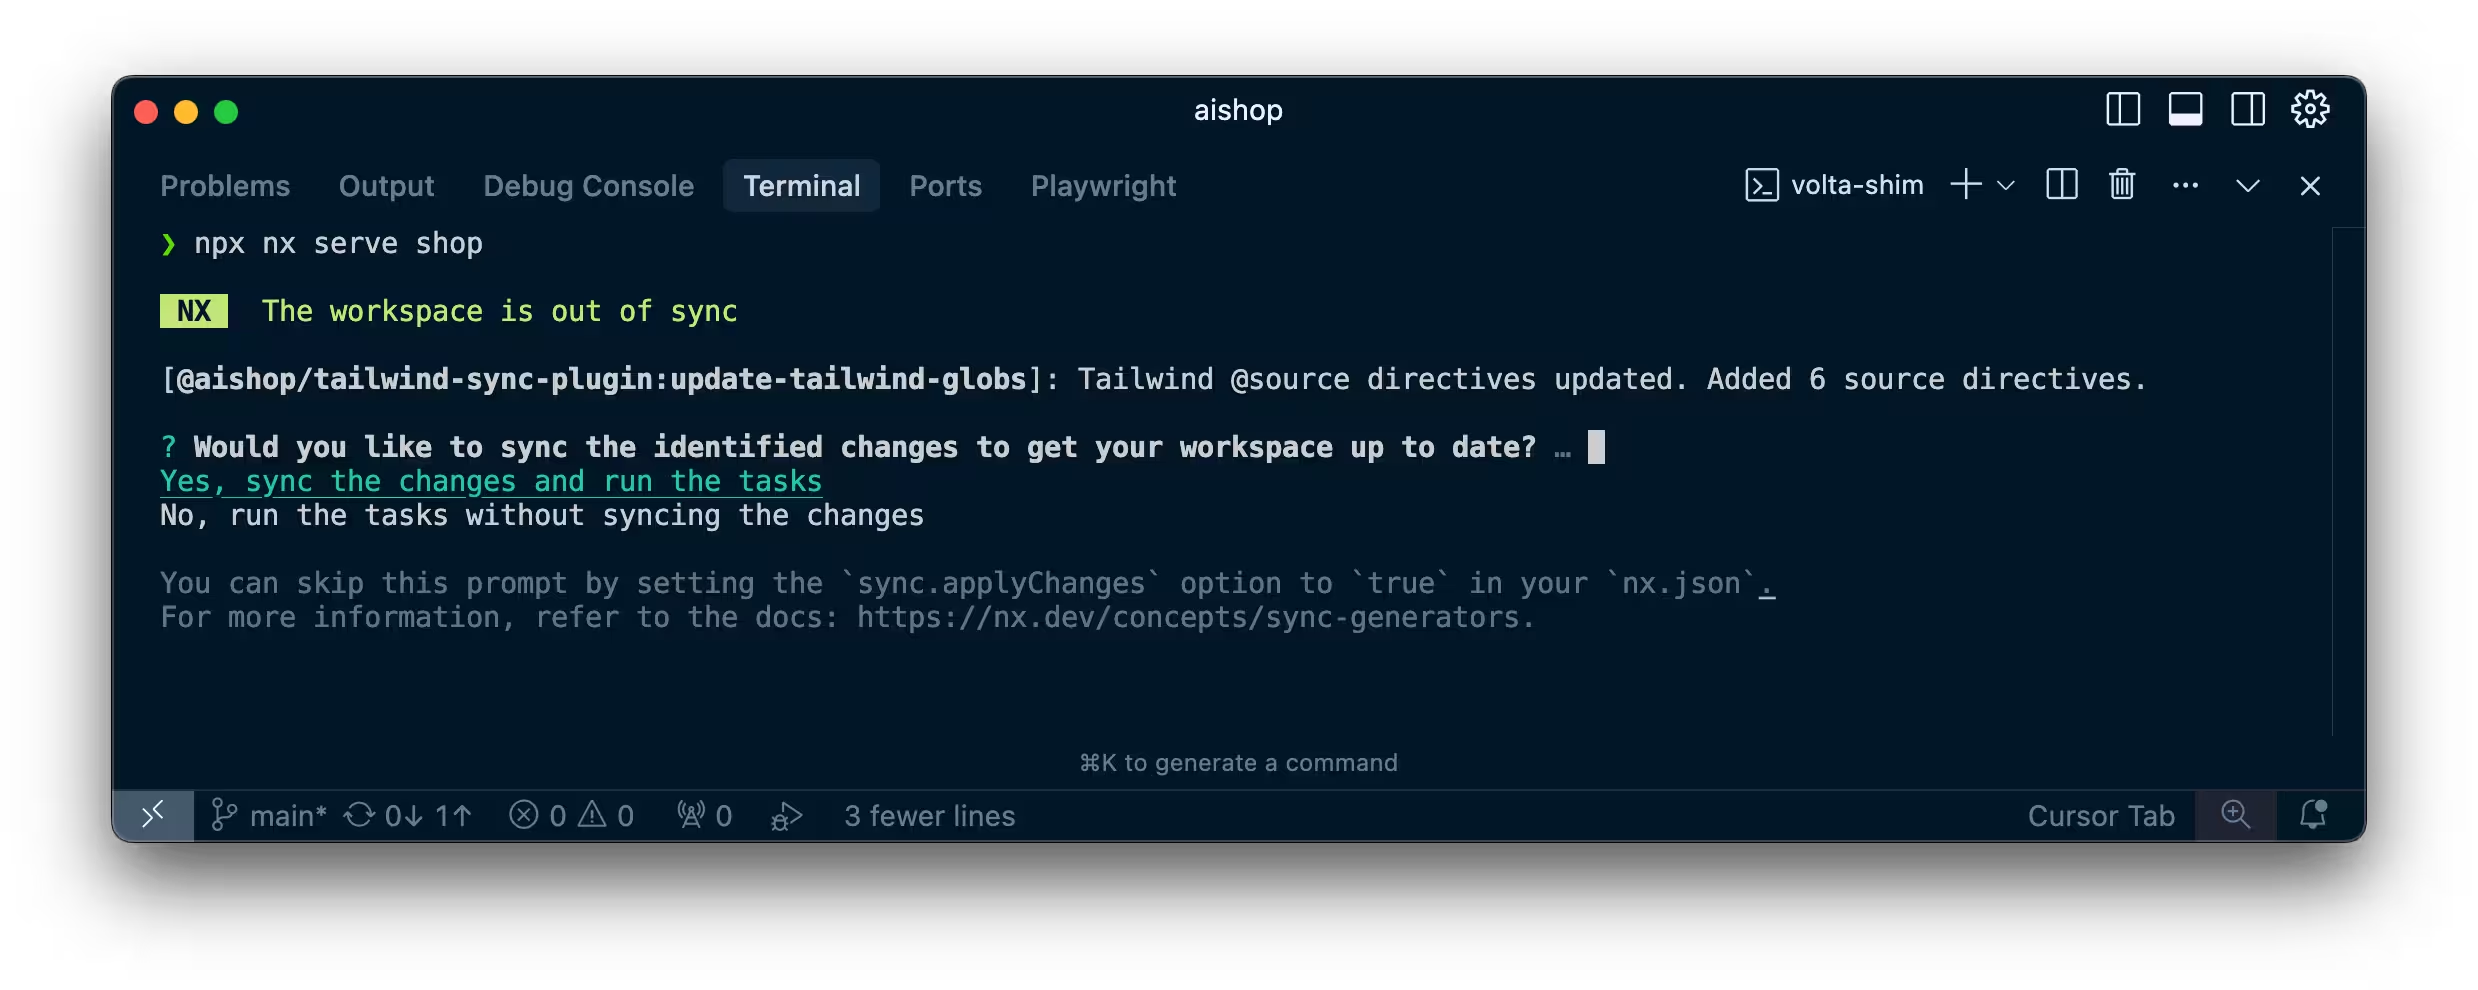
When you run your development server with nx serve shop, the sync generator automatically checks if your @source directives are up to date:

Your CSS file is automatically updated with the correct directives based on your actual project dependencies. If you add or remove dependencies later, the next build or serve will detect the changes and update the configuration automatically.
You can find the complete implementation in this GitHub repository.
Using Tailwind v3?
If you're currently using Tailwind v3, the concept is similar but the implementation differs. Instead of updating @source directives, you'd modify the tailwind.config.js file with glob patterns.
Check out the following video which explains the same approach for Tailwind v3:
The Tailwind v3 demo repository shows how to implement this approach for older versions.
Conclusion
While Tailwind v4's simplified setup is a significant improvement, manually maintaining @source directives creates a maintenance burden in monorepos. Nx Sync Generators solve this by automatically keeping your Tailwind configuration in sync with your project dependencies, eliminating manual updates and preventing hard-to-debug styling issues.
This approach transforms configuration maintenance into a completely automated process, letting you focus on building features rather than managing paths.


