BitBucket Cloud Auth
This page is only for BitBucket Cloud (bitbucket.org). If you have an on-premise version of BitBucket Data Center please refer to the docs here.
First, you'll need to create a BitBucket "OAuth consumer" for your organisation.
Creating a BitBucket OAuth consumer
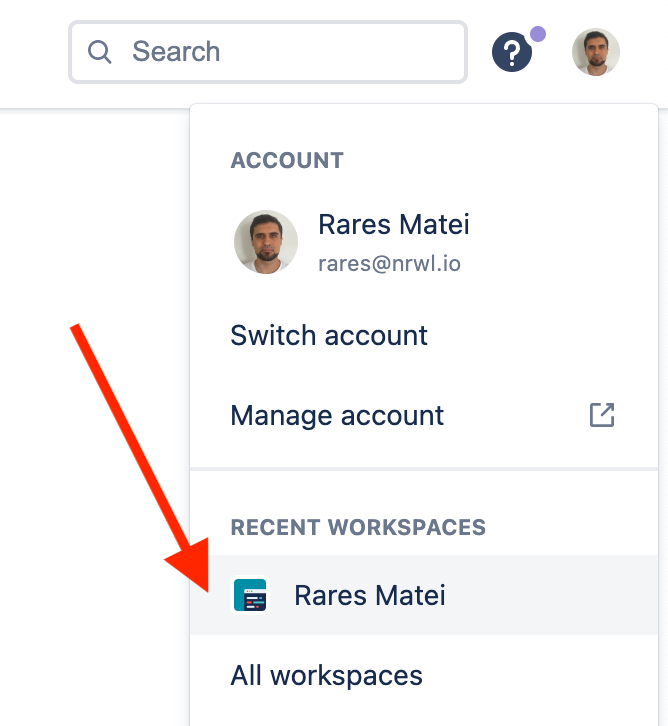
From BitBucket, click on your profile picture and select your workspace:
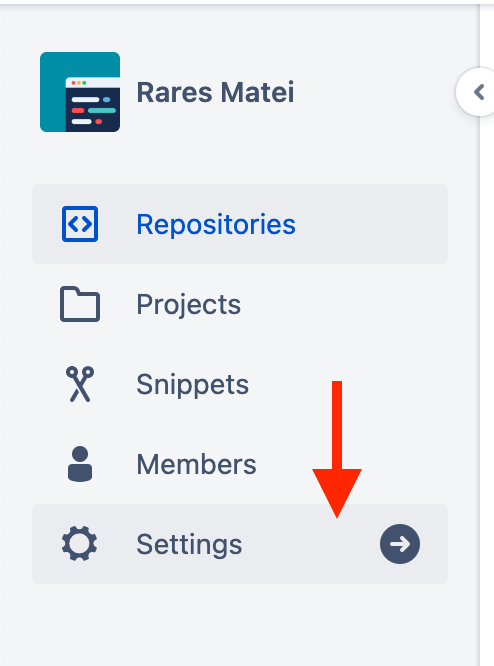
Then "Settings":
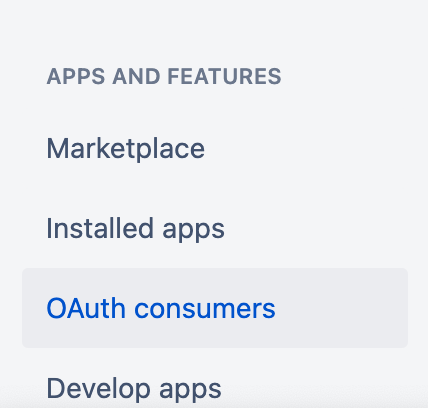
Then "OAuth consumers":
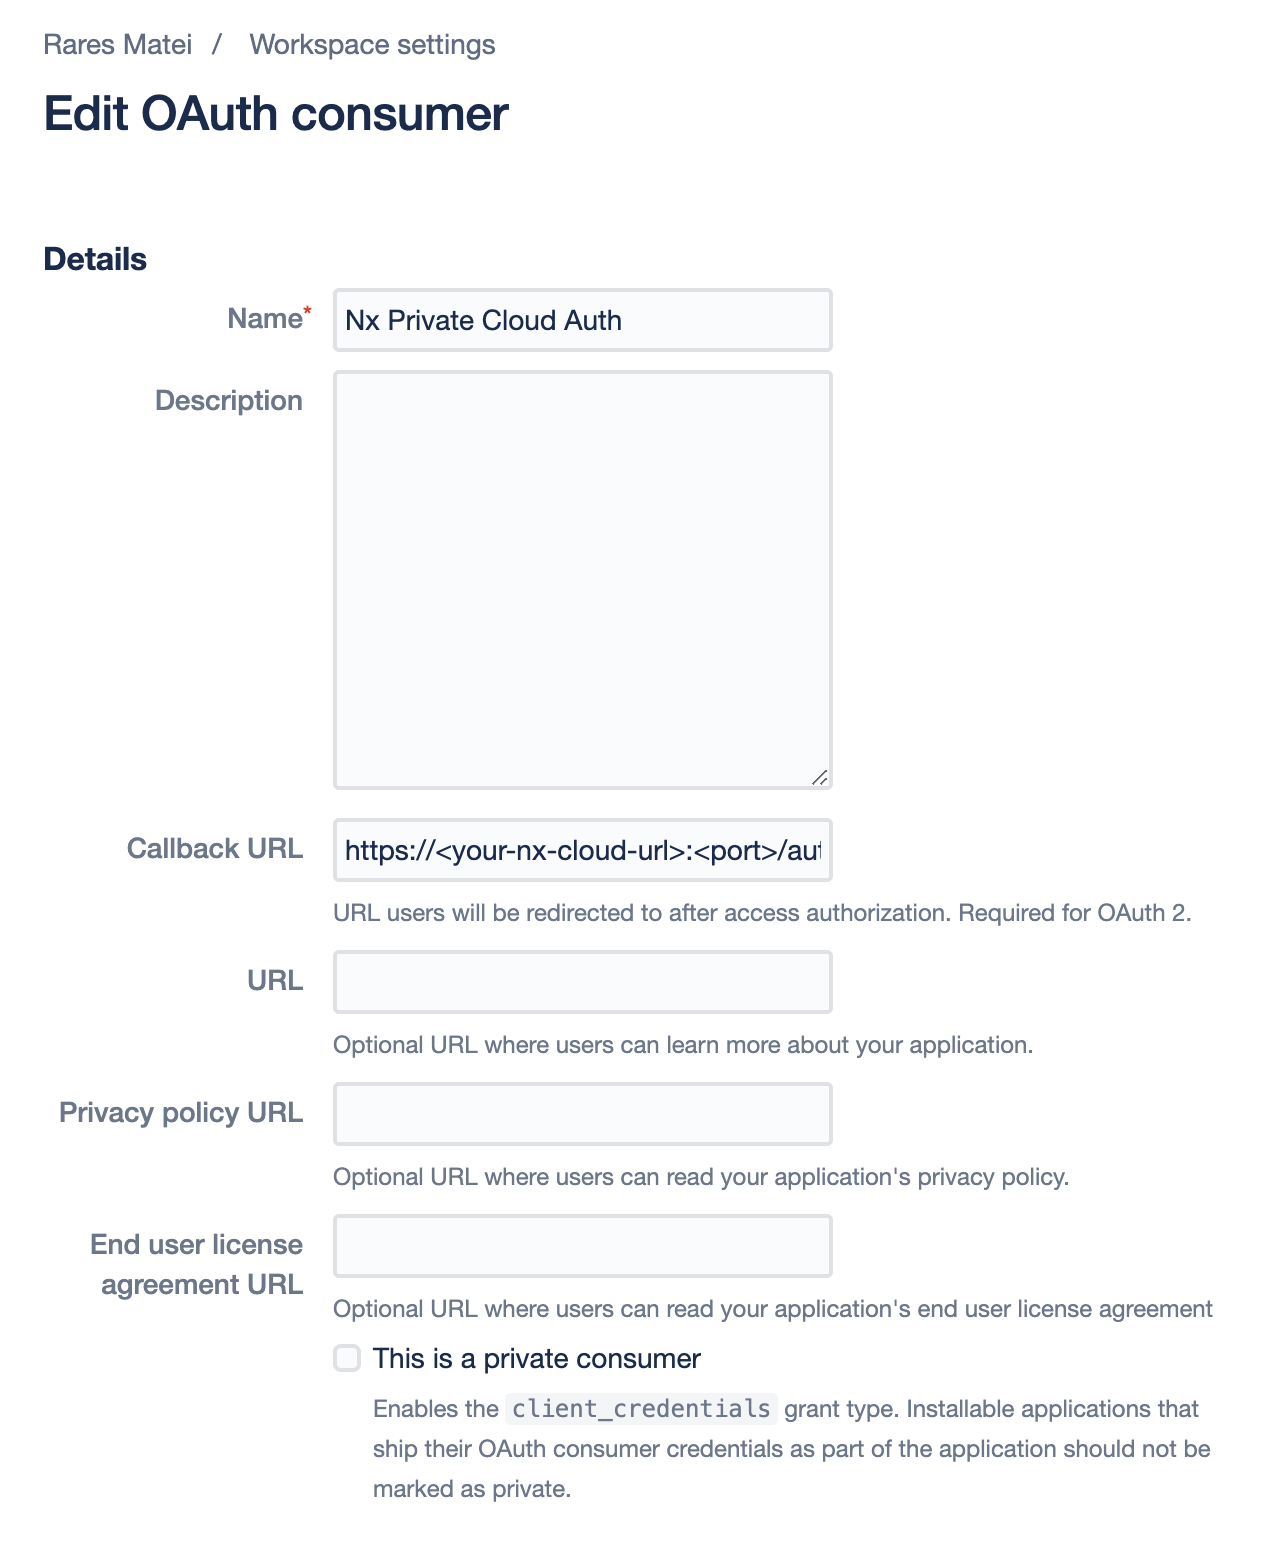
And create a new consumer.
Give the app a name. The callback URL is the important bit. It needs to be in this form:
1[your-nx-cloud-url]/auth-callback
2
3# for example
4https://my.nx-enterprise.url:8080/auth-callback
5
Important: Ensure there is no backslash at the end of the "Callback URL" (i.e. it matches the above pattern)
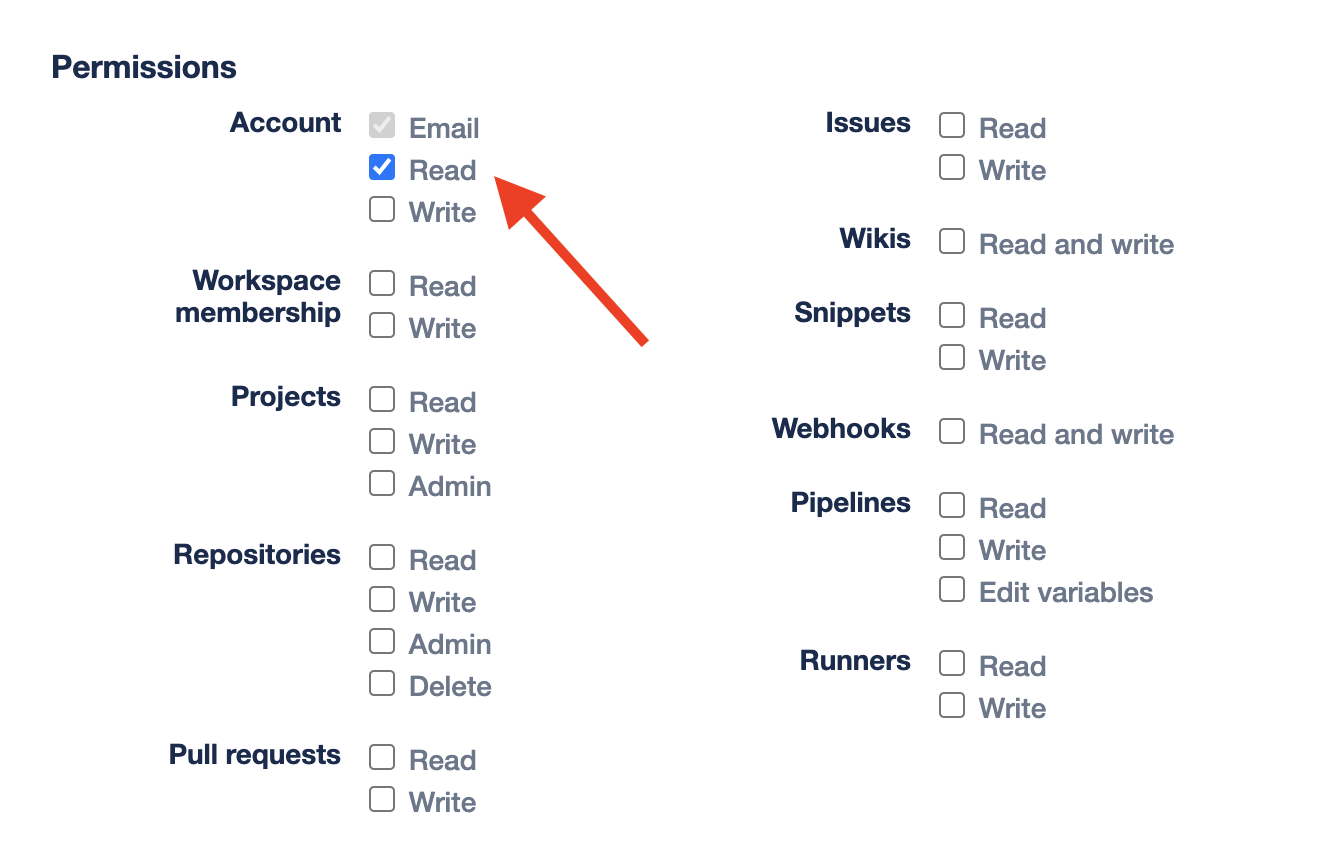
Ensure you grant it the account:read and account:email scopes:
Save your changes.
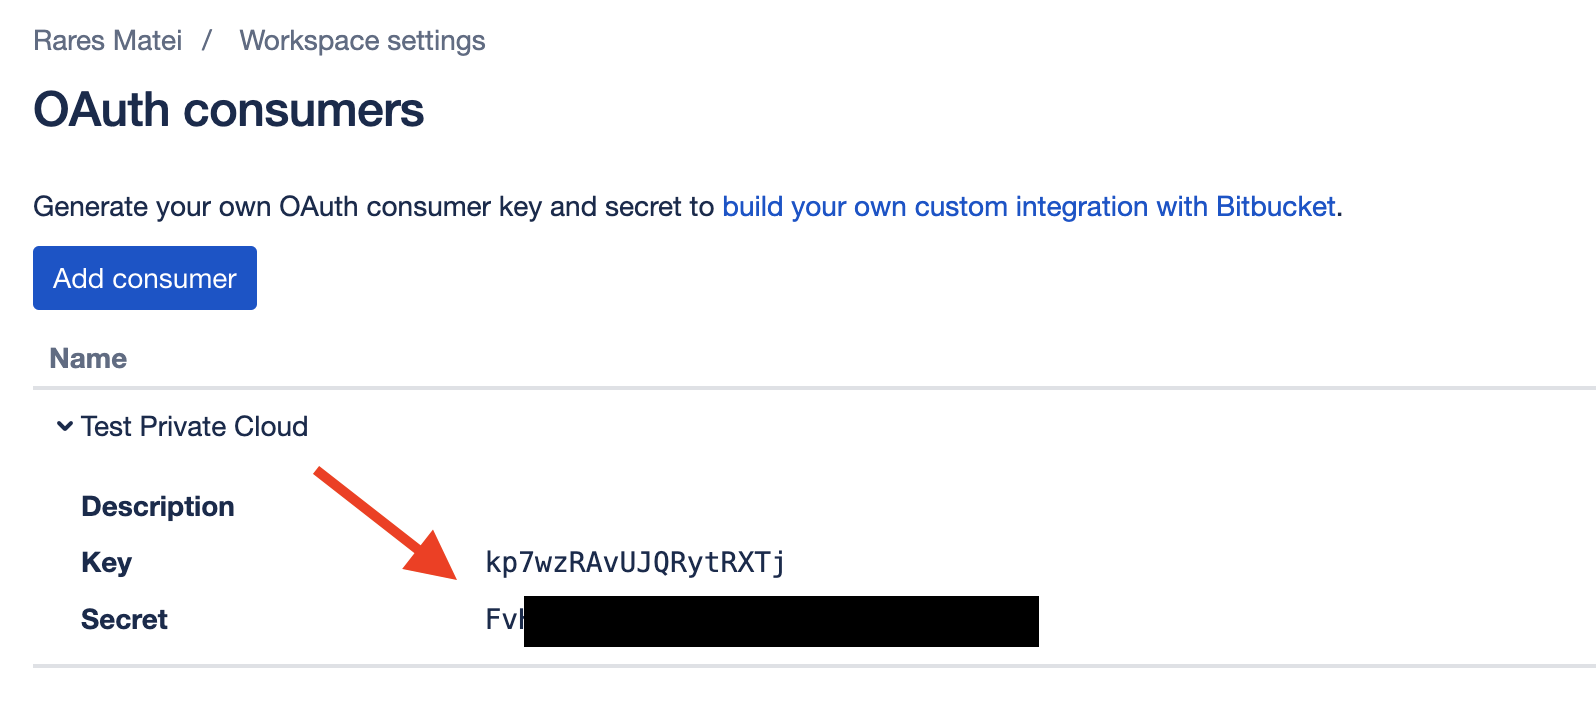
Once you create, keep a note of the Key and the Secret:
Connect your Nx Cloud installation to your new app
It's now time to enable auth on NxCloud. Refer to the auth guide here for instructions on configuring your Helm values file.