

SAML setup
Section titled “SAML setup”Create a new enterprise app
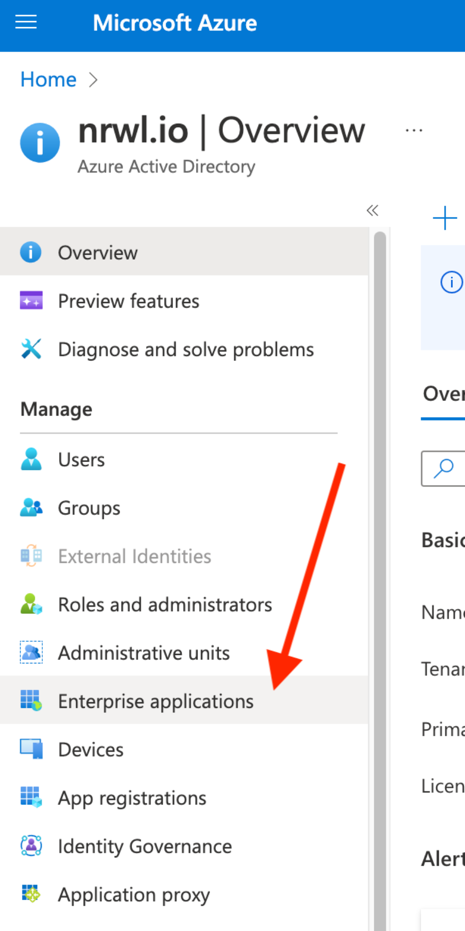
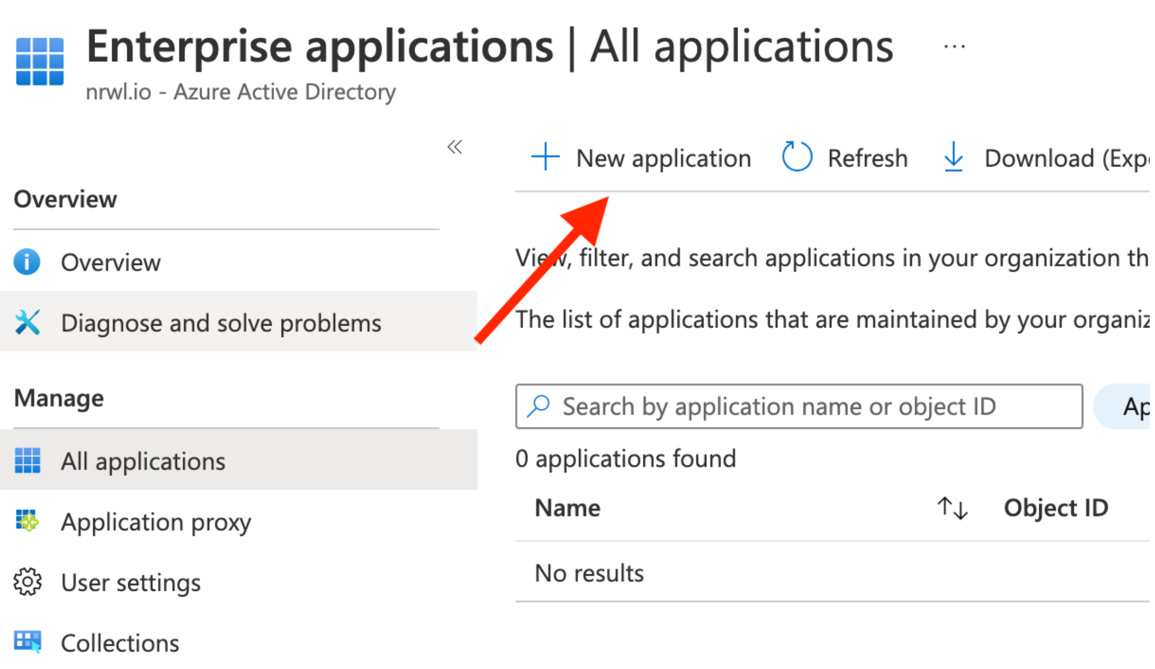
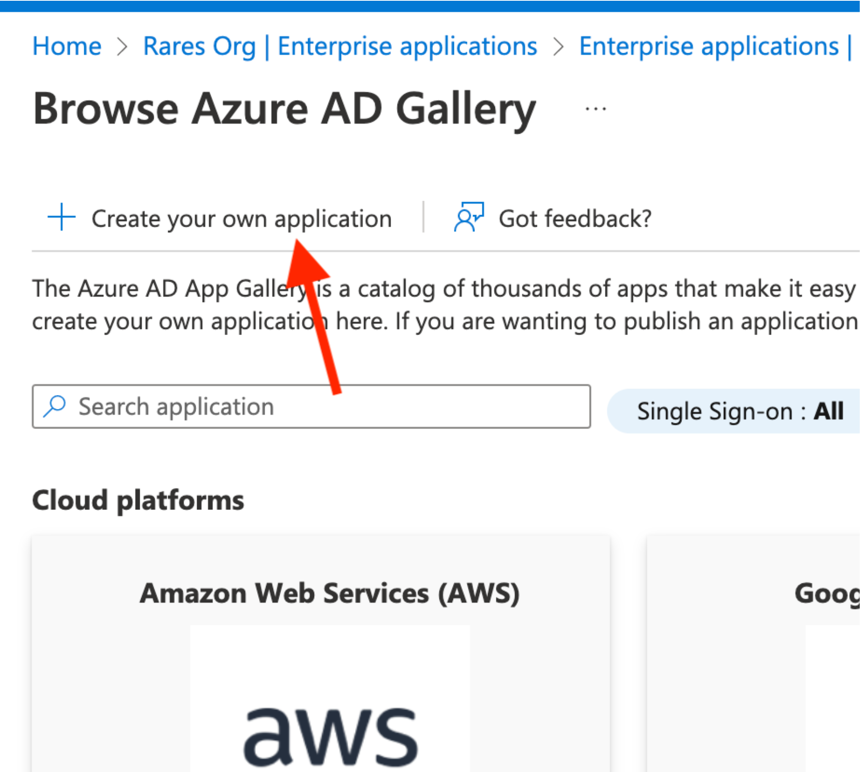
Choose "Create your own":
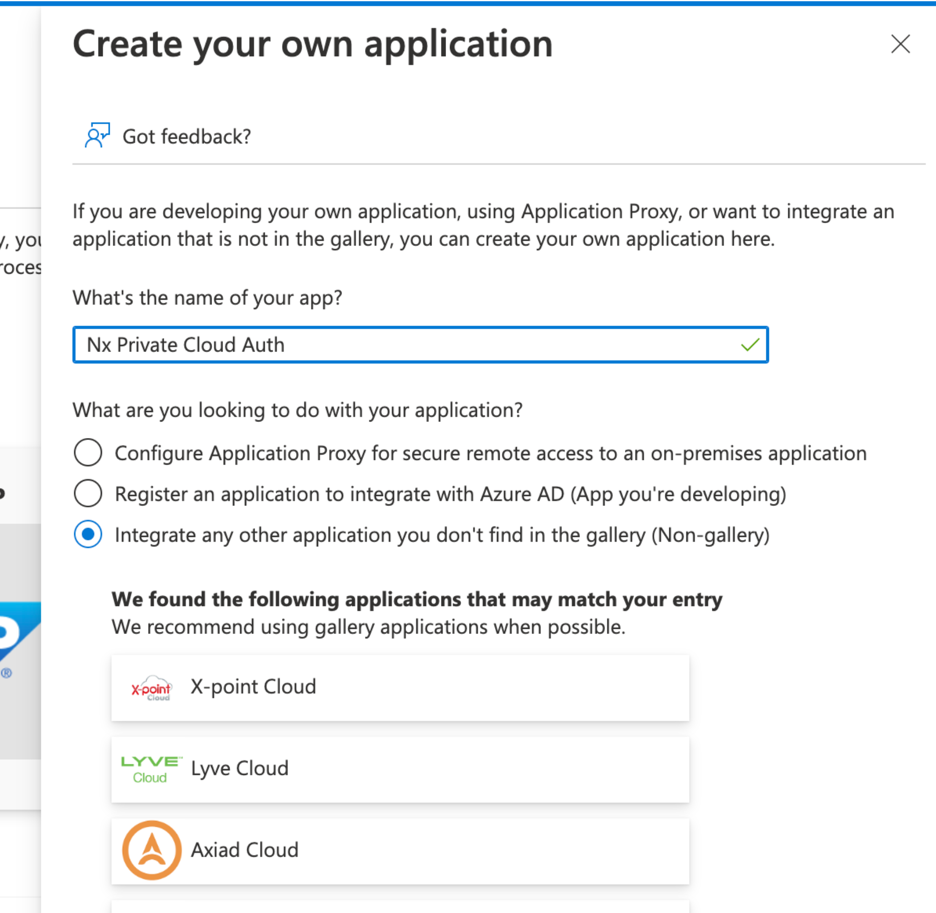
Give it a name
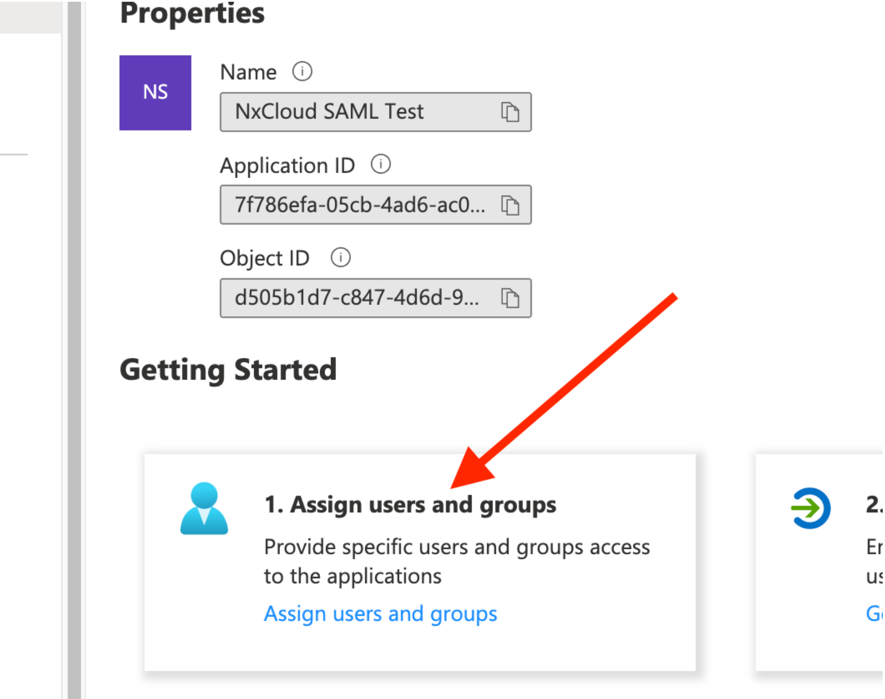
Assign your users and/or groups to it:
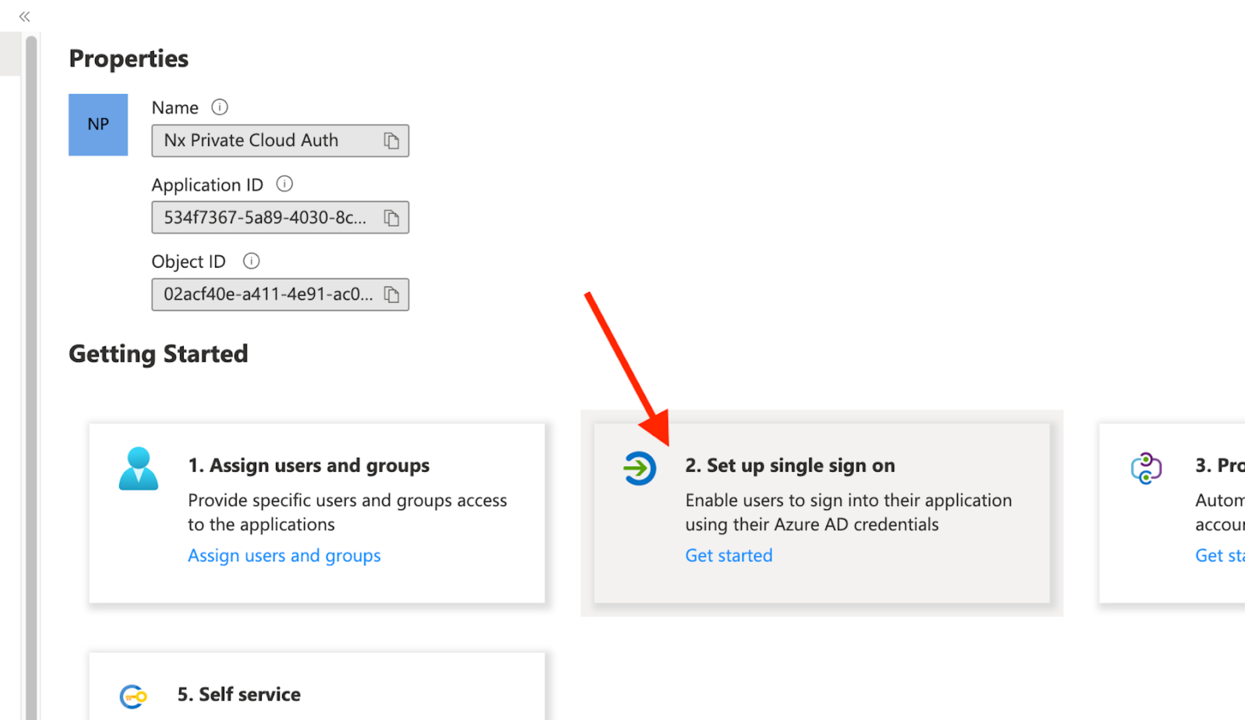
Then set-up SSO
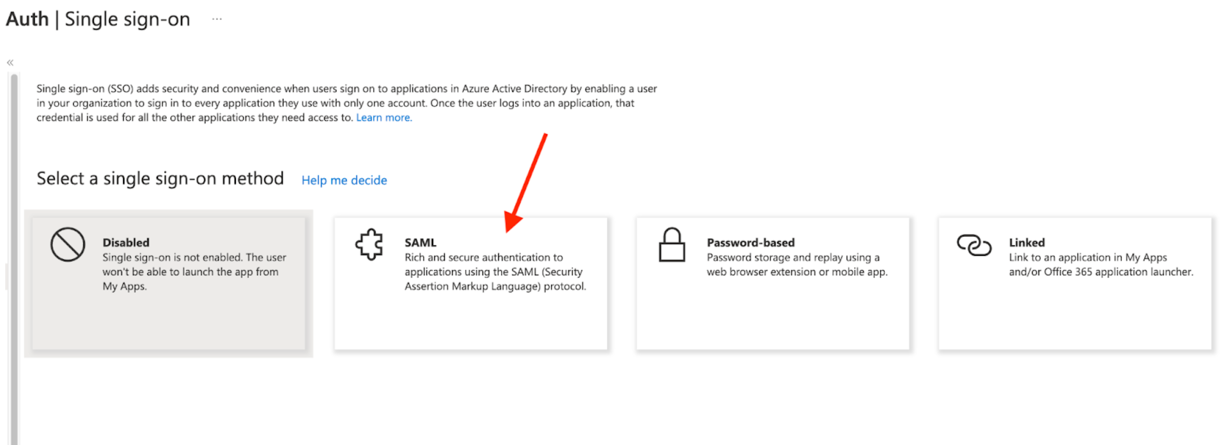
And choose SAML:
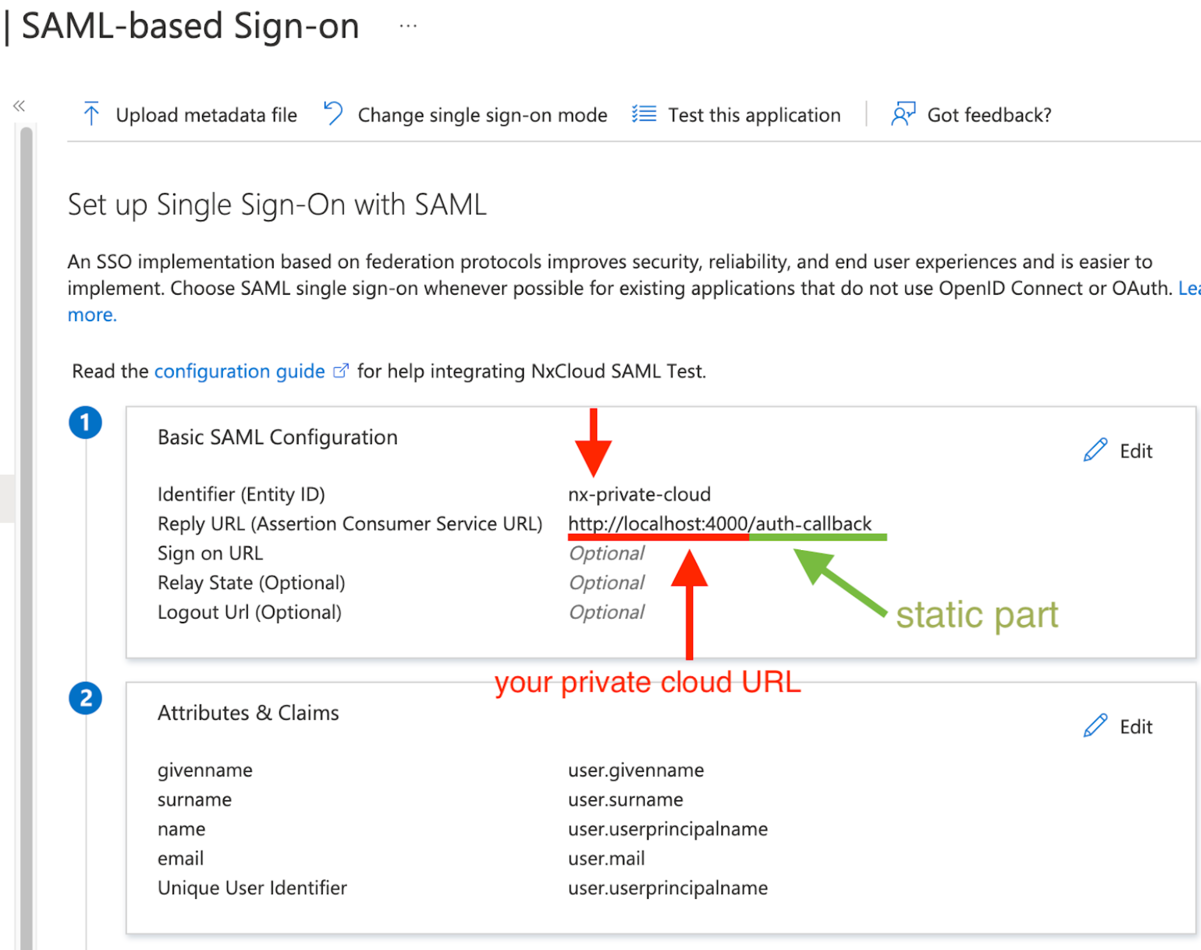
Add these configuration options
- Configure the Identifier exactly as
nx-private-cloud - For the Reply URL, it should point to your Private Cloud instance URL. Make sure it ends with
/auth-callback
- Configure the Identifier exactly as
Scroll down and manage claims:
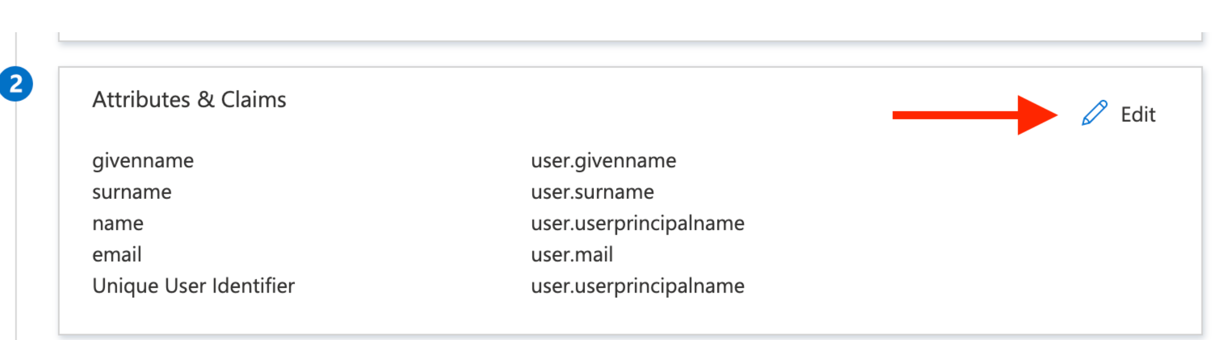
The first row should be the
emailclaim, click to Edit it: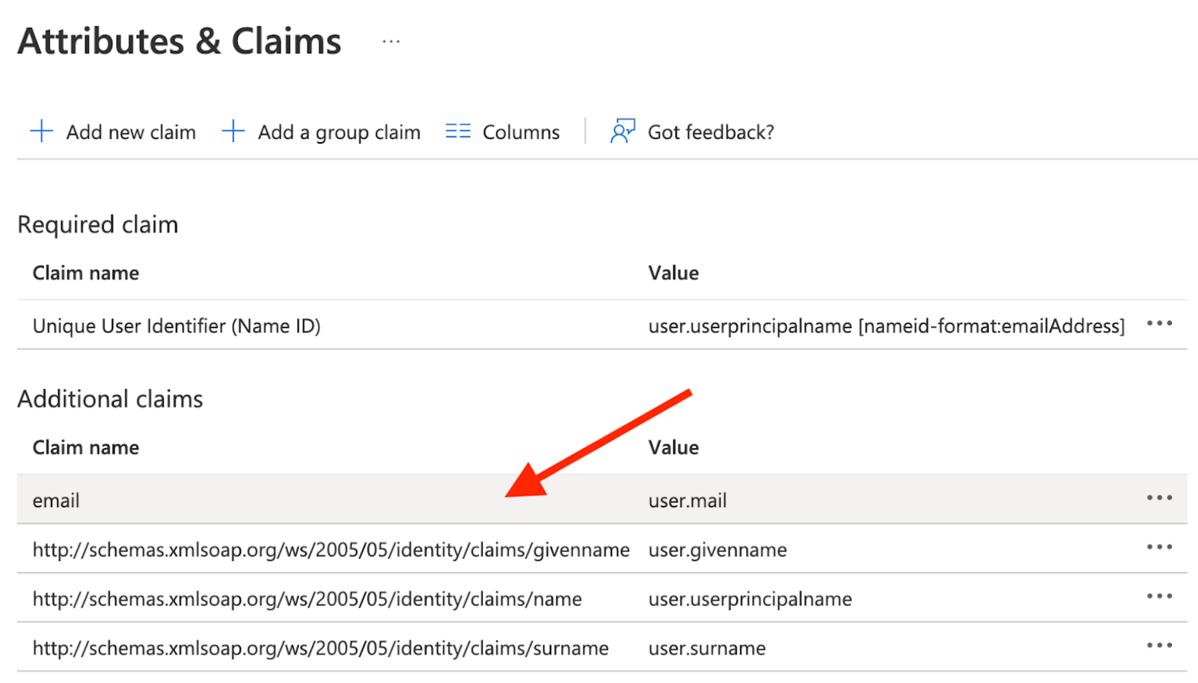
Configure it as per below
- "Namespace" needs to be blank
- "Name:" needs to be "email"
- See screenshot below. This is an important step, because Nx Cloud will expect the "email" property on each profile that logs in.
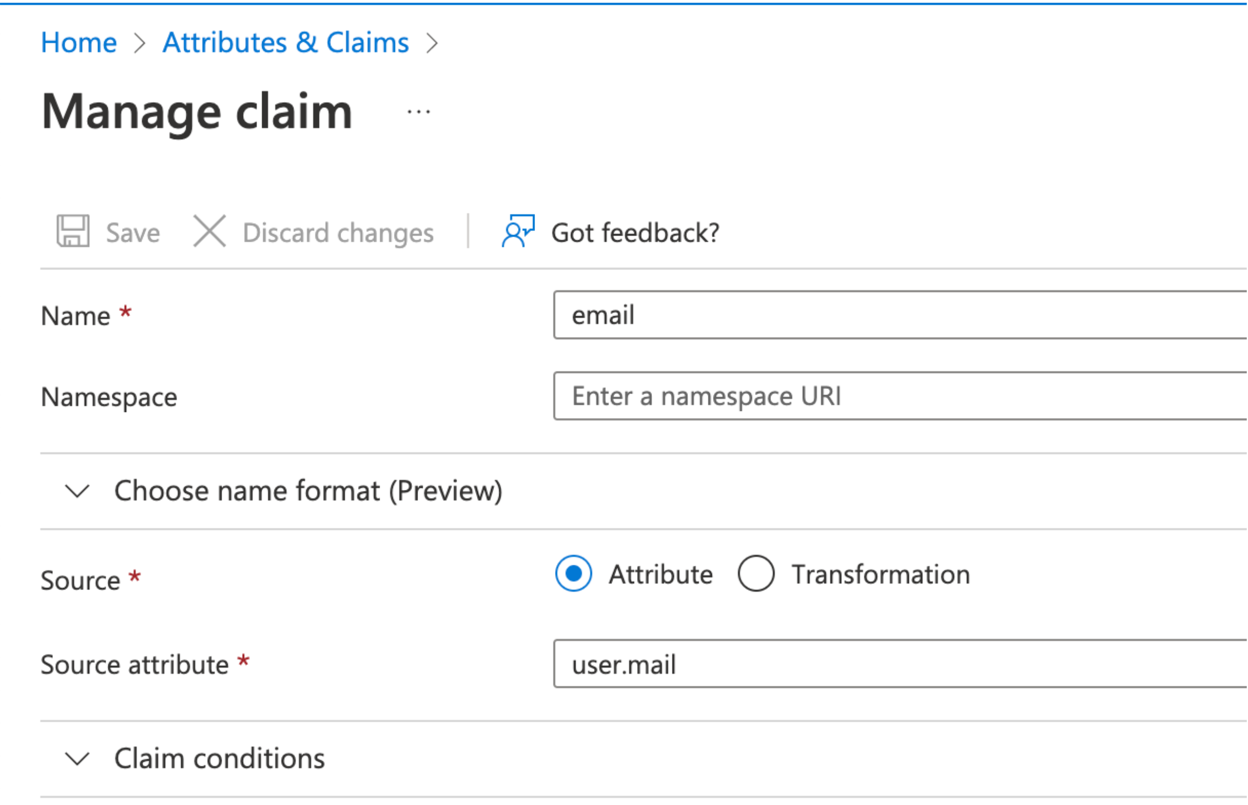
Make sure your application user profile exposes the email address under
user.mail. This can be configured inUsers and Groupsin the Azure portal. Alternatively, you can always configure theemailclaim to use a different property under theuserobject.Under
SAML Certificates, click the pencil icon to edit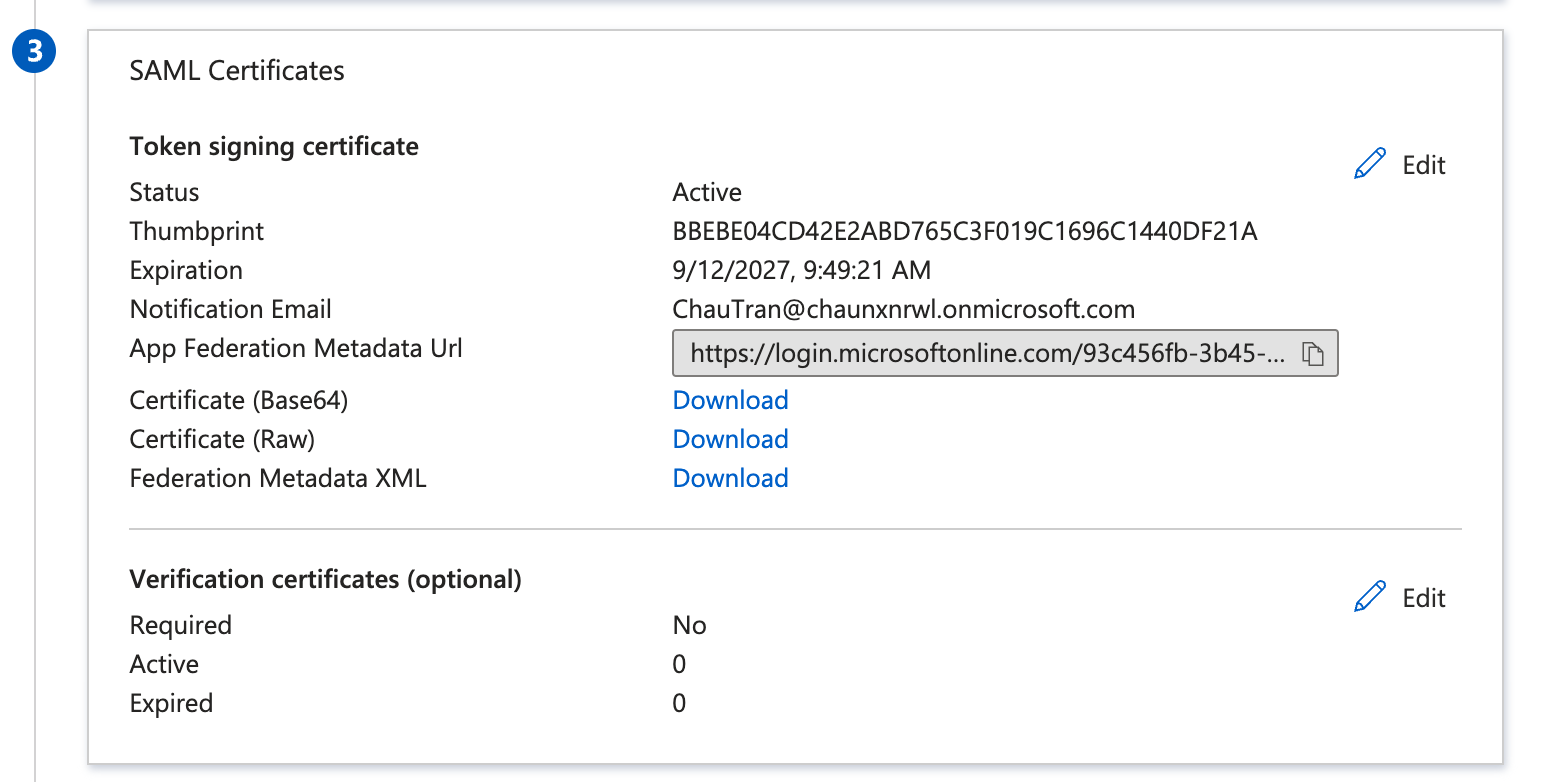
For Signing Option, select Sign SAML response and assertion

Then click Save and close the popover.
Download the certificate in Base64:
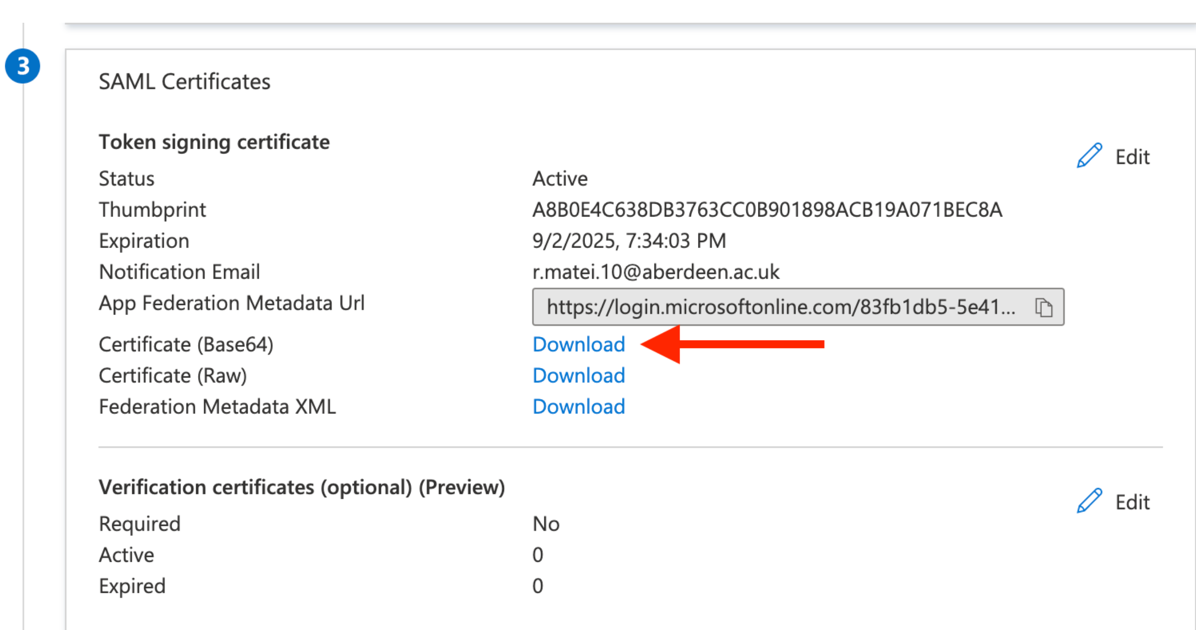
Extract the downloaded certificate value as a one-line string:
awk 'NF {sub(/\r/, ""); printf "%s\\n",$0;}' azure_cert_file.cer- We'll use this later
Copy the Login URL:
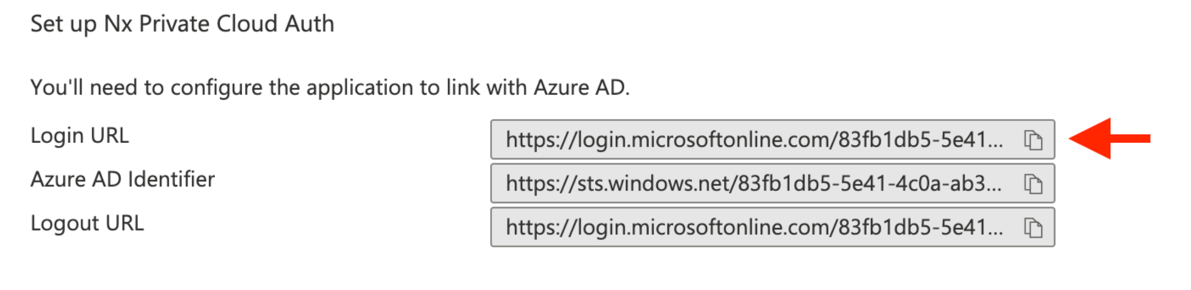
SCIM provisioning
Section titled “SCIM provisioning”SCIM provisioning enables automatic user lifecycle management for Nx Cloud through Microsoft Entra ID.
Before you start:
- SAML authentication must already be configured and working, using the steps above.
- You need a SCIM bearer token (JWT), your Nx Cloud organization ID, and your Nx Cloud app URL. Your developer productivity engineer (DPE) provides these values.
- Create two groups in Entra ID for Nx Cloud access: one for regular members and one for admins. A user being provisioned must belong to only one of these groups.
Create app roles
Section titled “Create app roles”Go to App registrations > Private Nx Cloud > App roles
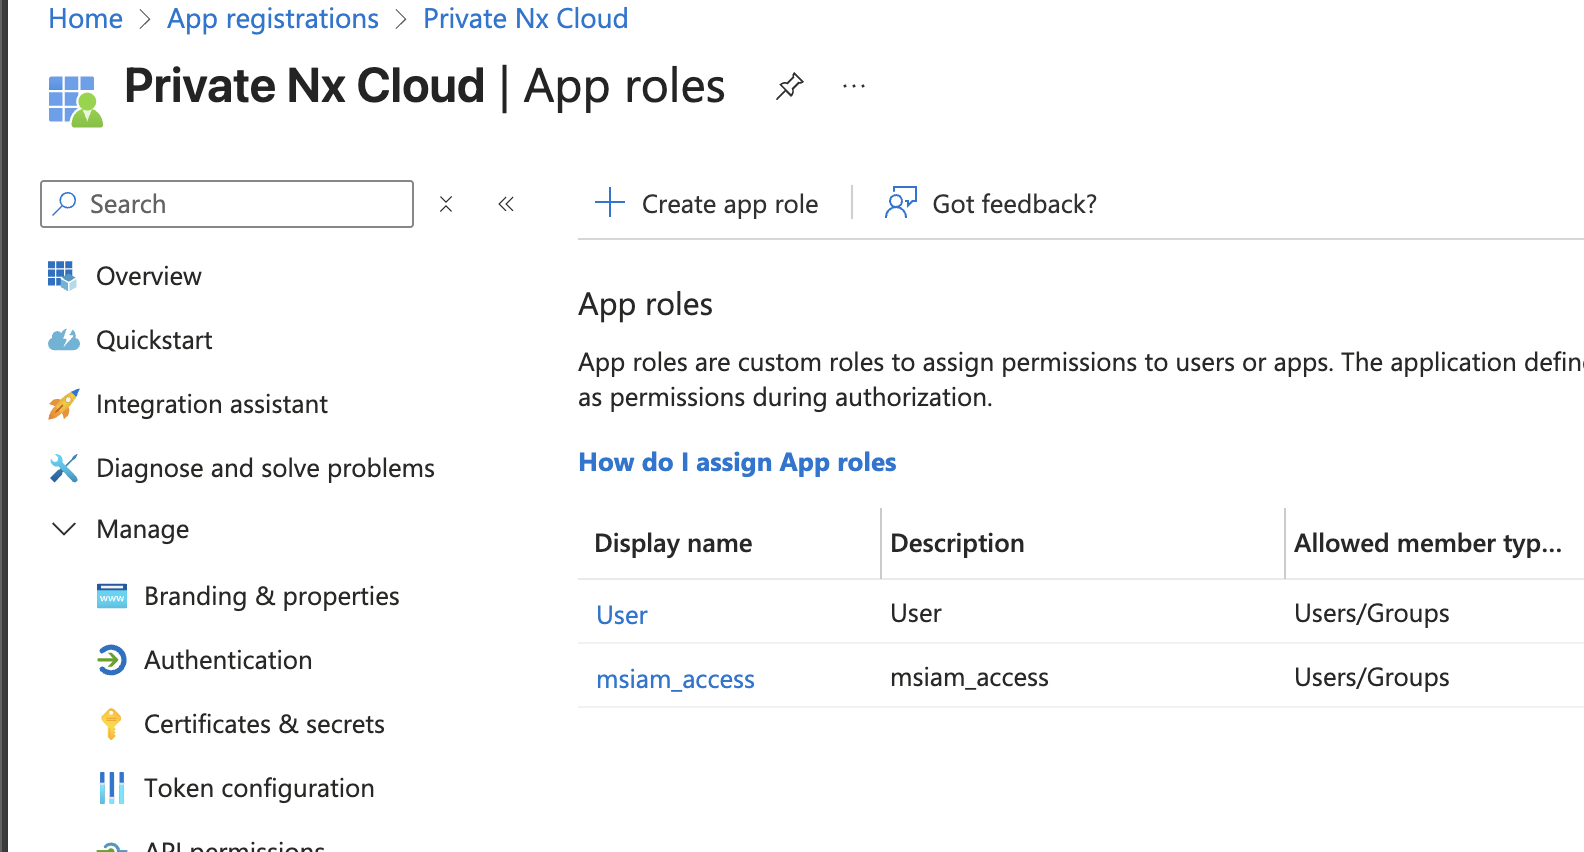
Click Create app role and set:
- Display name:
READ - Allowed member types: Users/Groups
- Value:
READ - Description:
Nx Cloud Read Role
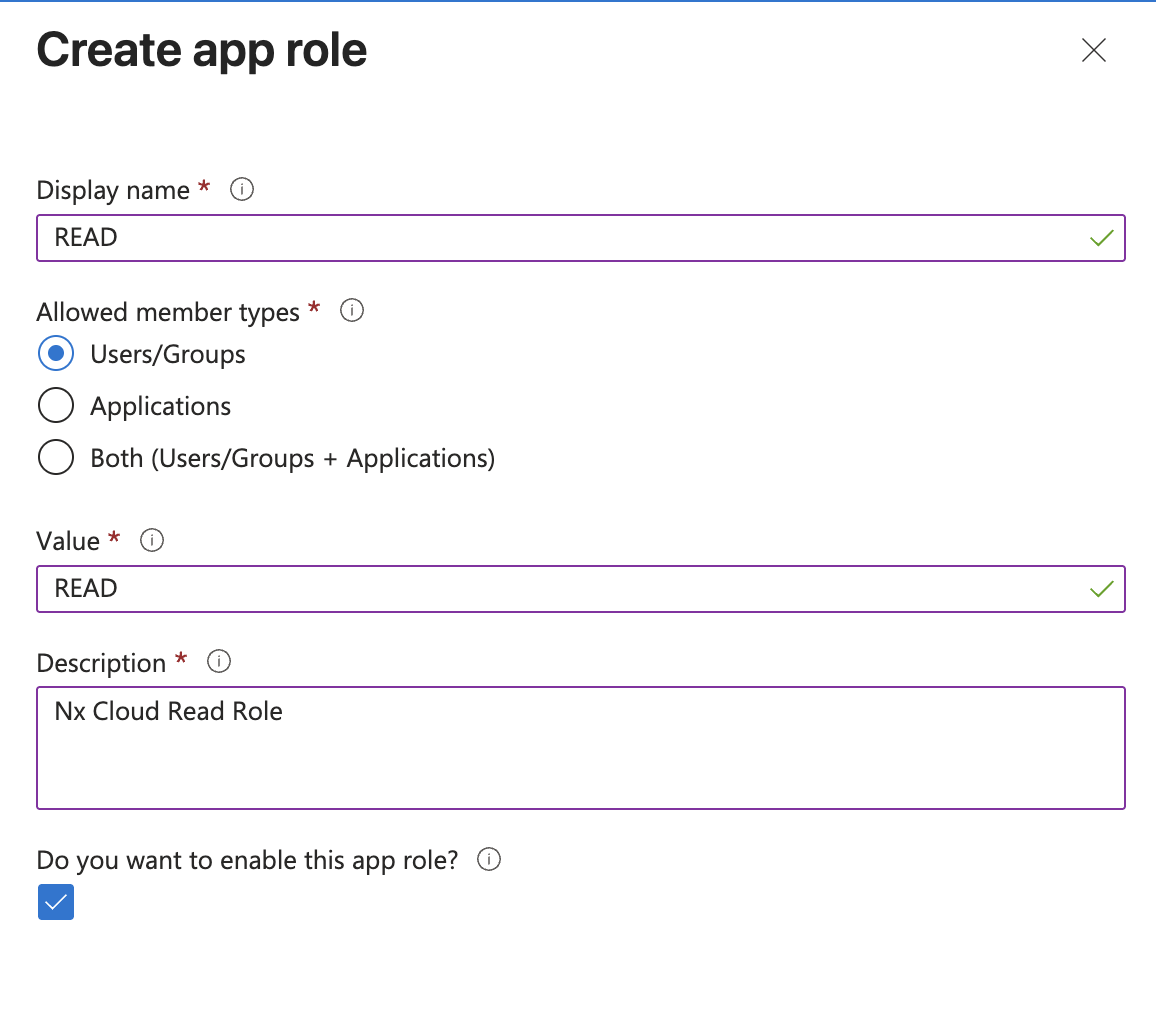
- Display name:
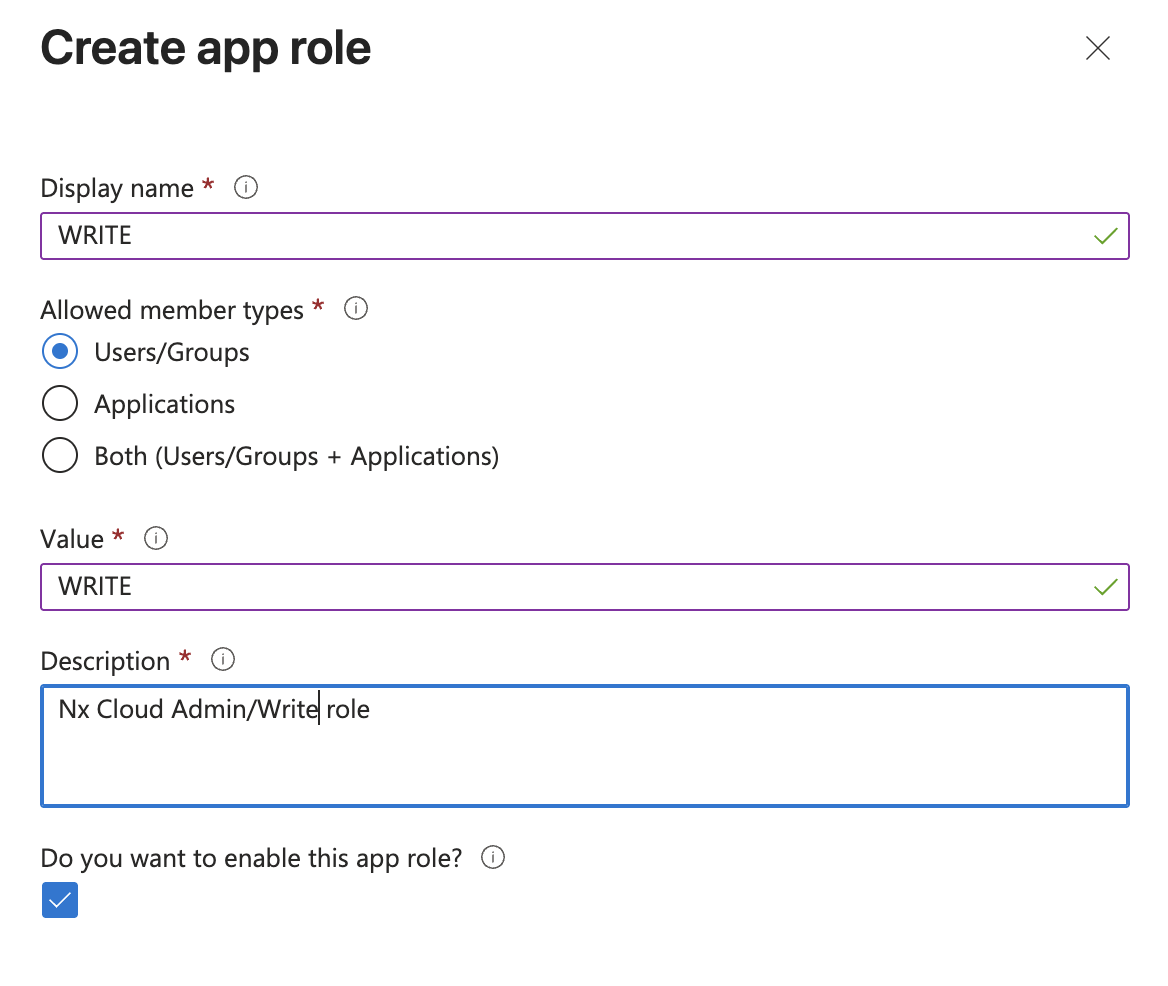
Click Create app role again for the write role and set:
- Display name:
WRITE - Allowed member types: Users/Groups
- Value:
Write - Description:
Nx Cloud Admin/Write Role
- Display name:
Configure the SCIM endpoint
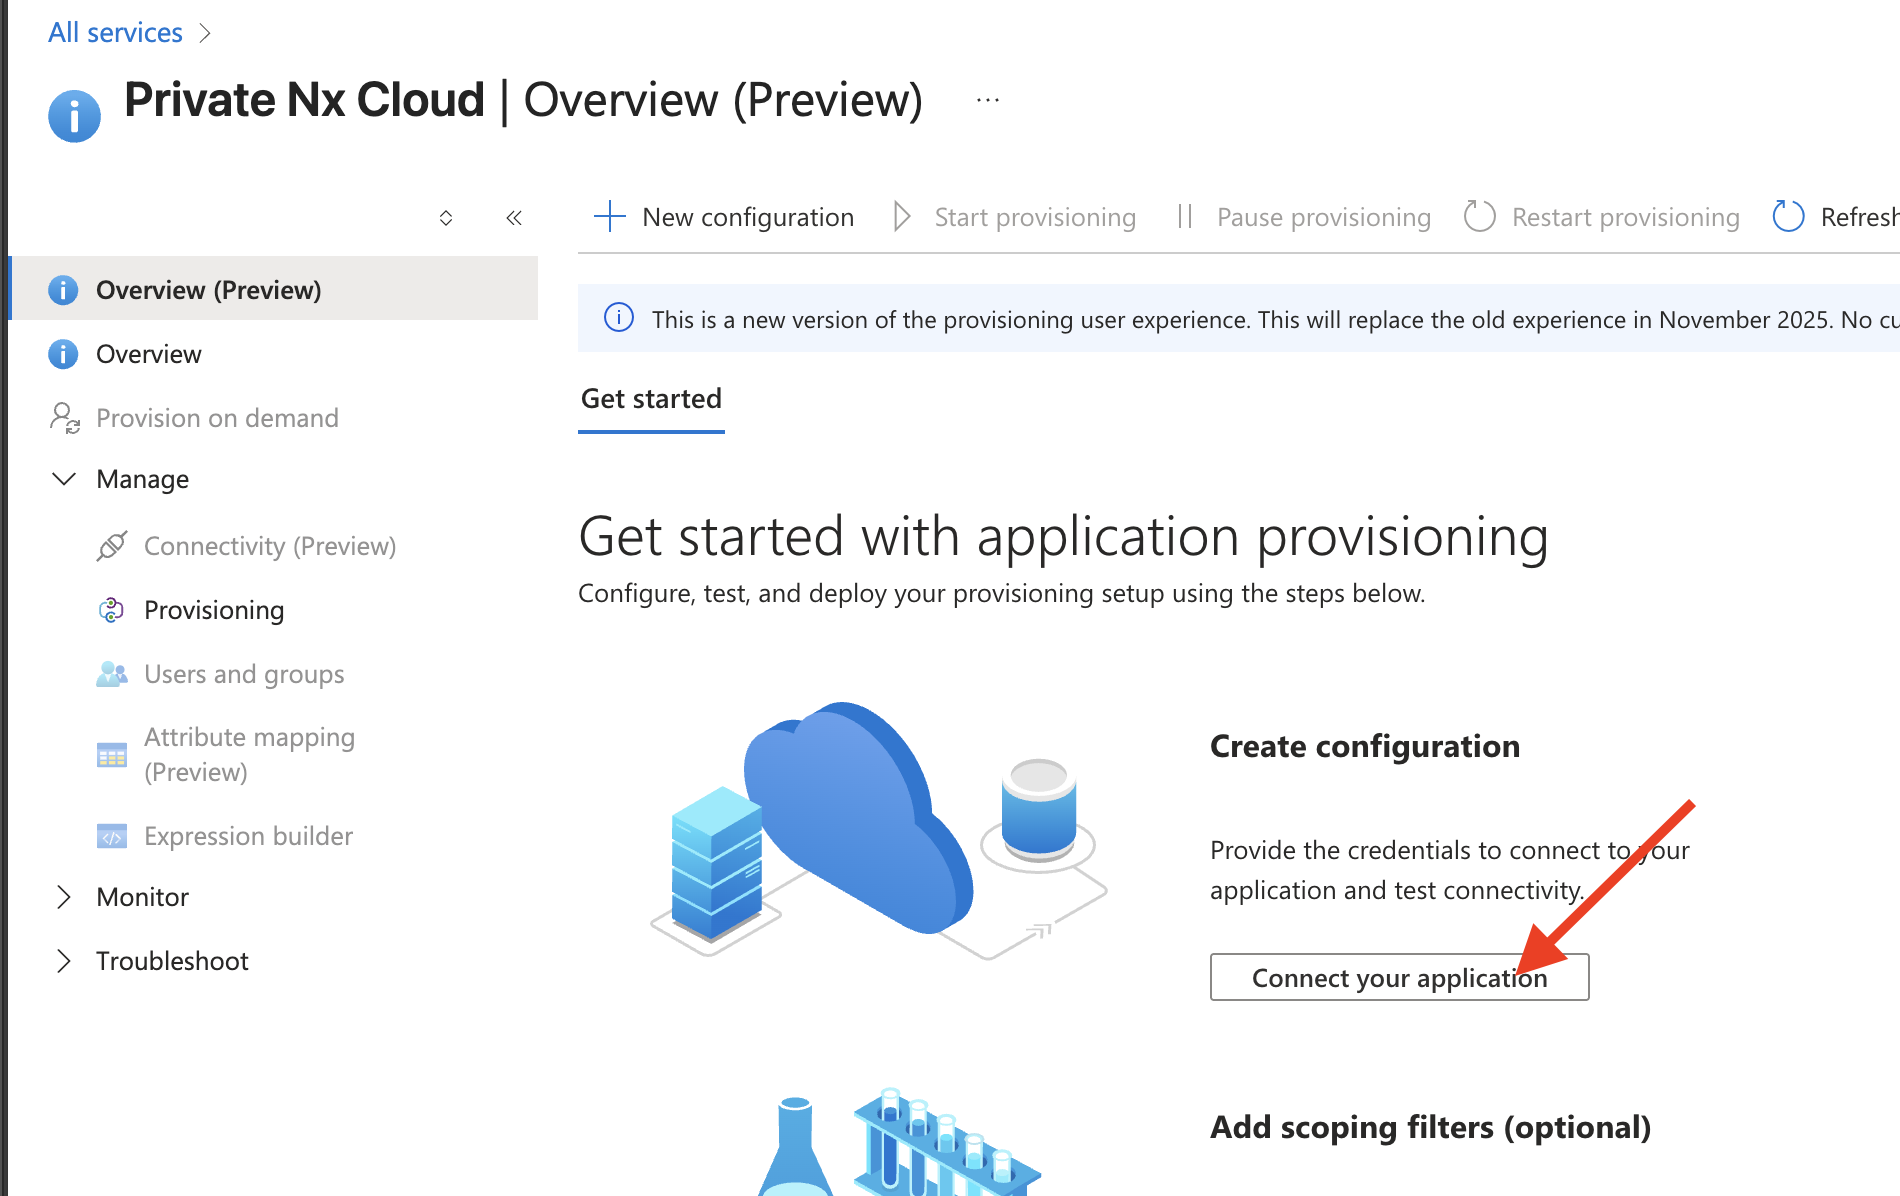
Section titled “Configure the SCIM endpoint”Go to Enterprise applications > Private Nx Cloud > Provisioning
Click Connect your application
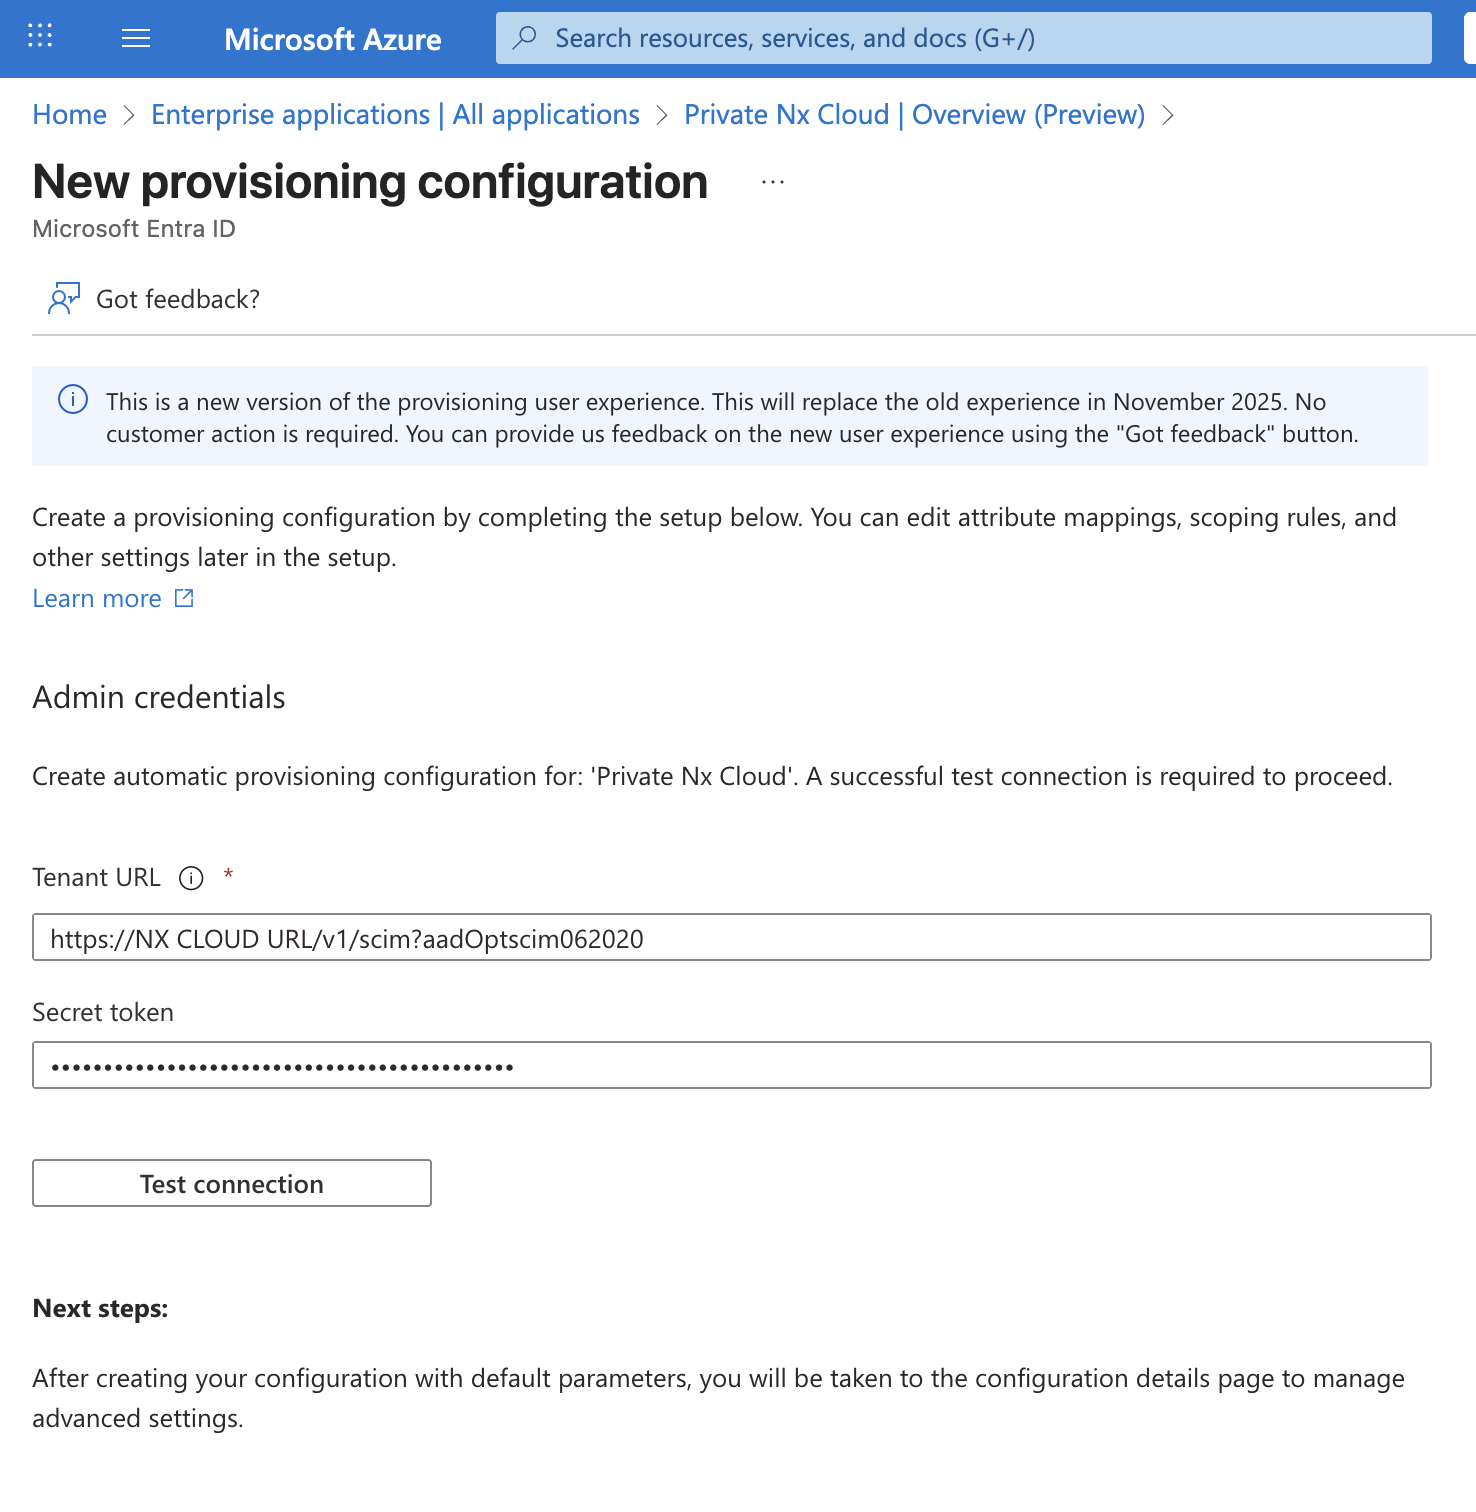
Fill in the form:
- Tenant URL:
https://<your-nx-cloud-url>/v1/scim?aadOptscim062020aadOptscim062020is a feature toggle in Entra ID that makes the request structure follow the SCIM specification
- Secret Token: your SCIM bearer token (JWT)
- Tenant URL:
Click Test Connection to confirm it succeeds
Click Create
Configure group attribute mapping
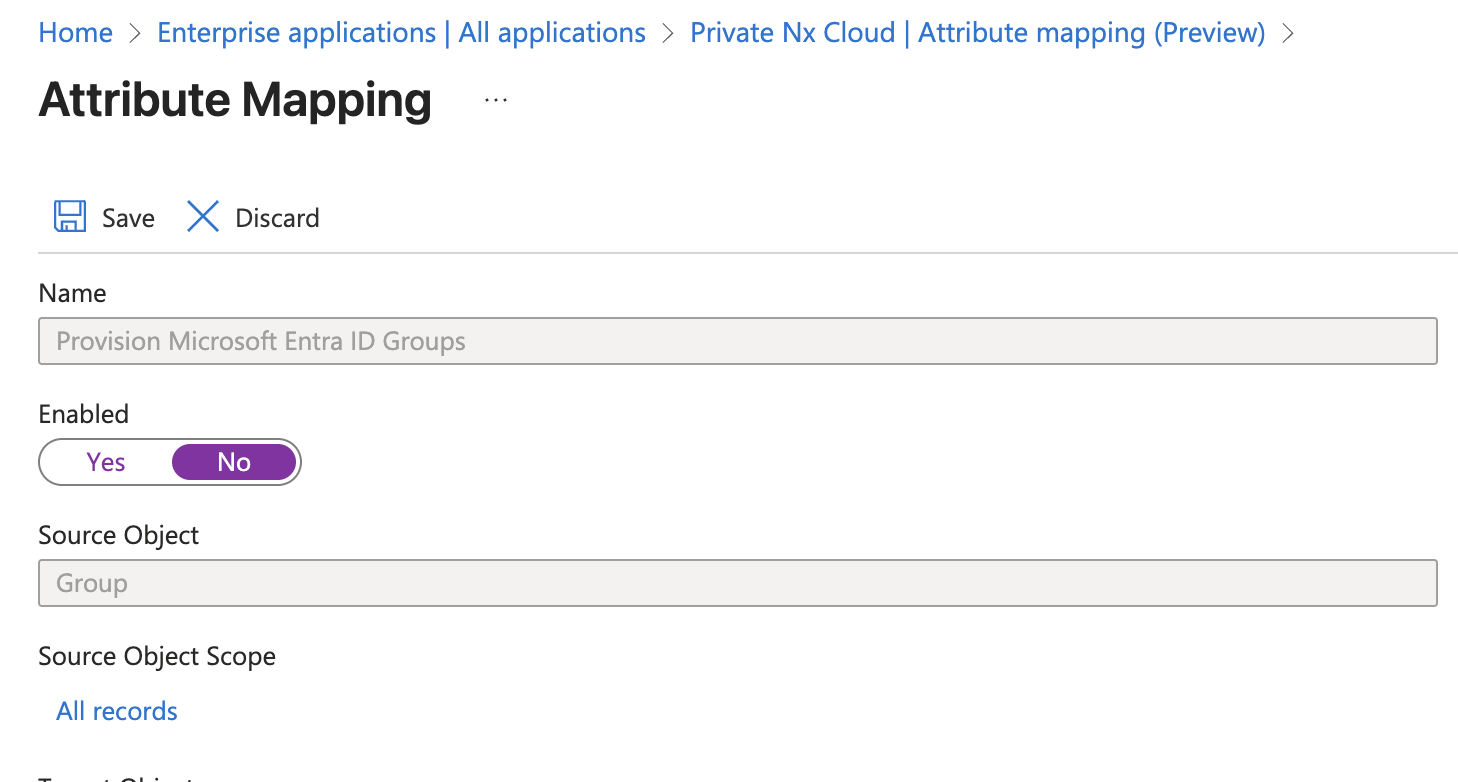
Section titled “Configure group attribute mapping”Nx Cloud doesn't provision groups, only users, so turn this mapping off.
Go to Enterprise applications > Private Nx Cloud > Provisioning > Attribute mapping
Click Provision Microsoft Entra ID Groups
Toggle Enabled to Off
Configure user attribute mapping
Section titled “Configure user attribute mapping”Nx Cloud reads an access specification from a custom SCIM attribute to determine what each provisioned user can do in your workspace.
Go to Enterprise applications > Private Nx Cloud > Provisioning > Attribute mapping
Click Provision Microsoft Entra ID Users
Scroll down and check Show advanced options
Click Edit attribute list for customappsso
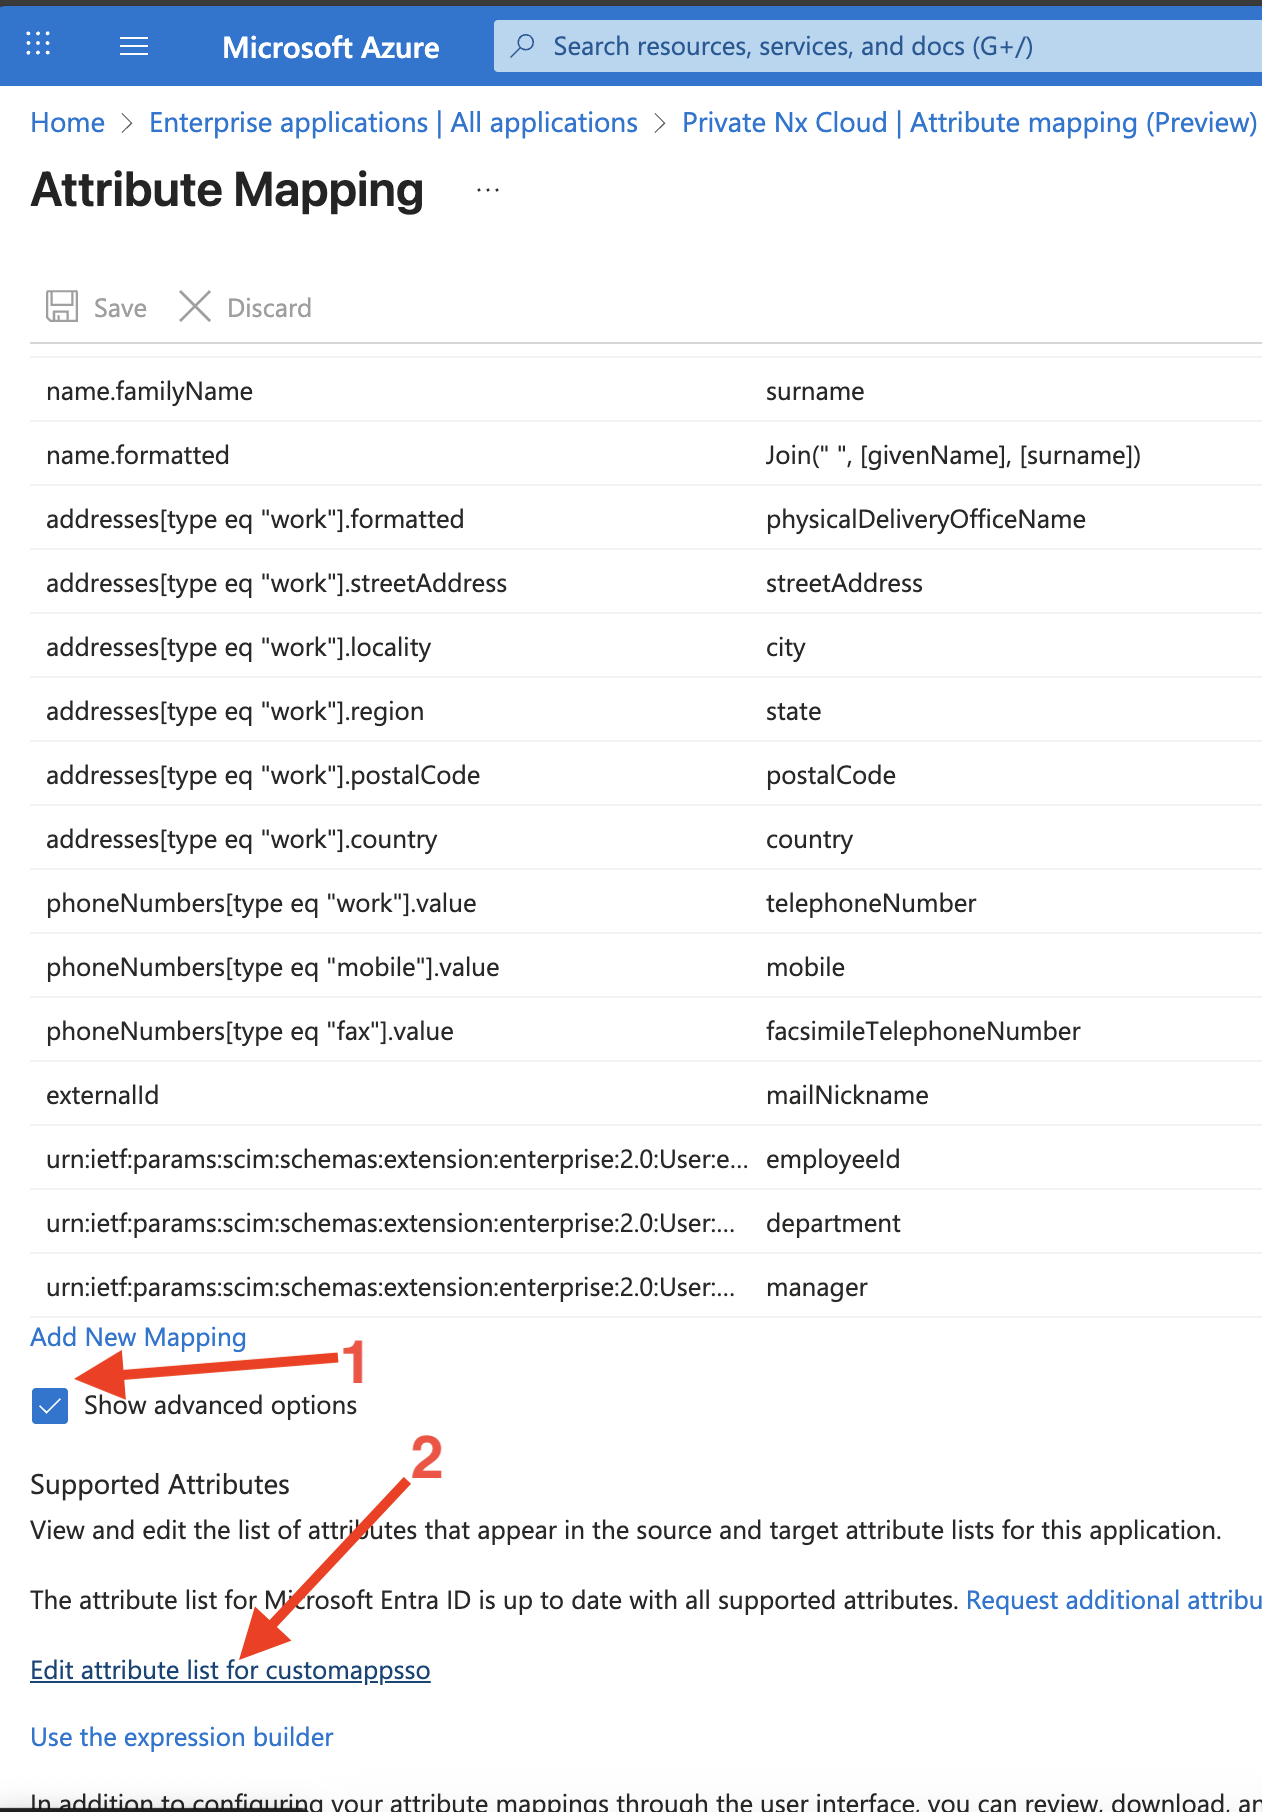
Scroll to the bottom and add a new attribute:
- Name:
urn:ietf:params:scim:schemas:extension:nxcloud:2.0:User:nxCloudAccessSpec - Type: String
- Required: True
- Name:
Click Save
Go back to Provision Microsoft Entra ID Users and find the
mailNicknametoexternalIdmapping- Entra ID creates this mapping by default. If it's missing, click Add new mapping.
Set the following values, then click Ok:
- Mapping Type: Direct
- Source attribute:
userPrincipalName - Target attribute:
externalId - Match objects using this attribute: No
- Apply this mapping: Always
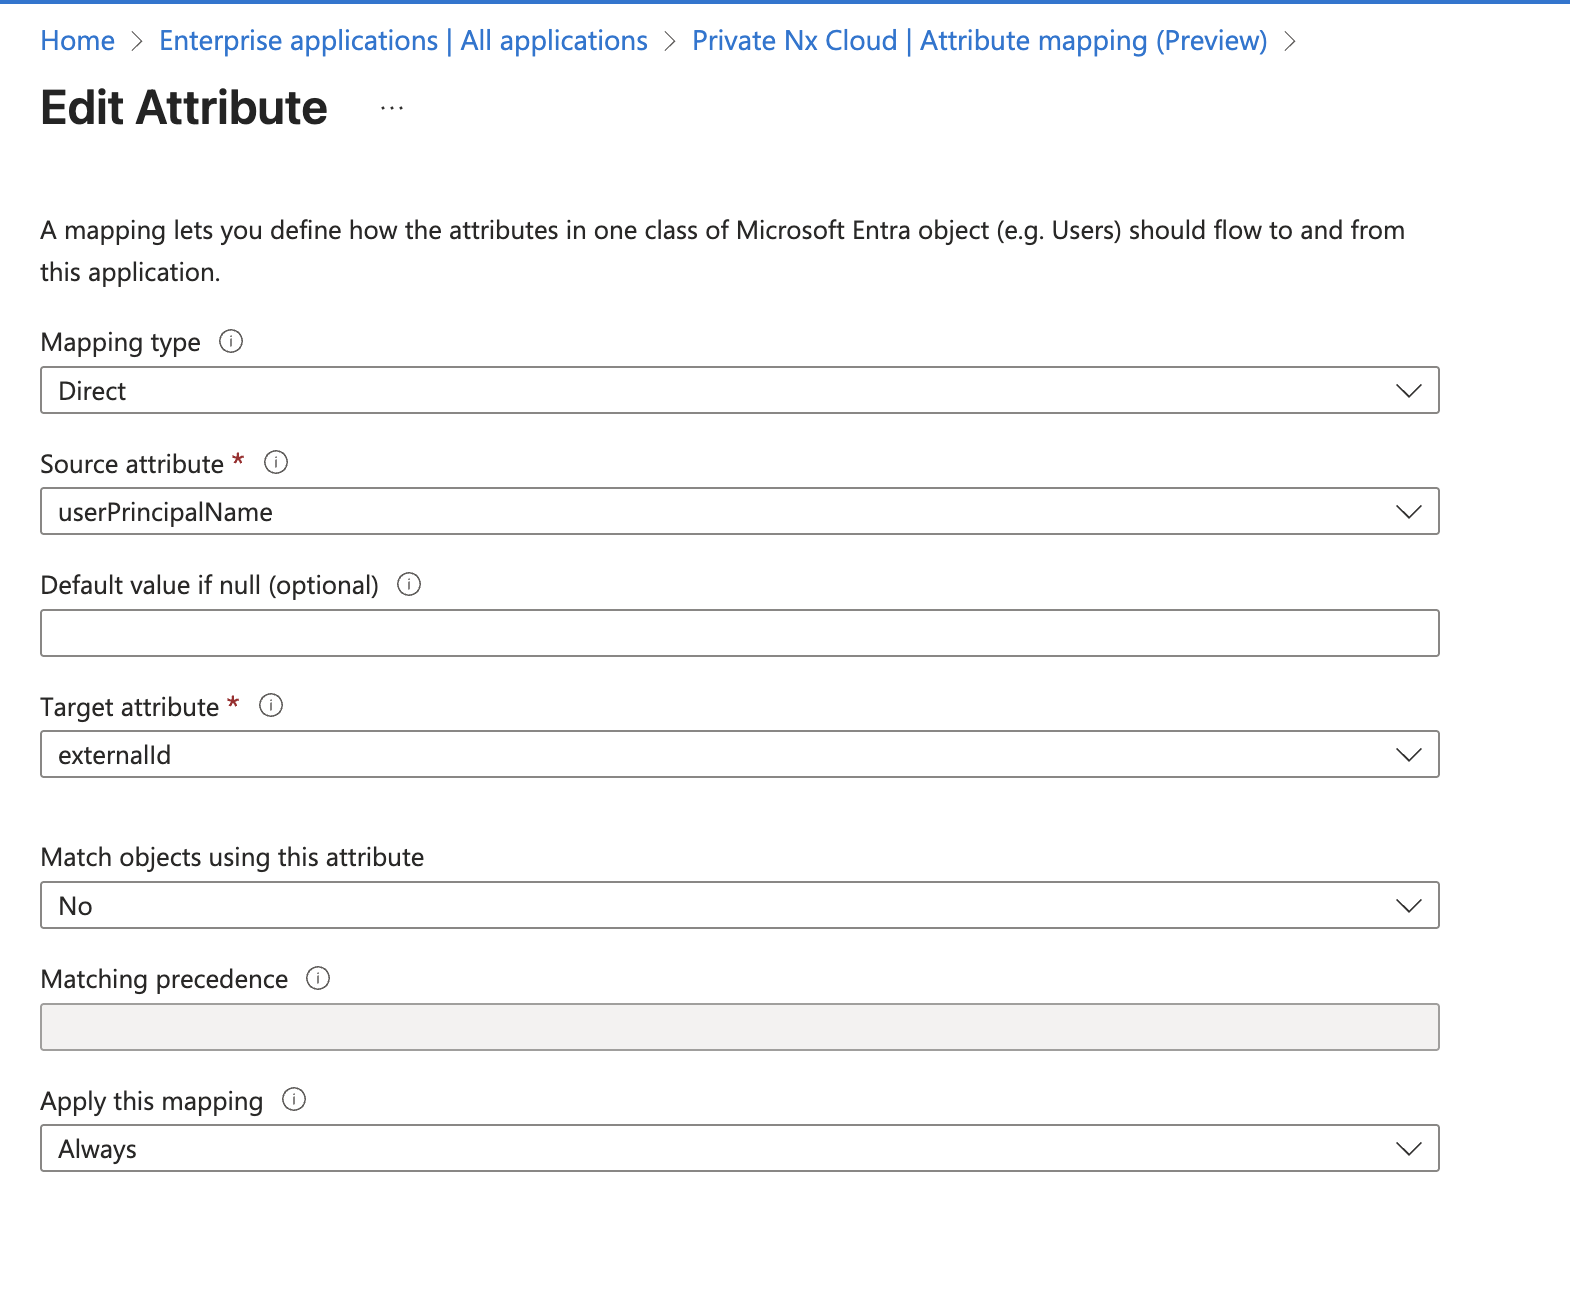
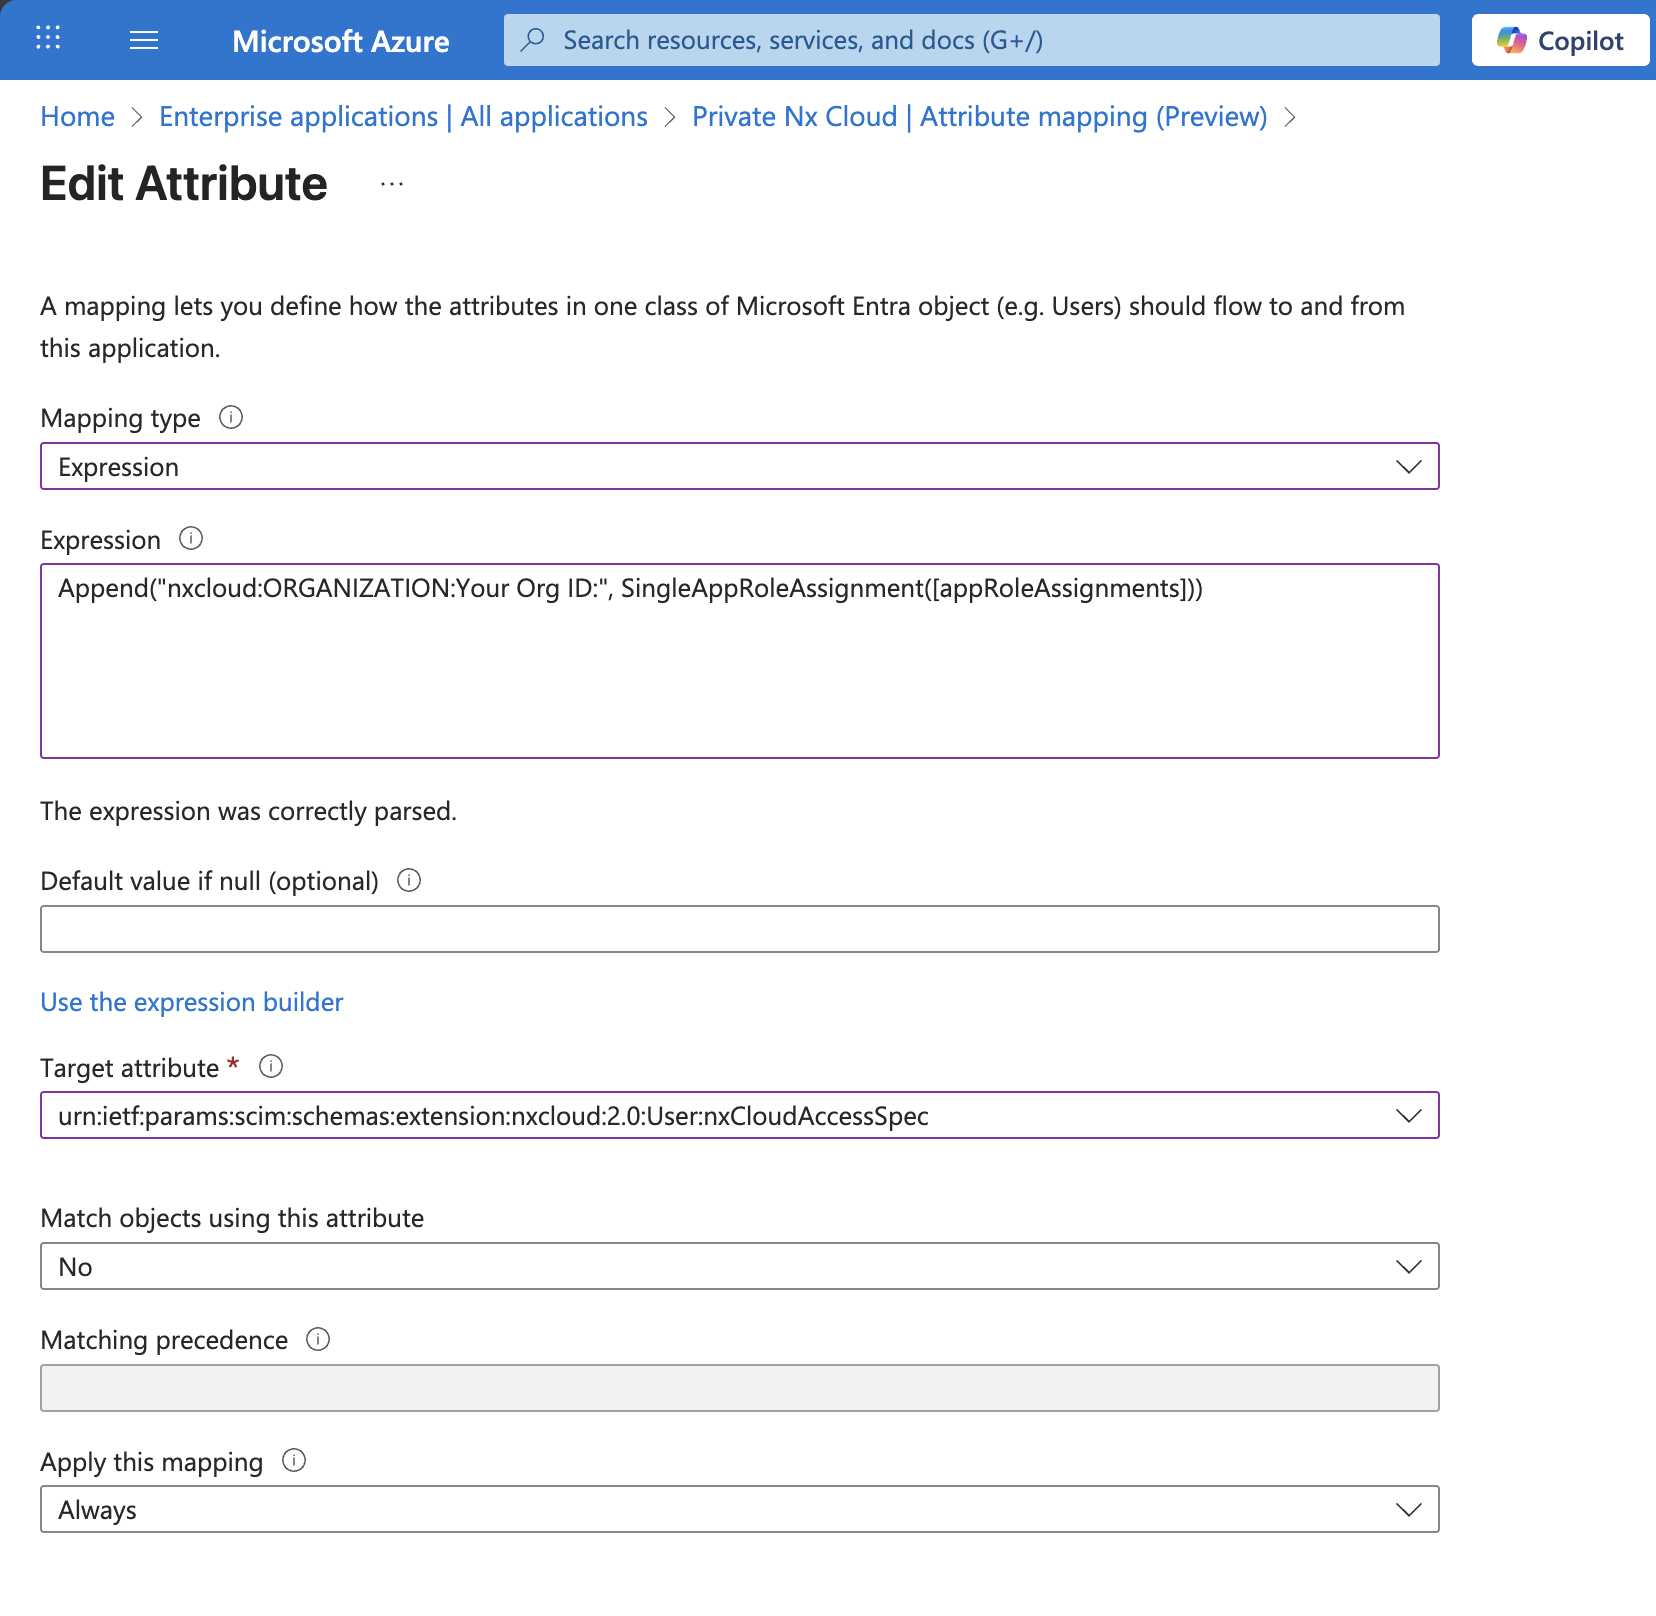
Back on Provision Microsoft Entra ID Users, click Add new mapping
Set the following values, then click Ok:
- Mapping Type: Expression
- Expression:
Append("nxcloud:ORGANIZATION:<organization_id>:", SingleAppRoleAssignment([appRoleAssignments]))- Replace
<organization_id>with your Nx Cloud organization ID
- Replace
- Target attribute:
urn:ietf:params:scim:schemas:extension:nxcloud:2.0:User:nxCloudAccessSpec - Match objects using this attribute: No
- Apply this mapping: Always
Remove every mapped attribute except:
userNameactivedisplayNameemails[type eq "work"].valuename.givenNamename.familyNamename.formattedurn:ietf:params:scim:schemas:extension:nxcloud:2.0:User:nxCloudAccessSpecexternalId
Click Save
Associate groups
Section titled “Associate groups”Go to Enterprise applications > Private Nx Cloud > Provisioning > Users and groups
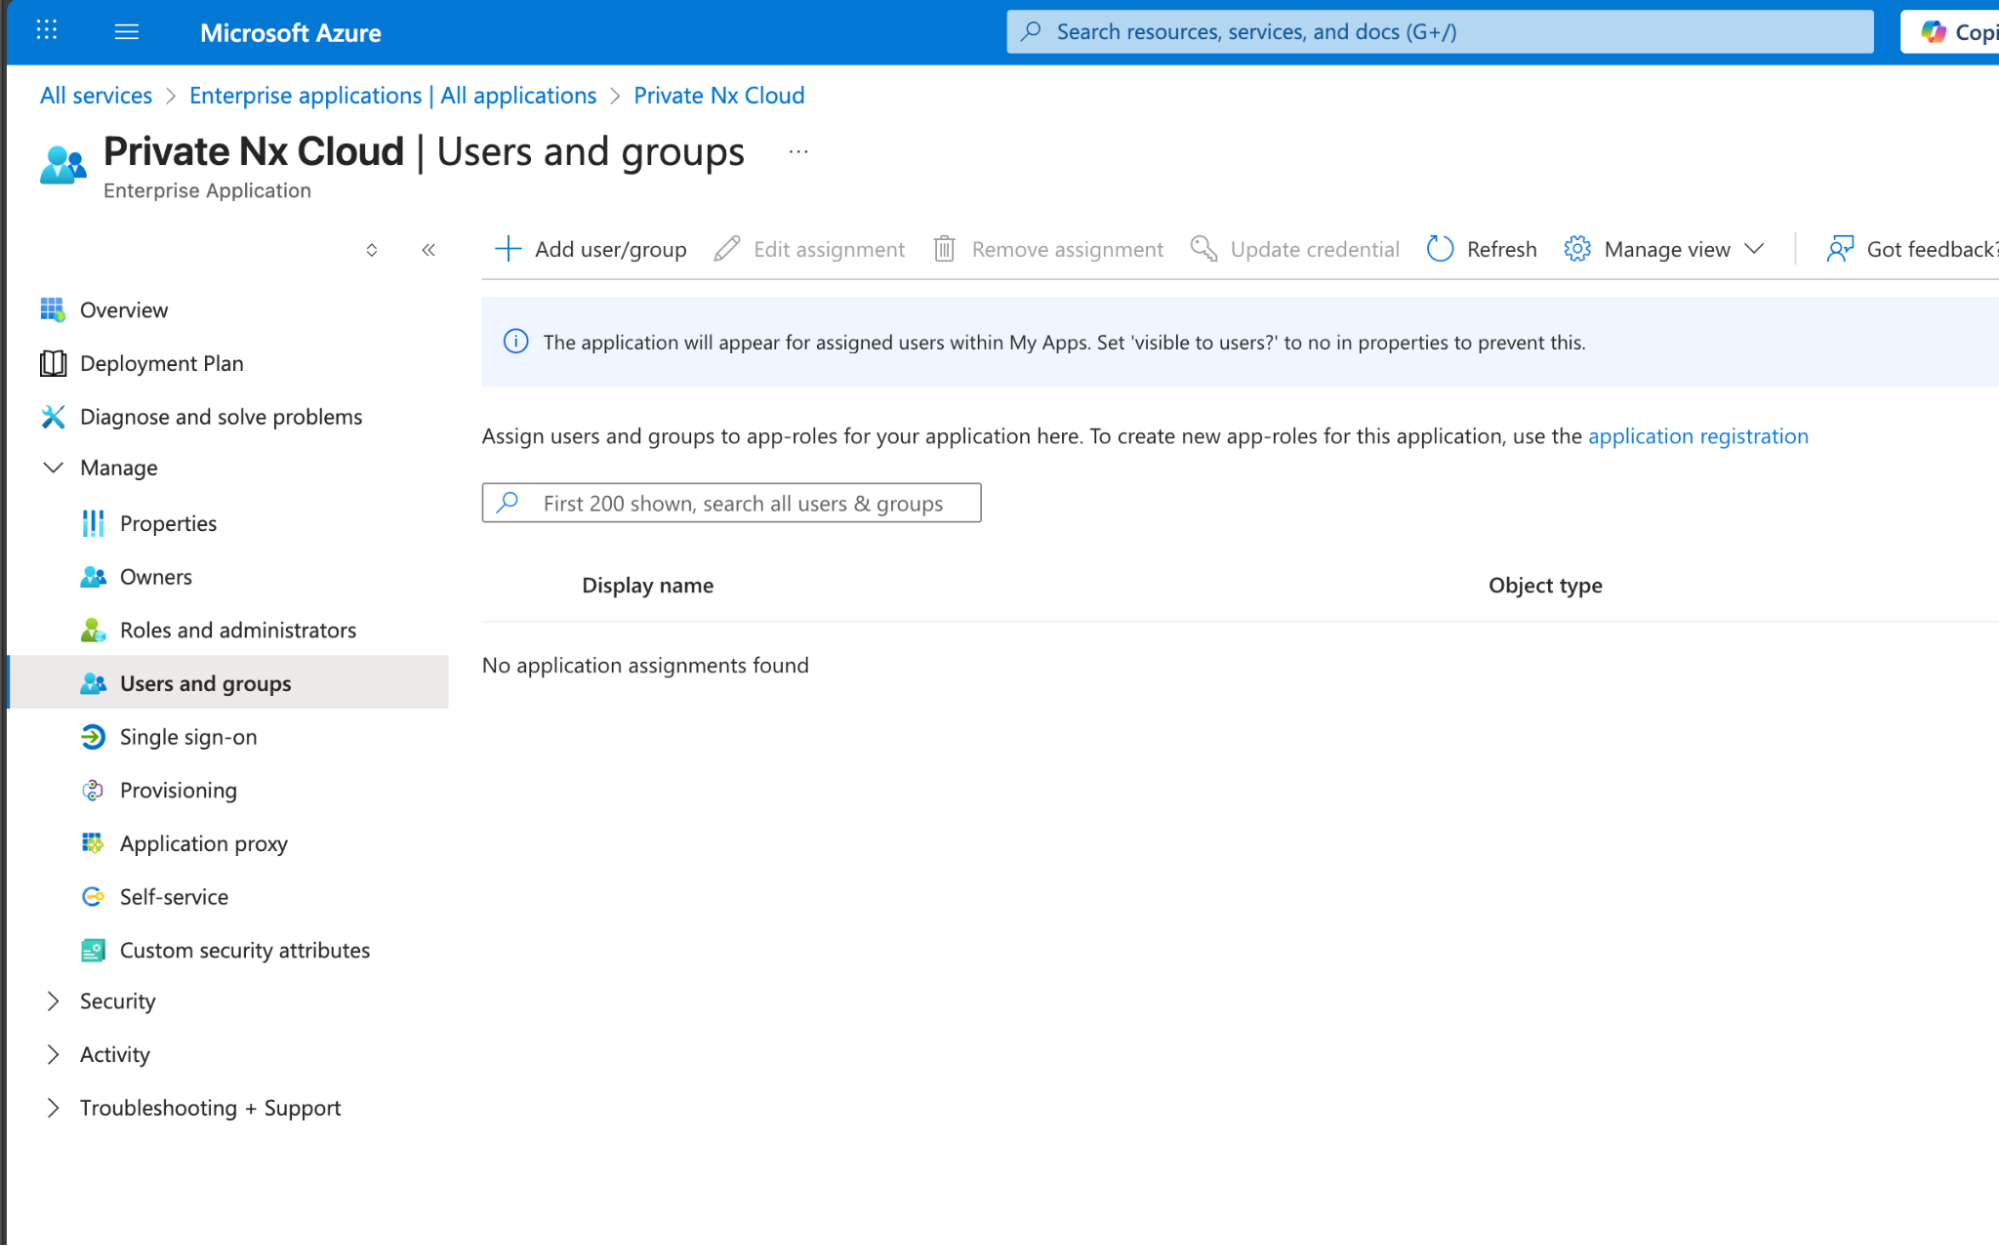
Click Add user/group
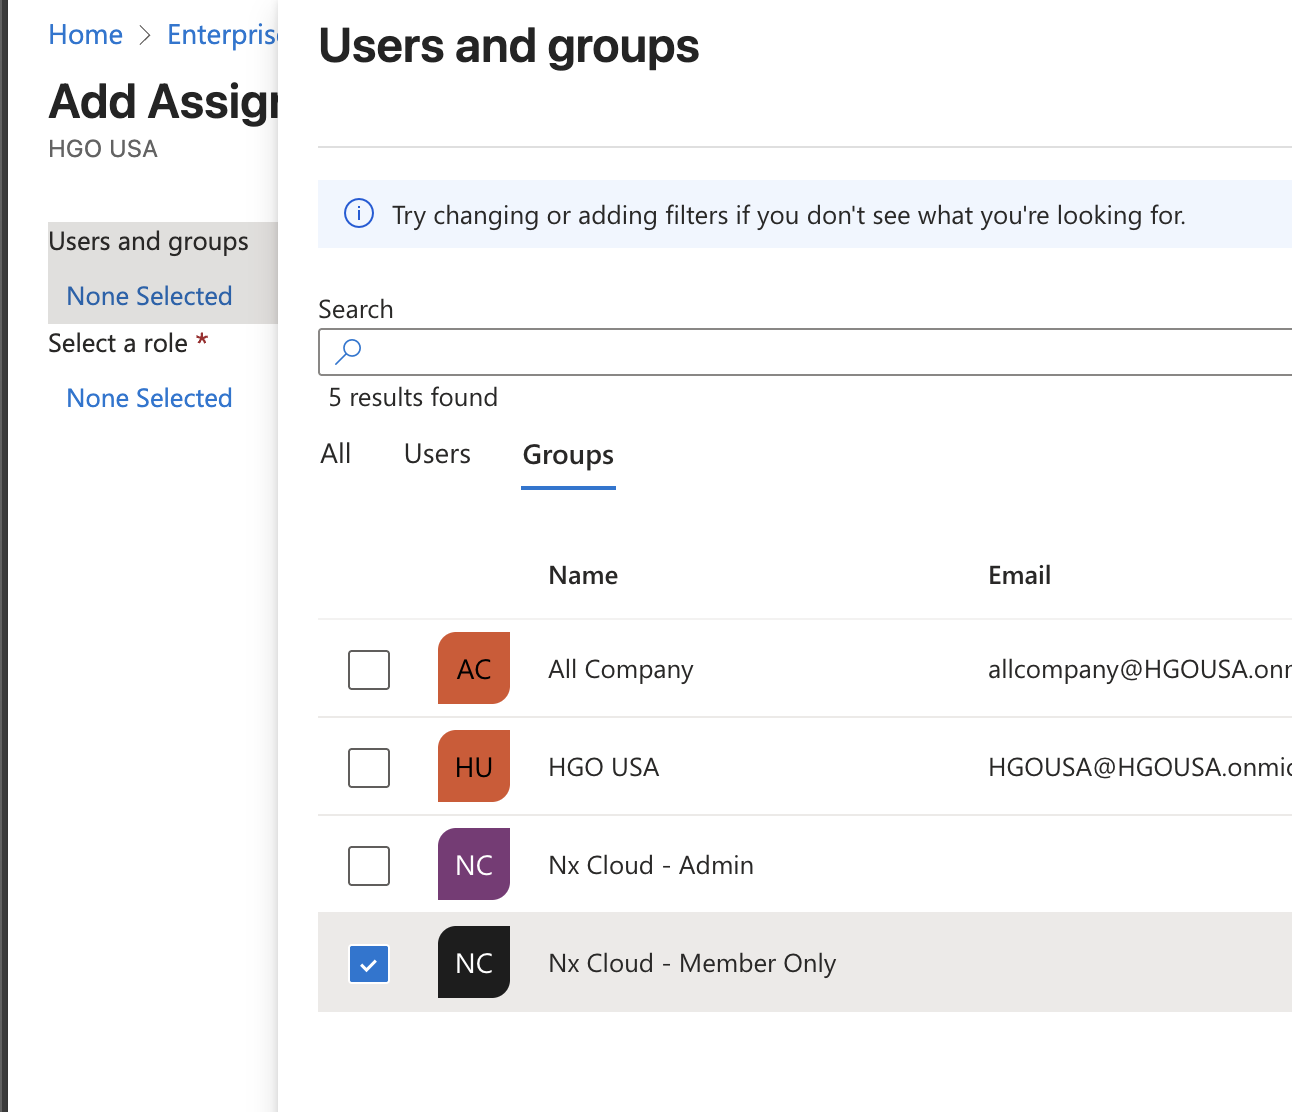
Click None Selected under Users and groups, select your Nx Cloud member group, then click Select
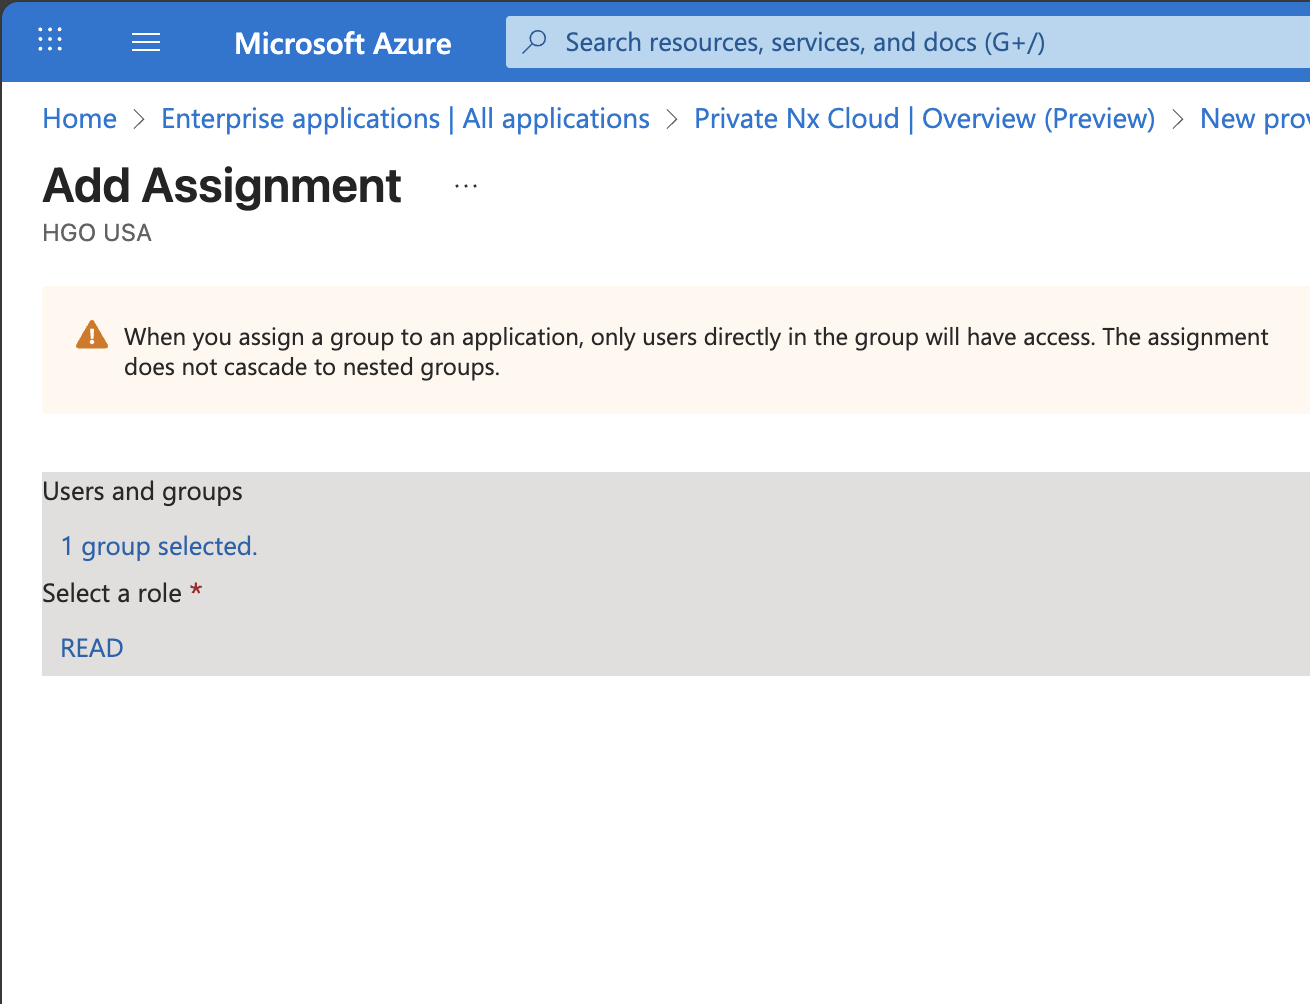
Click None Selected under Select a role, select READ, then click Select
Click Assign
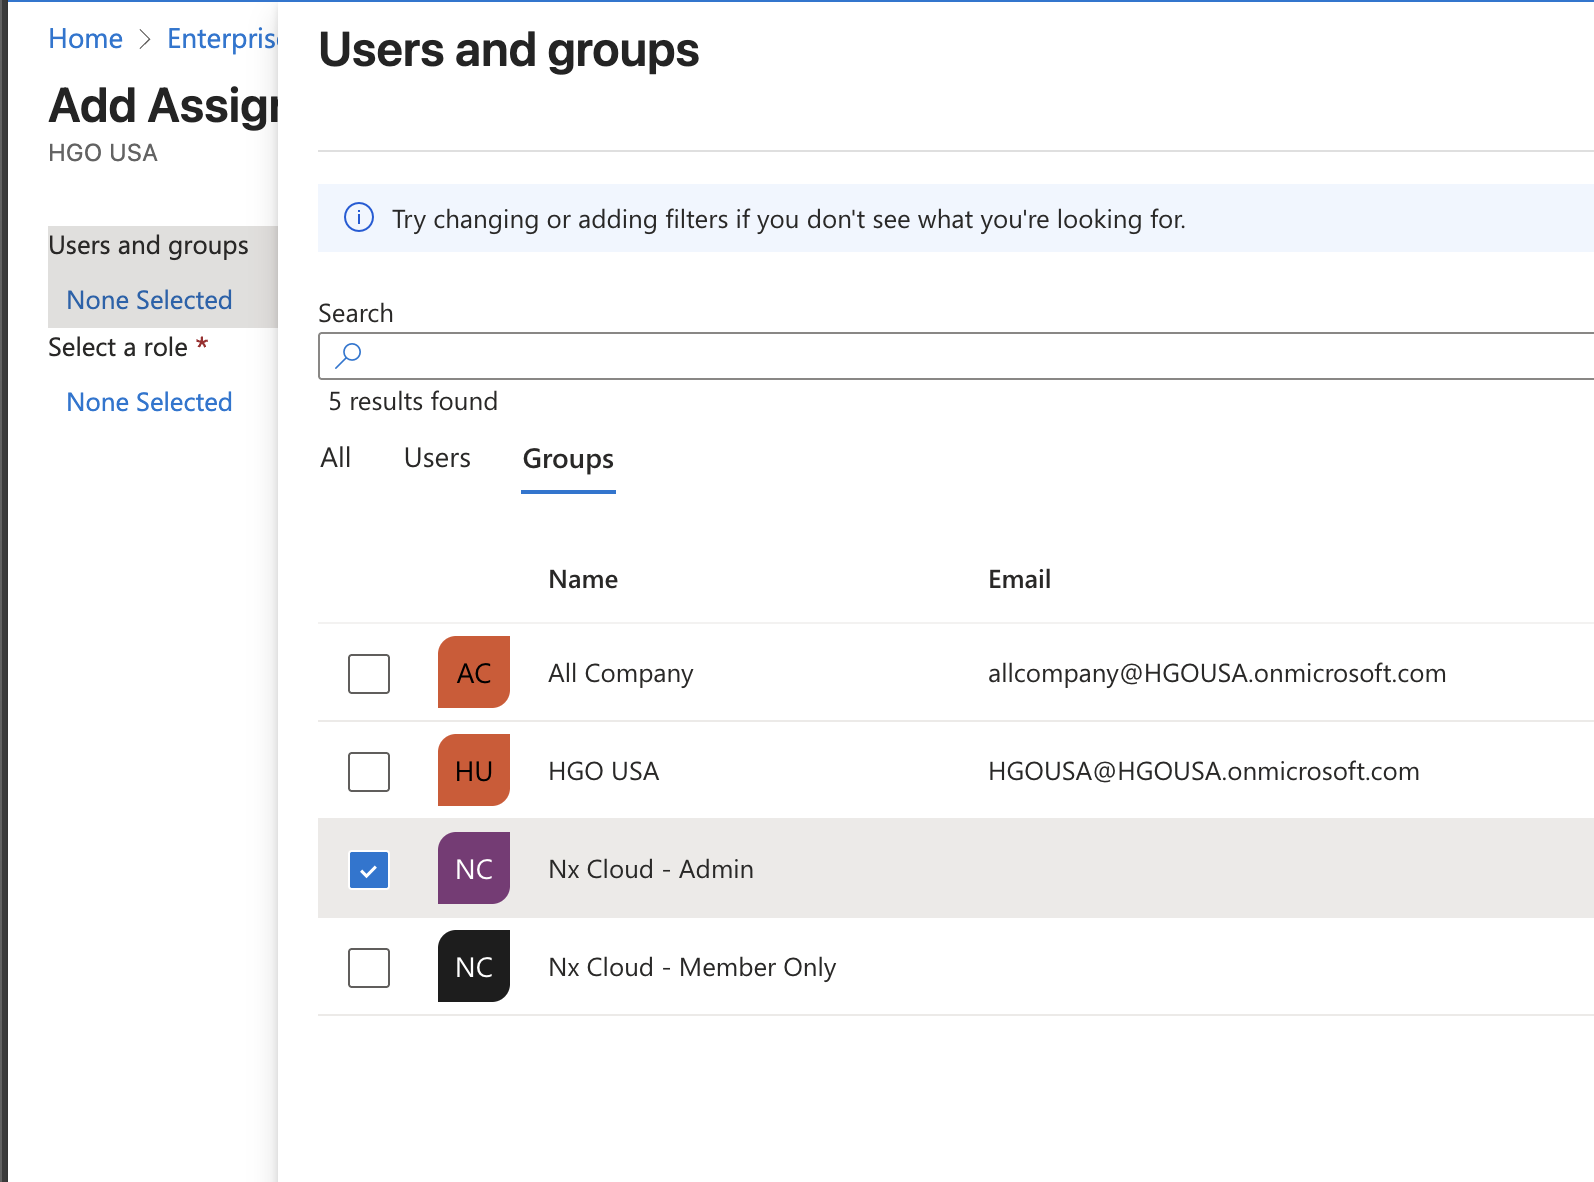
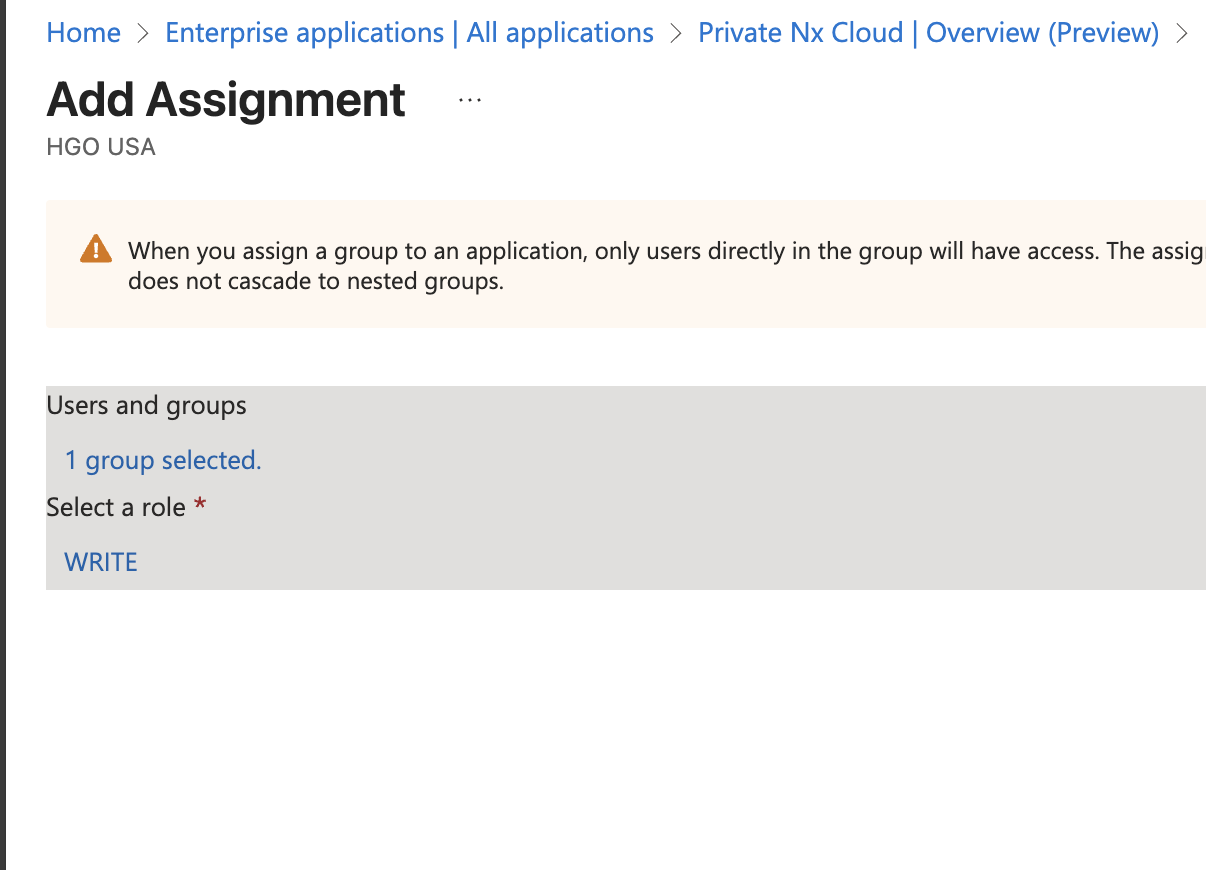
Repeat steps 2 through 5 for the Nx Cloud admin group, assigning the WRITE role instead
Test provisioning
Section titled “Test provisioning”- Go to Enterprise applications > Private Nx Cloud > Provisioning > Provision on demand
- Select a user who belongs to one of the groups you assigned above
- Click Provision
- A new user shows a green check mark next to every step on success
If provisioning fails, contact your DPE.
Information to exchange with your DPE
Section titled “Information to exchange with your DPE”Your DPE provides the following values up front so you can complete both the SAML and SCIM configuration.
From your DPE
Section titled “From your DPE”- Nx Cloud app URL — used as the Reply URL (step 7) and the SCIM tenant URL
- SCIM bearer token (JWT) — used as the SCIM secret token
- Nx Cloud organization ID — used in the
nxCloudAccessSpecexpression mapping
Send back to your DPE
Section titled “Send back to your DPE”After completing the setup, send the following so your DPE can finish connecting your Nx Cloud instance:
- SAML Certificate — the one-line certificate string extracted in step 13:
SAML_CERT=<your-cert-string> - SAML Entry Point — the login URL copied in step 14:
SAML_ENTRY_POINT=<your-login-url>